how to style open shelves in kitchen: practical tips for a beautiful space
Posted by Harvey Bruce on
Ever walked into a kitchen and felt that something's missing, even though the cabinets are spotless? You know the moment when you stare at an empty wall of open shelves and think, "If only I could make this look curated, not chaotic." That's exactly why we're diving into how to style open shelves in kitchen – because the right touches turn a functional space into a showcase.
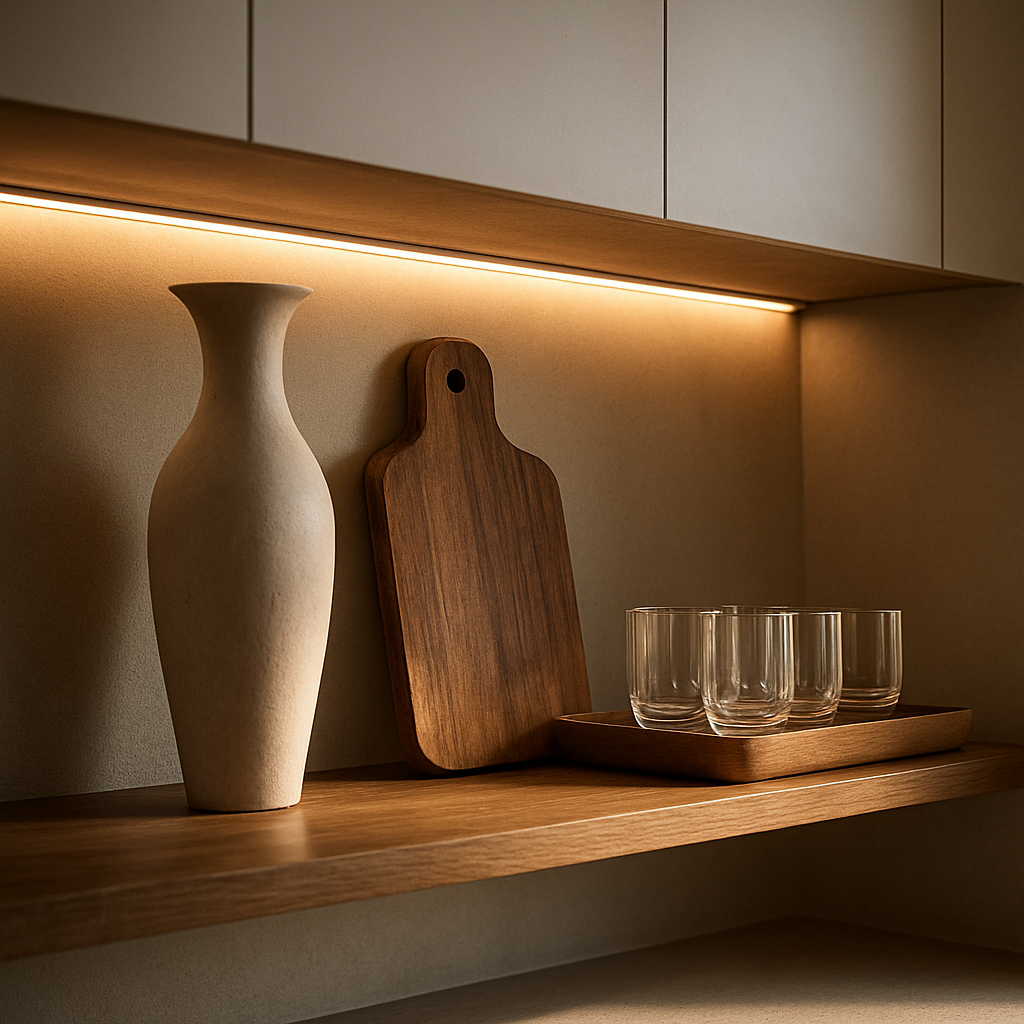
First, think of the shelves as a gallery wall for the things you love. Start with a base of larger, sturdy items – a sleek stoneware bowl or a handcrafted wooden cutting board – to anchor the eye. Then sprinkle in smaller accessories like copper jars, a handful of herbs in terracotta pots, or a few curated pieces of glassware. In our experience, pairing a tall vase with a low, wide tray creates visual balance; the vase draws the gaze upward while the tray grounds the composition.
Here's a quick, actionable checklist:
- Pick three "hero" pieces (one tall, one medium, one short).
- Group items in odd numbers – groups of three or five feel natural.
- Mix textures: matte ceramic, polished metal, natural wood.
- Leave breathing space; empty shelf real estate prevents clutter.
Real‑world example: a couple in Brighton recently revamped their open‑plan kitchen. They placed a reclaimed oak board for weekly meal planning, added a set of hand‑blown glass bottles for oils, and topped the top shelf with a row of low‑profile pendant lights. The pendant lights, sourced from a local lighting specialist, added a warm glow that highlighted the curated items without overwhelming the space.
Don't forget lighting – under‑shelf LED strips or subtle spotlights can make your display pop after dark. For a seamless solution, consider partnering with LED Artistry lighting specialists who specialise in high‑end residential installations.
If you're hunting for inspiration on mixing bespoke pieces, our Creative Furniture Guide: Bespoke Homeware and Interior Styling is packed with ideas that translate perfectly to open‑shelf styling. From choosing the right colour palette to layering decorative trays, the guide walks you through each step.
Remember, the goal isn't to cram every pretty thing you own onto the shelves; it's to tell a story that reflects your lifestyle. Start with a clear vision, follow the checklist, and let the shelves become a living part of your kitchen's personality. Let's dive in and transform those blank boards into a curated masterpiece.
TL;DR
Want a kitchen that feels curated, not chaotic? Our quick guide shows how to style open shelves in kitchen with three hero pieces, balanced textures, and subtle lighting, turning blank boards into a personalised showcase. Follow our simple checklist, add a touch of bespoke homeware, and let each shelf tell the story of your home.
Step 1: Choose the Right Open Shelf Style
When you stare at those empty shelves, the first question that pops up is: what vibe am I chasing? Are you after a sleek, modern line‑up, a cosy farmhouse feel, or maybe a splash of eclectic colour? Pinpointing the style up front saves you from a frantic shuffle of items later on.
Start by visualising the overall mood of your kitchen. If your cabinets are crisp white and your appliances stainless, a contemporary style with clean‑line accessories will feel seamless. On the other hand, if you love the warmth of reclaimed timber, a rustic‑industrial mix can add that lived‑in charm without looking forced.
Match the shelf depth to the style
Deep shelves can handle chunky pottery, tall glass bottles or a stack of artisanal plates – perfect for a traditional or country look. Shallow shelves, meanwhile, showcase slim vases, matte trays or a row of sleek spice jars, which play nicely with a minimalist aesthetic.
Pro tip: measure the vertical space first. A tall, narrow shelf can become a visual anchor for a statement piece, while a wide, low shelf grounds the composition and lets you spread out lighter items.
Play with material contrast
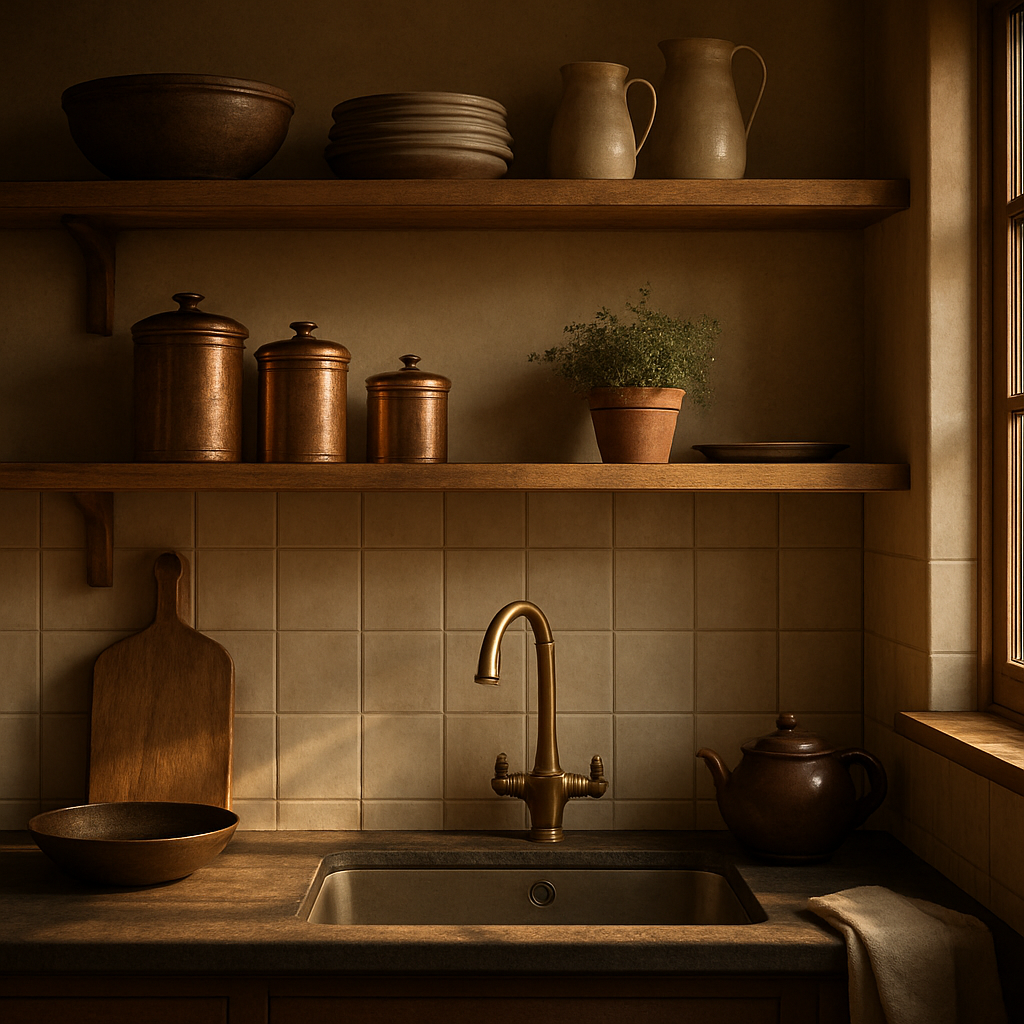
Think about the textures you already have. A matte stoneware bowl sits beautifully next to a polished copper jar – that contrast is what makes a shelf feel curated, not chaotic. If you’re leaning towards a contemporary vibe, consider a sleek glass vase paired with a brushed‑metal utensil holder. For a rustic feel, mix a hand‑carved wooden bowl with a woven linen tray.
And don’t forget the power of colour. A single pop of deep navy or emerald can turn a simple arrangement into a focal point. You don’t need a rainbow; just one bold hue can anchor the rest of the palette.
Lighting – the silent style‑setter
Even the best‑chosen pieces can look flat without the right light. Subtle under‑shelf LED strips or a discreet pendant can highlight texture and create ambience after sunset. If you’re after a high‑end finish, our partners at LED Artistry lighting specialists can help you pick fixtures that blend into the ceiling while casting a warm glow on your curated items.
Speaking of art, a carefully chosen print can double as a decorative element and a conversation starter. I recently saw a client pair a set of contemporary wildlife art prints with copper herb jars – the natural tones in the artwork echoed the metal, tying the whole shelf together. If you need inspiration, check out this practical guide to buying and displaying contemporary wildlife art prints – it’s a treasure trove of ideas.
Now, let’s talk about the actual pieces you might choose. A tall, sculptural vase can act as the “hero” item, drawing the eye upward. Pair it with a medium‑sized wooden cutting board – functional yet stylish – and finish with a low, wide tray of assorted glassware. The key is odd‑number grouping: three or five items feel naturally balanced.
While the video shows a walk‑through of arranging items, remember you don’t have to copy every detail. Adapt the concepts to the scale of your own shelves and the pieces you already love.
For those who enjoy browsing curated collections, the LGFMH homeware collection offers a range of bespoke trays, stoneware bowls and artisan glass that fit perfectly into the styles we’ve discussed. Their pieces are designed with both form and function in mind, making the styling process feel less like a chore and more like a creative play.
Finally, step back and breathe. Give each shelf a moment to “settle” before adding the next item. You’ll often notice a piece that feels out of place – that’s your cue to swap it out or reposition.
Step 2: Curate Items for Visual Balance
Now that you’ve picked a shelf style, it’s time to think about what actually lives on those boards. Picture this: you’re reaching for a bowl of fresh fruit, and the whole shelf feels like a well‑rehearsed photo‑shoot rather than a chaotic mess. That’s visual balance, and it starts with a little curation.
Start with a focal point
Every shelf needs a piece that catches the eye – a tall vase, a sculptural bowl, or a handcrafted cutting board. Choose something that reflects your personality and lets the rest of the items orbit around it. When you’re unsure, imagine the shelf as a gallery wall: the largest artwork anchors the composition, and the smaller frames fill the gaps.
In our experience at Harvey Bruce Interiors, a single statement piece, like a hand‑blown glass carafe, instantly lifts a modest shelf into a luxe vignette. It’s the kind of thing that makes guests say, “Wow, where did you find that?”
Mix heights, not just shapes
Think of height as the rhythm of a song. Too many items at the same level feel flat; a varied skyline adds movement. Stack a few plates on a low riser, place a medium‑height jar next to a tall candlestick, and leave a bit of breathing space between them.
That approach is echoed in the Malacasa’s tips on colour harmony and stacking, which stress the importance of different stack heights to keep the eye engaged without overwhelming the viewer.
Group by colour families
Colour is the easiest way to create cohesion. Pick a palette – perhaps a soft ivory with a splash of muted teal – and keep every item within that range. White dinnerware, pale stoneware, and a few pastel ceramics will bounce light around, making the shelf feel brighter and more spacious.
Don’t feel forced to stay monochrome, though. A single accent, like a copper kettle or a deep‑green herb pot, can act as a visual pop that prevents the display from feeling too safe.
Balance texture and material
Wood, metal, ceramic, and glass each bring a different tactile quality. Pair a smooth porcelain plate with a rough‑hewn wooden board, or a glossy metal canister with a woven linen basket. The contrast adds depth without needing extra décor.
When you’re selecting pieces, ask yourself, “Does this texture add warmth or does it clash with the shelf’s material?” If the answer is the latter, set it aside for another spot.
Keep functionality front‑and‑centre
Remember, open shelves are still part of a working kitchen. Items you use daily – a set of everyday plates, a favourite oil cruet, a cutting board – belong on the most accessible level. Reserve the top shelf for decorative pieces you love but don’t need every day, like a pretty serving bowl or a small indoor plant.
That separation mirrors the advice in the DIY Playbook’s guide to styling open shelves, which suggests placing daily essentials at eye level and saving higher zones for visual interest.
Leave breathing room
It’s tempting to fill every inch, but a little empty space is the secret sauce of a curated look. Aim for roughly a thumb‑width gap between groups – just enough to let each item breathe.
And if you catch yourself reaching for another decorative knick‑knack, pause. Ask if it serves a purpose or simply adds clutter. Often, less really is more.
Final quick checklist
- Pick one statement piece to anchor the shelf.
- Arrange items in at least three different heights.
- Stick to a colour family with one accent hue.
- Mix textures: wood, metal, ceramic, glass.
- Place everyday use items at eye level, décor up high.
- Leave a thumb‑width gap between groups.
Take a step back, sip your tea, and see if the shelf feels like a conversation rather than a lecture. If it does, you’ve nailed visual balance – and you’re one step closer to mastering how to style open shelves in kitchen.
Step 3: Install with Style and Function (Video Demo)
Let’s get real about installing open shelves that actually feel elevated, not makeshift. This is where function meets style, and where a little planning goes a long way.
Before you pick up a drill, check you’ve got a plan for layout and weight. In our experience at Harvey Bruce Interiors, the goal isn’t to cram everything on one board but to anchor the display with one or two hero pieces and let the rest orbit around them. Think of it as a tiny gallery that also holds your daily needs.
Prep and safety
First, locate the wall studs. A stud finder is your best friend here. You’ll want heavy items like cast‑iron skillets or stacked porcelain on brackets tied into those studs for real security. Mark each stud with a light pencil mark and measure the distance between brackets so everything lines up.
Next, choose brackets rated for the weight you’ll carry. If you’re planning to load with substantial wares, opt for a robust, fixed support rather than a decorative option. Remember, safety first—this is a kitchen, not a display case in a studio.
Mounting and leveling
Hold the first bracket over your marks and drive screws into the studs. Then level it carefully. A misaligned bracket makes the whole shelf look crooked and irritates you every time you reach for a mug. Do the same for the remaining brackets, keeping consistent spacing to avoid a wonky line.
Pro tip: drill pilot holes first. It saves your wall and keeps screws from wandering. If you’re using two shelves side by side, run a dry‑fit first to confirm spacing looks balanced from a distance.
Placing the boards
Lay your shelf boards across the brackets. If you’re confident, you can screw the boards to the brackets for added security. Otherwise, the weight should keep them in place. Sand any rough edges and consider a light pre‑finish or sealant, especially in a busy kitchen where splashes happen.
Styling for function and vibe
Now the fun part. Start with a focal piece—a tall vase, a sculptural dish, or a handcrafted cutting board—that anchors the composition. Build out in odd numbers and mix heights to create a visual rhythm. Place everyday items at eye level and reserve the top shelf for decorative pieces you love but don’t need daily.
If you want a deeper dive into installation styles, a reliable step‑by‑step guide can be really helpful. Dream Green DIY has a practical install guide you can reference for specifics like stud spacing and bracket placement. Step-by-step install guide can be a handy companion as you work through your layout.
Finally, check everything again. Load gradually, wipe up fingerprints, and step back to see if the shelves feel like a natural extension of your kitchen. That moment when it clicks—that’s what you’re after.
And if you’re craving expert help, Harvey Bruce Interiors can tailor the shelving to your space, selecting finishes and hardware that align with your luxe, sustainable aesthetic. As you style, remember to distribute weight evenly along the row—heavier items on the ends can tilt the shelf, so mix in balanced placements across the length.
One last thought: lighting can dramatically enhance the display. Consider subtle under‑shelf LEDs to highlight your hero pieces after dark. If you’re unsure where to start, platforms like Harvey Bruce Interiors make this easier by guiding you through choosing finishes that echo other pieces in your kitchen.
Step 4: Add Decorative Accents & Lighting (Comparison Table)
Now that the shelves are up and your hero pieces are in place, the next question is: how do you turn a functional board into a little stage? The answer is all about the right accents and a bit of light that makes every object look its best, even after the kitchen lights go dim.
Think of lighting as the spotlight on a theatre set. A subtle wash can highlight a handcrafted stoneware bowl, while a decorative tray can gather smaller bits into a tidy vignette. You don’t need a full‑blown chandelier – a few well‑chosen details are enough to give the shelves personality and purpose.
So, what should you consider? First, ask yourself which mood you want to create. Warm amber glows are cosy and inviting, perfect for a cottage‑style kitchen. Cool white LEDs feel modern and keep the colour of your dishes true. Then, decide how permanent you want the solution to be – removable hooks and rails are great for renters, while built‑in LED strips work best when you’re committing to a long‑term look.
Below is a quick comparison table that breaks down three popular options. It shows the key feature of each, and a practical tip on how to use it on open shelves. Use it as a cheat‑sheet when you’re scrolling through product pages or chatting with a supplier.
| Option | Key Feature | Styling Tip |
|---|---|---|
| Under‑shelf LED strip | Low‑profile, energy‑efficient lighting that can be dimmed | Run a warm‑white strip along the back edge of each shelf; hide the driver in a discreet nook and use a remote to set a soft glow for evenings. |
| Gallery rail (protective edge) | Metal or brass rail that prevents items from tipping off the shelf | Choose a brass rail for a luxe feel and line it up with the front edge of your tallest piece – it adds safety and a subtle decorative line. |
| Decorative tray or basket | Organises small accessories while adding texture | Place a matte‑finished wooden tray on the middle shelf for oils, spices, and a small potted herb – it grounds the visual flow and keeps things tidy. |
Here’s how to implement each option without over‑complicating the process.
1. Install under‑shelf LEDs
Start by measuring the length of the back edge of your shelf. Most LED kits come with peel‑and‑stick tape; clean the surface, apply the strip, and plug it into a nearby outlet or a hidden power strip. If you’re uneasy about wiring, many retailers now sell battery‑operated strips that click onto a tiny magnetic base – no soldering required.
Once the lights are on, step back and adjust the dimmer until the glow feels like a soft sunrise rather than a harsh spotlight. This subtle ambience works especially well when you’ve placed a glazed stoneware bowl; the light will bring out its subtle glaze variations without washing out colour.
2. Add a gallery rail
Gallery rails are a favourite among homeowners who worry about delicate pieces sliding off. The tastingtable article points out that these rails come in brass, wood, or even pastel‑coloured finishes, letting you match the metal of your kitchen hardware.gallery rails are simple to install – most have pre‑drilled holes and a small screw that secures them to the front lip of the board.
Pick a finish that echoes another element in the room – perhaps the brass tap on your sink – and you’ll get a cohesive look that feels intentional rather than an after‑thought.
3. Choose decorative trays or baskets
Trays act like miniature stages for your everyday accessories. A shallow, natural‑wood tray adds warmth and can hold a set of olive‑oil bottles, a small cutting board, and a sprig of rosemary. If you prefer a softer texture, a woven rattan basket adds a hint of coastal charm and hides any stray crumbs.
Remember to keep the tray’s height consistent with the shelf’s depth – you don’t want it to look like a box perched on a plank. A good rule of thumb is to choose a tray that occupies no more than a third of the shelf’s width, leaving room for the surrounding pieces to breathe.
Finally, test the balance. Light a candle on the far end of the shelf; if the flame wavers, you might have too much weight on that side. Shift a decorative object or add a small plant to even things out. Small adjustments now save you a wobbly shelf later.
By mixing these three elements – subtle lighting, protective rails, and purposeful trays – you give your open shelves a finished, curated feel that feels both luxurious and lived‑in. It’s the little details that turn a plain board into a showcase you’ll love to look at, day after day.
Step 5: Maintain & Refresh Your Open Shelves
Let’s be honest: open shelves look stunning when they feel alive with light and texture. The real test is keeping them feeling curated over time. In our experience at Harvey Bruce Interiors, maintenance is what makes the difference between a pretty display and a luxe focal point.
Start with a simple routine you can actually keep. A quick dust wipe every week, about 10 to 15 minutes for a quick refresh once a month, and a bigger seasonal update are enough to keep things speaking to your design goals. This keeps dust at bay and prevents clutter from creeping back in.
Weight and balance matter more than you’d think. Heavier wares belong on the lower shelves, lighter pieces up higher. After a few weeks you’ll notice if a shelf looks off or if a line feels unsteady; adjust by shifting a piece or two so the distribution reads evenly across the row.
Rotate three hero pieces every 4 to 6 weeks. A tall vase, a sculptural bowl and a small ceramic jar can anchor the scene while giving other items room to breathe. This keeps the display fresh without turning the shelves into a storage closet.
Refresh smartly. When you swap pieces, introduce a new texture or colour family as a subtle update. Keep the back layer neutral and let one accent hue pop in a vase or a tray. This keeps the shelf cohesive while still feeling fresh and personal.
Lighting checks aren’t optional. Make sure under-shelf LEDs stay bright but gentle, with cables tucked away neatly. After dark, the shelves should feel inviting, not harsh. If spacing has changed due to new pieces, adjust lighting to maintain a soft glow that highlights your hero items.
If your kitchen or cabinets have evolved, that’s your cue for a bigger refresh. Revisit the three hero pieces rule, adjust the heights, and rework the colour family to align with the rest of the room. It’s a few thoughtful tweaks, not a full renovation, that keeps the shelves current.
A practical habit you can keep is a quick photo log. Snap a shot at the start of each season. You’ll spot patterns in what you actually reach for versus what’s just on display. This helps you shop with intention and avoid overcrowding later.
For homeowners aiming to elevate open shelves in a luxe home, this approach is where the magic happens. We source exclusive homeware from worldwide markets to offer you pieces that feel premium yet sustainable. If you’d like targeted guidance, we can tailor a refresh plan that fits your kitchen and lifestyle.
If you want more actionable ideas, check out tips for kitchen open shelving. It’s a concise guide that mirrors our practical approach to keeping a living, breathable display. tips for kitchen open shelving.
Step 6: Integrate Bespoke Homeware from Harvey Bruce
Now you’ve got the shelf shape, the lighting and the basic hero pieces sorted – it’s time to bring in the truly special bits that turn a functional board into a conversation starter. Think of bespoke homeware as the jewellery of your kitchen: each piece should feel purposeful, beautifully crafted, and just a little bit personal.
Pick bespoke pieces that speak to you
Start by hunting the items that make you smile the first time you see them. Maybe it’s a hand‑blown ceramic vase in muted teal, a walnut cutting board with a subtle grain pattern, or a set of stoneware bowls that whisper of the potter’s studio in Portugal. When you choose something that resonates, you’ll find yourself reaching for it without even thinking – and that emotional connection is the secret sauce of a curated shelf.
Harvey Bruce’s global sourcing means you can pick pieces that are sustainably made and still feel luxuriously unique. Look for a story behind each object – a small note about the maker, the material origin, or the technique used – and let that story guide where it lives on the shelf.
Mix materials for depth
One of the easiest ways to add visual intrigue is to layer different textures. Pair a smooth porcelain bowl with a rough‑hewn wooden bowl, or place a brushed‑copper oil cruet next to a matte stoneware jar. The contrast creates a tactile rhythm that the eye follows from left to right.
Remember the rule of three: aim for at least three distinct material families on each level. That keeps the display feeling balanced without looking chaotic.
Create a cohesive colour story
Colour is the glue that holds a shelf together. Choose a base palette – perhaps soft ivory, warm sand, and a hint of muted teal – and let every bespoke item fit within that range. A single accent colour, like a deep forest‑green pitcher, can act as a focal pop without overwhelming the composition.
If you’re unsure, glance at Emily Henderson’s open‑shelving guide for a quick colour‑harmony refresher.Emily Henderson’s open‑shelving guide shows how a limited palette can feel both curated and lived‑in.
Layer with functionality
Every piece you place should have a reason beyond looks. A handcrafted wooden tray can corral everyday spices, a sleek stoneware pitcher can hold water for quick refills, and a tall ceramic vase can double as a visual anchor and a spot for fresh herbs. By giving each item a purpose, you’ll avoid the dreaded “just‑because‑I‑liked‑it” clutter.
Arrange items in odd numbers – groups of three or five – and vary the heights. The tallest piece should sit near the back or centre, drawing the eye upward, while shorter items rest in front, creating a sense of depth.
Final check – the breath test
Step back and look at the shelf from a few feet away. Do you see a rhythm, or does it feel cramped? A good rule of thumb is to leave roughly a thumb‑width of empty space between each group. If any area feels too dense, swap a piece out for a smaller accessory or a simple wooden coaster.
Lastly, consider the daily flow. Items you use most – a favourite mixing bowl or a daily‑use oil cruet – should sit at eye level. Decorative, conversation‑starter pieces belong a touch higher, where they can be admired without getting in the way of cooking.
Integrating bespoke homeware is less about stuffing the shelf and more about curating a story you’ll want to read every morning. When each item feels intentional, your open shelves become a living tableau that evolves with your life, yet always feels unmistakably yours.
Conclusion
So, you’ve made it to the end of our deep dive on how to style open shelves in kitchen, and I hope you’re feeling inspired.
Remember the core idea: pick a hero piece, play with height, keep a colour family, and leave breathing room – that thumb‑width gap that makes each item breathe.
If you’re standing in front of those blank boards tomorrow, try the quick ‘thumb‑test’: step back, spot the gaps, and ask yourself if the scene feels like a conversation or a cluttered billboard.
A little tweak—swap a heavy bowl for a lighter ceramic, or add a subtle tray—can instantly lift the whole story without buying anything new.
And when the seasons change, rotate three pieces, introduce a fresh accent hue, and let the shelves evolve with your life – that’s the secret sauce of a timeless look.
In our experience at Harvey Bruce Interiors, a thoughtful shelf feels like a living canvas – functional, beautiful, and always ready for the next coffee mug or family heirloom.
So, what’s next? Grab a favorite piece, apply the rhythm we’ve outlined, and step back. If it feels right, you’ve nailed how to style open shelves in kitchen – now go enjoy the space you’ve created.
Enjoy the pride of a curated kitchen that tells your story every day, and remember – a little love goes a long way.
FAQ
How do I pick the right height for each piece when I style open shelves in kitchen?
Start by imagining a skyline – the tallest piece should sit near the back or centre of the shelf, drawing the eye upward. Then layer medium‑height items a few inches in front, and finish with low‑profile objects at the front edge. A good rule of thumb is to keep the tallest item under 18‑inches high on a 12‑inch deep board, so it doesn’t dominate the whole wall. Walk back a few steps; if the arrangement feels like a gentle wave rather than a wall of blocks, you’ve hit the sweet spot.
What’s the best colour palette for a cohesive look while I style open shelves in kitchen?
Choose a base family of two to three muted tones – think soft ivory, warm sand, and a hint of muted teal. Then introduce a single accent colour, like copper or deep forest‑green, in a vase or kettle. This limited palette keeps the shelf from feeling chaotic while still giving you a pop of personality. When you step back, the pieces should look like they belong together, not like they were pulled from different showrooms.
How often should I rotate items on my open shelves to keep them feeling fresh?
We recommend a gentle refresh every four to six weeks. Swap out three hero pieces – maybe a sculptural bowl, a tall vase, and a decorative tray – and replace them with items of a similar scale but a new texture or colour. This small rotation prevents the shelf from looking static and gives you a chance to showcase seasonal pieces, like a summer citrus bowl or a winter‑green herb pot.
Can I display heavy cookware on floating shelves without worrying about safety?
Yes, as long as you anchor the brackets into wall studs and choose brackets rated for at least 15 kg per metre. Place the heaviest items, such as cast‑iron skillets, on the lower shelf or nearer the brackets for extra support. If you’re unsure, run a quick finger‑press test – the shelf should feel firm, not flexing. Distributing weight evenly across the length also helps prevent any wobble over time.
What are the most effective ways to add subtle lighting without a full‑blown chandelier?
Under‑shelf LED strips are a low‑profile hero. Stick the strip along the back edge of each board, choose a warm‑white setting, and dim it to a soft glow. If wiring feels intimidating, battery‑operated strips with magnetic backs work just as well. The light should highlight the texture of a stoneware bowl or the glaze on a ceramic vase, creating a gentle spotlight that feels intentional but not overpowering.
How do I keep my open shelves tidy when I have kids or frequent kitchen traffic?
Start with a clear hierarchy: everyday essentials at eye level, decorative pieces higher up, and heavier items lower down. Use shallow trays or woven baskets to corral smaller bits like spices or napkins – they look intentional and keep clutter at bay. Finally, adopt a weekly “thumb‑test” – step back, spot any crowded zones, and remove anything that doesn’t serve a purpose or add visual interest.
← Older Post Newer Post →
