How to Choose an Extendable Dining Table for Small Spaces
Posted by Harvey Bruce on
Picture this: you’ve just moved into a cosy two‑bedroom flat in Edinburgh, the kitchen is bright but the dining nook feels more like a narrow hallway. You love entertaining, yet the space only fits a tiny bistro table.
Does that ring a bell? So many homeowners chasing that perfect balance between style and function end up compromising one or the other. The good news is there’s a design hero that slips right into tight footprints – the extendable dining table for small spaces.
What makes an extendable table a game‑changer is its ability to shrink down to a compact size for everyday meals, then pull out extra leaves when friends drop by. In our experience the hidden leaf mechanism adds up to 30 % more surface area without demanding extra floor space, meaning you can keep a sleek, minimalist look most of the time and still host a dinner for six when the mood strikes.
Take Emma, a first‑time buyer in Glasgow. She chose a walnut‑toned, butterfly‑leaf table that folds flat to 120 cm. On a regular night she slides a single chair in front, but when her parents visited she simply pulls the two extra leaves and the table stretches to 180 cm. The extension sits snug against the wall, leaving a clear pathway for the hallway – a practical win for anyone juggling limited clearance.
Here’s a quick checklist to make the extension work for you:
- Measure the longest uninterrupted wall in your dining area, then subtract 10–15 cm for breathing room.
- Pick a leaf style that matches your lifestyle – butterfly for quick pop‑out, or slide‑out for a smoother motion.
- Check the load rating; solid oak or walnut frames usually support 70 kg per leaf.
- Finish matters: a low‑VOC oil coat will age gracefully and keep the table looking fresh for years.
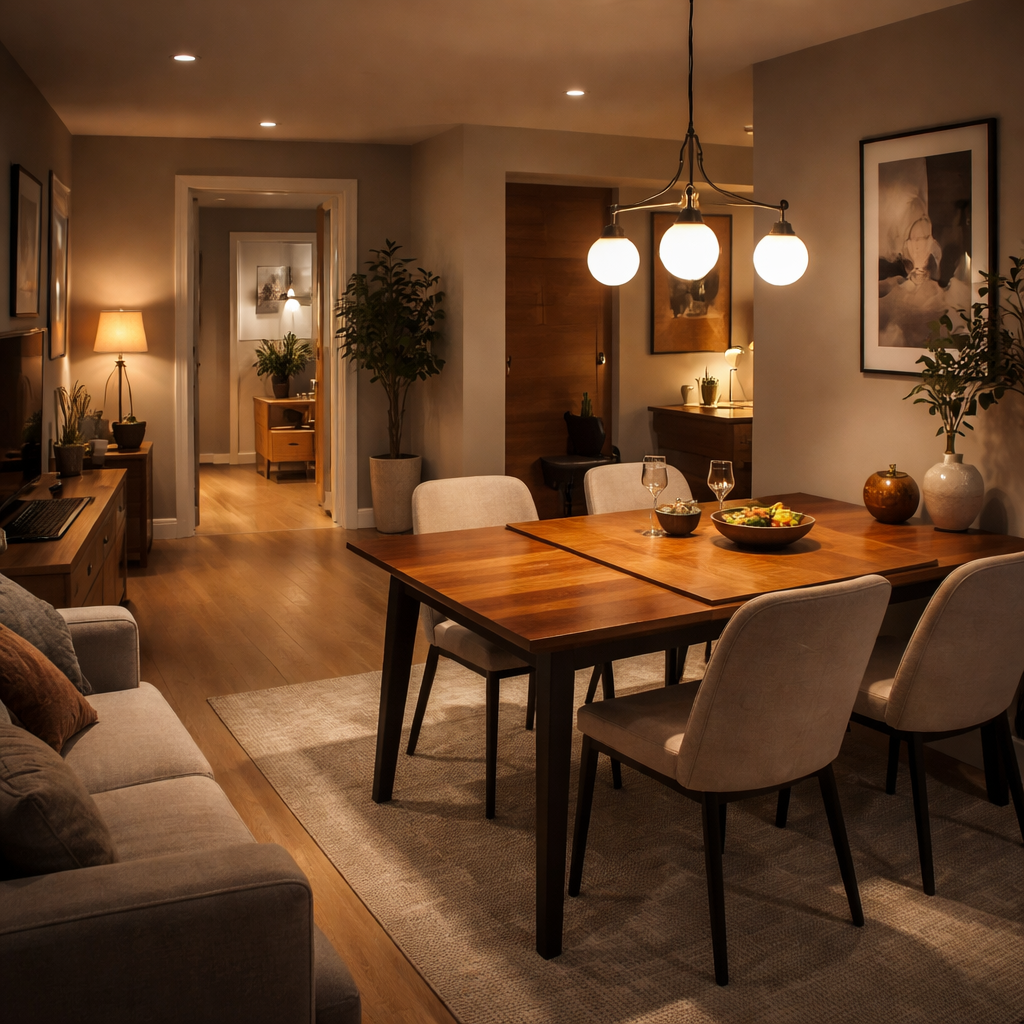
Don’t forget the ambience. Pairing your extendable piece with a subtle pendant or wall‑mounted LED strip creates a cosy glow that makes even a modest room feel inviting. A warm light also highlights the wood grain, turning the table into the room’s natural focal point.
Need a deeper dive into choosing the right table? Our Dining Tables Review: Choosing, Styling, and Caring for the Perfect Piece walks you through shape, material and styling tips that fit snugly into small‑space living.
So, if you’re ready to stop wrestling with a too‑big table or a too‑tiny bistro, start by measuring, pick a leaf system that feels right, and let the flexibility of an extendable dining table for small spaces transform your home.
TL;DR
If you’re juggling a cosy flat and still want to host friends, an extendable dining table for small spaces gives you the flexibility to shrink for daily meals and expand for gatherings without sacrificing style.
Measure your wall, pick a leaf mechanism that matches your lifestyle, and finish with a low‑VOC oil so the piece ages beautifully while keeping your living area bright and welcoming.
Step 1: Assess Your Space and Layout Needs
First thing’s first – step into the room with a mental note of how you move around it. Do you feel cramped when you swing a chair out, or does the space breathe? That gut feeling is the compass that will guide every measurement you take.
Grab a tape measure and start with the longest uninterrupted wall where the table will live. Subtract about 10‑15 cm (4‑6 in) so the table isn’t glued to the plaster. This little breathing room prevents the dreaded “I can’t get the leaf out” moment when guests arrive.
Next, think about traffic flow. Picture a busy evening – a tray of appetizers, a couple of plates, maybe a wine bottle. You’ll need a clear pathway of at least 90 cm (35 in) between the table edge and any door or hallway. If the path feels tighter than a London tube carriage at rush hour, you’ve probably chosen a table that’s too wide.
Height and eye‑level considerations
We all know the sweet spot – about two‑thirds the height of your sofa or dining chair. For a typical 30‑inch high sofa, aim for a table around 20‑22 inches tall. That way you can rest a glass without stretching, and the visual line stays harmonious.
And don’t forget the ceiling. In low‑ceiling flats (think older Edinburgh flats with charming beams), a lower profile table keeps the room from feeling boxed in. If you have a vaulted ceiling, you can afford a slightly taller piece without sacrificing proportion.
Leaf mechanism matters
Butterfly leaves pop out in a flash – perfect if you love spontaneous dinner parties. Slide‑out leaves glide smoothly and hide neatly when retracted, ideal for a sleek, minimalist vibe. If you’re unsure, picture yourself pulling a leaf in front of a mirror. Does it feel effortless or clunky?
While you’re daydreaming, you might also want a touch of ambience. A subtle LED strip or pendant can highlight the wood grain when the table expands. LED Artistry offers ideas for low‑profile lighting that won’t steal the show but will make the extension look polished.
Material & finish checklist
Solid wood adds gravitas; oak and walnut can support the extra weight of extra leaves (usually up to 70 kg per leaf). A low‑VOC oil finish not only looks gorgeous but also ages gracefully – a small detail that makes a big difference in a small space.
Looking for inspiration on sustainable wood sourcing? Wood N Wares showcases Canadian timber options that pair beautifully with UK interiors.
Now, let’s talk aesthetics. If your décor leans modern, a light‑stained ash table with a matte metal frame keeps the room airy. If you love a cosy, traditional feel, a deep walnut with a brushed brass leaf mechanism adds warmth without overwhelming the floor plan.
Here’s a quick visual checklist you can print out:
- Wall length – measure, subtract 10‑15 cm.
- Clearance – minimum 90 cm pathway.
- Table height – ≈ 2/3 of nearby seating.
- Leaf type – butterfly for speed, slide‑out for elegance.
- Finish – low‑VOC oil for longevity.
When you’ve got those numbers, you can start browsing with confidence. Imagine sliding the leaf out while a soft glow from your new LED accent highlights the grain – it’s a small drama that makes everyday meals feel special.
Take a moment after the video to visualise the table in your own nook. Does the leaf fit against the wall without blocking the hallway? Does the height feel right when you sit down?
If you’re still on the fence about style, a quick read on contemporary wall art can spark ideas for pairing décor. contemporary wildlife art prints guide offers tips on choosing pieces that complement the natural tones of an extendable wooden table.
Finally, remember this simple mantra: measure, breathe, and match. Your space may be small, but with the right assessment you’ll unlock a dining experience that feels spacious, stylish, and ready for any gathering.
Step 2: Choose Materials and Styles that Maximize Small Spaces
Let’s be real: in a compact dining area, the wrong materials or a heavy finish can make the room feel cramped. You want air, ease, and a sense of flow. At Harvey Bruce Interiors, we see this all the time: the right materials do more than look good—they shape how you move through the space.
In our experience, three principles tend to make the biggest difference: light tones, slender legs, and finishes that age gracefully. When a table reads lighter in colour and has slim, tucked‑in legs, you’ll feel the space open up. It’s not magic—it's geometry and perception.
First, what you’re choosing matters as much as the piece you’re buying. Solid oak or ash in a pale or natural oil finish offers durability without bulk, but wood veneers can be a smarter choice for small spaces. They give you a similar look with less weight and sometimes less cost. The goal is to keep the footprint visually lean while preserving tactile luxury.
Next, consider the finish. Matte or satin finishes reflect more ambient light than high‑gloss surfaces, which helps rooms feel brighter. Lighter tones—think pale oak, driftwood, or pale ash—read as expansive and pair beautifully with neutral palettes and subtle textures. If you love warmth, choose finishes that age gracefully with a hint of honey or amber, rather than heavy brown stains that anchor the room.
Legs matter. A table with slim, pencil‑thin legs or a trestle base takes up less visual space than chunky pedestals. If you can, look for designs that tuck the legs closer to the corners so the chairs can pull out without feeling cramped.
Leaf mechanics play a quiet but mighty role here. For small spaces, you want something practical in daily life and discreet when stowed. Butterfly leaves are quick to deploy, slide‑out leaves feel smoother, and some designs hide the leaves entirely until you need them. If you’re unsure, a showroom test is worth it—move chairs around, imagine your dinner party, and feel the rhythm of the space. For real‑world ideas, explore Transformer Table extendable options to see how different mechanisms behave in tight rooms.
So, what should you do next? Start with materials that keep the room feeling light, pick a finish that ages gracefully, and choose a leaf style that matches how you live. It’s about balance—luxury, practicality, and space to breathe.
Finishes and materials: quick criteria
Choose finishes that age well and require sensible maintenance. If your daily life is busy, prioritise durable surfaces and easy upkeep. If you want a sense of calm luxury, lean toward finishes with soft edges and subtle warmth.
| Feature | Solid Oak (natural oil) | Walnut Veneer (matte finish) | Light Ash or Pale Painted Wood |
|---|---|---|---|
| Visual space perception | Warm, traditional grain; reads as classic without heaviness | Light, airy feel with modern edge | Bright, contemporary mood that makes a room feel larger |
| Durability / maintenance | Very durable but needs regular oiling to age gracefully | Solid look with easier maintenance; occasional wipe | Low maintenance; refresh with paint or wax as desired |
| Best use‑case | Everyday dining with family; anchors a traditional nook | Open‑plan spaces and kitchens; casual yet refined | Small studios or city flats needing a light mood |
Remember, your table is more than a surface. It’s a tactile statement that anchors space and mood. If you want a more bespoke touch, Harvey Bruce Interiors can help tailor finishes, leg styles, and leaf mechanisms to your exact floorplan and lifestyle. We’re here to help you create a luxurious, functional dining corner that feels inviting day in, day out.
Step 3: Explore Top Extendable Mechanisms (Video)
Okay, you’ve measured, you’ve picked a finish, and now the real magic begins – the leaf mechanism. It’s the part that decides whether you’ll spend a few seconds pulling a leaf out or wrestle with a clunky hinge every time guests show up.
Let’s break it down into three everyday mechanisms you’ll actually see in a small‑space extendable dining table for small spaces. We’ll look at how they feel, what kind of maintenance they need, and which type fits different lifestyles.
Butterfly (Flip‑Up) Leaves
Butterfly leaves fold up like a book and sit flush when not in use. They’re popular because they’re quick – you pull a handle, the leaf pops up, and you’re ready to go. In a cosy flat, that swift motion means you can keep the table compact during weekday meals and have a dinner‑for‑six set‑up in under a minute.
Real‑world example: Emma in Glasgow, who we mentioned earlier, uses a butterfly‑leaf walnut table that folds flat to 120 cm. When her parents arrived, she simply lifted the leaf, and the table extended to 180 cm without any extra tools. The mechanism’s hidden hinges stay tucked under the tabletop, preserving a clean look.
Tip: Look for models with stainless‑steel hardware. It resists rust in humid kitchens and feels smoother than cheap zinc.
Slide‑Out (Gear‑Driven) Leaves
Slide‑out leaves glide on a concealed track, often powered by a gear system. The motion is quieter than a butterfly leaf and can handle larger extensions – think adding two or three leaves at once.
A couple in Edinburgh installed a slide‑out oak table that holds two 12‑inch leaves inside the tabletop. When they host a dinner party, the leaves glide out, and the table grows an extra 24 inches. Because the leaves sit inside the frame, there’s no visual clutter, which is perfect for a minimalist aesthetic.
Pro tip: Test the glide yourself before buying. A smooth, almost frictionless pull means the gear train is well‑engineered and will last years of daily use.
Bread‑Board (End‑Extension) Leaves
Bread‑board extensions add leaves at the ends of the table rather than the centre. The grain of the tabletop runs lengthwise, and the added leaf runs crosswise, acting as a stabiliser. This style is often found on farmhouse‑style tables where a solid, thick top is already part of the design.
One homeowner in Brighton chose a solid white‑oak farmhouse table with bread‑board leaves. The leaves are 18 inches each, adding three feet when both are pulled out. The added width doesn’t compromise leg clearance because the legs stay at the corners, which is a lifesaver in narrow corridors.
Remember: Bread‑board leaves don’t store inside the table, so you’ll need a little extra storage space for the detached pieces. A low‑profile sideboard or a decorative basket does the trick.
How to Choose the Right Mechanism for Your Space
Step 1 – Think about frequency. If you extend the table once a week, a butterfly leaf is fine. If you often have larger gatherings, slide‑out or bread‑board gives you more surface without compromising stability.
Step 2 – Check the load rating. A typical butterfly leaf supports 70 kg per leaf, while slide‑out tracks often handle 80 kg or more because the weight is distributed along the gear.
Step 3 – Measure clearance. For slide‑out systems, you need a little extra room behind the table for the track to travel. For bread‑board, ensure you have at least 12 inches of wall space on each side when fully extended.
Step 4 – Look at aesthetics. If you love a seamless look, slide‑out or hidden‑inside leaves keep the surface uncluttered. If you enjoy a bit of visual interest, a butterfly leaf with a polished metal handle can become a design feature.
Quick Checklist Before You Buy
- Identify your most common extension length (one leaf vs. two).
- Test the mechanism in‑store – feel the resistance, listen for squeaks.
- Confirm the material of the hardware (stainless steel > zinc).
- Ask about the warranty on the moving parts – good manufacturers often cover gear systems for 2‑3 years.
- Consider the storage plan for detached leaves if you go bread‑board.
Want a deeper dive into the pros and cons of each mechanism? The guide from Lacks breaks down the options with clear diagrams and real‑world data small‑space extendable dining tables explained. Dutch Craft Furniture also showcases a range of leaf styles, from centre‑opening gear tracks to classic bread‑board extensions, with photos that help you visualise how each fits into a compact room extendable dining table collection.
Bottom line: the right mechanism turns an extendable dining table for small spaces from a novelty into a daily workhorse. Pick the one that matches your rhythm, your room’s geometry, and your style, and you’ll never feel cramped again.
Step 4: Integrate Bespoke Homeware and Wooden Plantation Shutters
Alright, you’ve got your extendable dining table for small spaces set up and it’s already doing the heavy lifting. The next move is to make the whole room feel curated, not just functional. That’s where a touch of bespoke homeware and a pair of wooden plantation shutters can turn a practical nook into a luxe retreat.
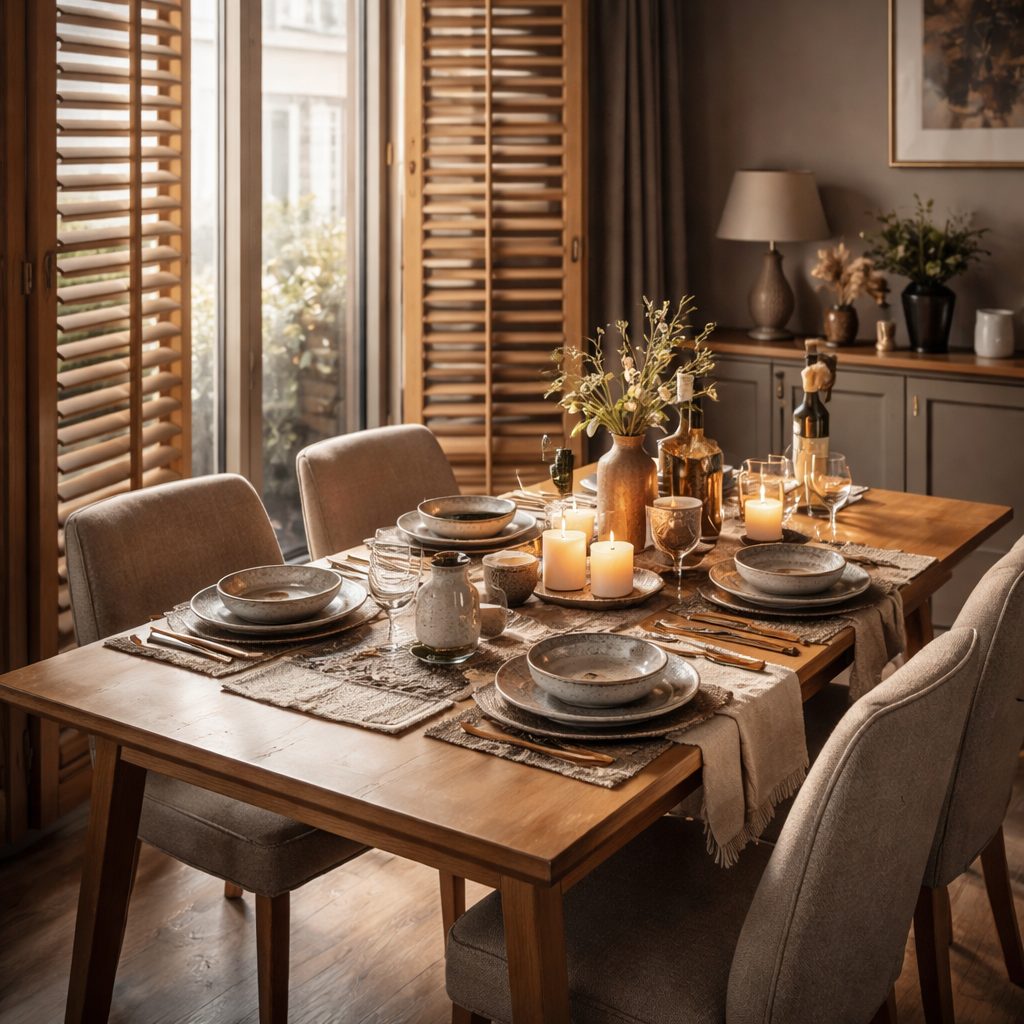
First, take a moment to picture the light coming through your windows. In a compact flat, every ray counts. Wooden plantation shutters not only add a warm, natural frame, they also let you dial the light level from bright morning sunshine to a cosy, dim dinner ambience. The result? You save a few pounds on heating because the shutters create an extra barrier against drafts, and the room feels instantly more intimate.
Choose shutters that match your table’s vibe
When you’re picking shutters, think about the wood tone you’ve chosen for your table. A walnut‑toned table pairs beautifully with rich, dark oak shutters – the contrast feels intentional, like a designer’s signature. If your table is a light ash or pale oak, go for a softer maple or beech shutter. The key is consistency; the wood grain should echo across the room, tying the table, chairs, and window treatment together.
And don’t forget the hardware. Brushed brass or matte black hinges keep the look modern, while classic oil‑rubbed bronze leans more traditional. A subtle hardware choice lets the shutters blend into the backdrop, letting the table remain the star.
Layer homeware without crowding
Now that the light is under control, bring in bespoke homeware that complements the extendable table’s style. Think of a hand‑crafted ceramic serving bowl in a muted terracotta – it adds colour without overwhelming a small space. A set of linen napkins in a soft ivory or pastel hue introduces texture and a hint of luxury.
Because the table can expand, you have the freedom to add a centrepiece only when the leaves are out. A low, sculptural candle holder or a small potted herb works perfectly when you’ve pulled the extra leaves for a dinner party, then you simply tuck it aside when the table is compact.
Pro tip: choose pieces that can be stored in a nearby sideboard or the lower shelf of your wooden shutters when not in use. That way you avoid the dreaded “where do I put this?” moment.
Step‑by‑step integration checklist
- Measure the window opening and order shutters that are at least 2‑3 cm narrower than the frame – this gives a neat reveal and keeps the shutters from rubbing.
- Select a wood finish that mirrors or subtly contrasts your table’s tone. Light‑tone tables → light‑tone shutters; dark‑tone tables → darker shutters.
- Install the shutters before you bring in large homeware items. This ensures you can plan the layout without having to move heavy shutters later.
- Place a decorative tray or a small console on the windowsill (if space allows) to hold everyday items like keys or mail – it keeps the table clear for meals.
- When the table is fully extended, arrange your bespoke pieces in a “triangle” layout: one focal point (like a vase), two supporting items (candles or a bowl), all spaced evenly for visual balance.
Does this feel like a lot? Take it one step at a time. Start with the shutters – they’re a permanent upgrade that pays off in comfort and energy savings. Then, gradually introduce homeware pieces you love, swapping them in and out as the table changes size.
If you’re still on the fence about whether shutters are worth it, the pros and cons of extendable dining tables article notes how a well‑chosen window treatment can boost both aesthetics and functionality, especially in tight living spaces.
Finally, remember that the goal isn’t just to fill a room, but to create a space you enjoy living in. By weaving together the natural warmth of wooden plantation shutters, the flexibility of your extendable table, and a few thoughtfully chosen homeware pieces, you’ll have a dining area that feels both luxurious and perfectly sized for everyday life.
Step 5: Maintain and Adapt Your Table Over Time
So, you’ve got that beautiful extendable dining table for small spaces humming along. But like any beloved piece, it needs a little TLC to stay graceful when you pull the leaves out for a weekend brunch or tuck them away after a quiet dinner for two.
1. Quick‑clean routine that respects the wood
Start with a soft, lint‑free cloth lightly dampened with a wood‑safe cleaner. Wipe in the direction of the grain – that tiny habit keeps the finish looking lived‑in rather than worn out. The folks at Icon by Design remind us to avoid abrasive pads; a simple swipe is enough for everyday spills, and a deeper once‑a‑month polish revives the natural luster.
And what about those stubborn coffee rings after a lazy Sunday morning? A dab of olive oil mixed with a touch of lemon juice works wonders – just test on a hidden corner first.
2. Keep the mechanism moving smoothly
Extendable tables are marvels of engineering, but the rails or hinges can collect dust over time. Grab a vacuum brush attachment and gently clear any debris from the tracks. Then, if your table uses a stainless‑steel pivot (most quality pieces do), a quick wipe with a dry cloth prevents rust in humid kitchens.
Transformer Table’s own guide notes that a light spray of silicone‑based lubricant on the sliding rails, applied sparingly, keeps the glide whisper‑quiet for years Transformer Table. Just be sure the table is fully re‑tracted before you spray, so the excess doesn’t seep into the leaf seams.
3. Seasonal check‑ups – why they matter
Think of your table like a seasonal wardrobe. In spring, give the wood a fresh coat of low‑VOC oil; it not only nourishes the grain but also adds a protective barrier against humidity spikes. In winter, inspect the leaf joints for any tightening caused by the colder air – a tiny screwdriver can loosen a screw without stripping the wood.
Real‑world example: Sarah, a first‑time homeowner in Bristol, set a reminder on her phone for a ‘quarterly table tune‑up’. After six months she noticed the butterfly leaf was a hair tighter; a quick adjustment saved her from a squeak that would have echoed during a dinner party.
4. Adapt the layout as your life evolves
Life changes – a new partner moves in, a child starts school, or the family grows. Your extendable table should grow with you. When you need extra seating, consider adding a matching bench or stackable chairs that tuck under the table when not in use. The Transformer line, for instance, offers a bench that slides into the same footprint, turning a six‑person setup into a twelve‑person banquet without sacrificing floor space.
Tip: keep a spare set of leaf panels in a low‑profile sideboard or even inside a lift‑top coffee table. That way, when you host a holiday feast, the extra leaves are already stored nearby and you won’t have to scramble for space.
5. Protect against everyday wear
Place coasters under every glass, and use placemats for hot dishes. It sounds obvious, but a single ring of heat can leave a permanent mark on a walnut finish. If you love the look of a natural wood top, a clear, water‑based sealant applied annually adds a thin shield without dulling the grain.
Another quick win: rotate the table every few months. This spreads wear evenly across the surface, especially if one side gets the most traffic from a kitchen doorway.
6. Document the process – a habit that pays off
Take a photo of the fully extended table, then another of the compact version. Store them in a folder on your phone titled ‘Table Care’. When you’re ready to sell or hand the piece down, you’ll have visual proof of its excellent condition – a subtle selling point for future owners.
And if you ever need a professional touch, Harvey Bruce Interiors offers a bespoke maintenance service that can refinish the table to match any new décor you decide to try. It’s a nice option when you want a fresh look without buying a brand‑new piece.
7. Checklist for a stress‑free maintenance day
- Gather a soft cloth, wood‑safe cleaner, and a small bottle of silicone lubricant.
- Wipe the tabletop with the cloth, following the grain.
- Vacuum the leaf tracks, then spray a thin line of lubricant if the table slides.
- Inspect hinges or pivots for tightness; adjust with a screwdriver as needed.
- Apply a light coat of low‑VOC oil (spring) or sealant (autumn) and let dry 24 hours.
- Rotate the table orientation and store any extra leaves in a nearby sideboard.
By turning these small habits into a quarterly ritual, your extendable dining table will continue to feel like a custom‑made piece, no matter how many times you pull the leaves out for a birthday feast or push them back for a quiet coffee. Remember, the goal isn’t just to preserve the wood – it’s to keep the whole dining experience fluid, flexible, and forever inviting.
FAQ
How can I tell if an extendable dining table for small spaces will actually fit my flat?
Start by measuring the longest clear wall where the table will live, then subtract about 10 cm to keep a breathing corridor for chairs. Sketch the floor plan and place a piece of cardboard the same length as the table in its fully‑extended position; walk around it and notice any traffic bottlenecks. If the cardboard fits with at least 60 cm clearance behind each seat, the table is a safe bet for your space.
Which leaf mechanism works best in a tight living‑room layout?
For the smallest rooms, a butterfly (flip‑up) leaf is quick and stays flush against the tabletop, so it doesn’t add extra depth when stored. Slide‑out leaves glide on hidden tracks and are perfect if you need a smooth, silent extension for frequent guests. Bread‑board leaves add length at the ends but require extra storage for the detached pieces, so they’re best when you have a sideboard or low cabinet nearby.
How often should I maintain my extendable table and what products are safe to use?
Give the surface a gentle wipe with a soft, lint‑free cloth and a wood‑safe cleaner once a week. Every three months, vacuum the leaf tracks and apply a thin line of silicone‑based lubricant if the table slides. In spring, refresh the finish with a low‑VOC oil; in autumn, a clear water‑based sealant works well. Avoid abrasive pads and harsh chemicals – they can strip the finish and damage the hardware.
Can I pair an extendable dining table with other furniture without crowding the room?
Yes – choose slim‑legged chairs or stackable stools that tuck under the table when it’s compact. A narrow sideboard or a low console placed against the opposite wall can hold extra leaves and serve as a serving station. Keep the overall depth under 90 cm; this maintains clear pathways and lets the table feel light rather than bulky, even when fully extended for a dinner party.
What finishes hold up best in high‑traffic small spaces?
Matte or satin low‑VOC oil finishes are forgiving; they highlight the wood grain while resisting scratches and moisture. A lightly waxed surface adds a protective layer without creating a glossy sheen that can make a room feel smaller. If you prefer a lacquered look, choose a water‑based, low‑odor coating that cures hard yet remains flexible enough to handle the repeated movement of the leaf mechanism.
Is a bespoke extendable table worth the investment compared with a mass‑market option?
A custom piece from Harvey Bruce Interiors can be sized precisely to your floor plan, matched to the exact wood tone of your existing décor, and fitted with a leaf system that suits your daily rhythm. While ready‑made options are cheaper up‑front, they often require compromise on dimensions or finish. In a small flat, that compromise can mean wasted space or a table that looks out of place, costing you comfort and resale value.
How should I style the table for everyday meals versus special occasions?
For daily use, keep the surface clear – a simple runner, two plates, and a small vase of fresh herbs are enough. When the leaves are extended for guests, add a low‑height centerpiece, a decorative tray for condiments, and a few candles to create ambience. Switch out the runner for a patterned tablecloth, and swap the herb vase for a statement bowl to signal a more formal setting without cluttering the space.
Conclusion
We've walked through everything that makes an extendable dining table for small spaces a real game‑changer in a cosy flat.
First, the right dimensions and a slim leaf mechanism keep the room feeling airy, while a light finish tricks the eye into seeing more space.
Second, pairing the table with thoughtful homeware – a linen runner for everyday meals, a low‑height centerpiece when the leaves are out – lets you shift effortlessly between casual and special occasions.
And if you ever wonder whether a bespoke piece is worth it, remember that a table built to your exact floorplan saves you wasted square footage and adds resale value.
So, what’s the next step? Grab a tape measure, picture the tabletop on the floor, and test the flow with a cardboard mock‑up. If the clearance feels right, you’re ready to choose a mechanism that matches your rhythm.
When you’re happy with the fit, let Harvey Bruce Interiors help you fine‑tune the finish, leg style and any hidden hardware – we love turning a functional table into a conversation starter.
Enjoy the freedom of pulling the leaf out for a dinner party and tucking it away for a quiet coffee. Your small‑space dining area just became the heart of the home.
← Older Post Newer Post →
