How to Measure for Curtains: A Friendly Guide to Perfect Fit with Harvey Bruce Bespoke Homeware
Posted by lamb27671@gmail.com on
Ever stood in front of a window, tape measure in hand, and felt the panic rise as you wonder if your new curtains will end up looking like a toddler’s art project?
You’re not alone—most of us have been there, squinting at the glass, trying to guess the perfect drop while the room’s lighting makes everything look a little off.
Here’s what I mean: you picture a luxurious, floor‑to‑ceiling drape that frames your sofa, but a few inches too short and the whole vibe feels unfinished, like a story with a missing chapter.
So, what’s the secret to nailing the look every time? It starts with a simple, step‑by‑step method that takes the guesswork out of measuring and lets you focus on the joy of picking fabrics that speak to your style.
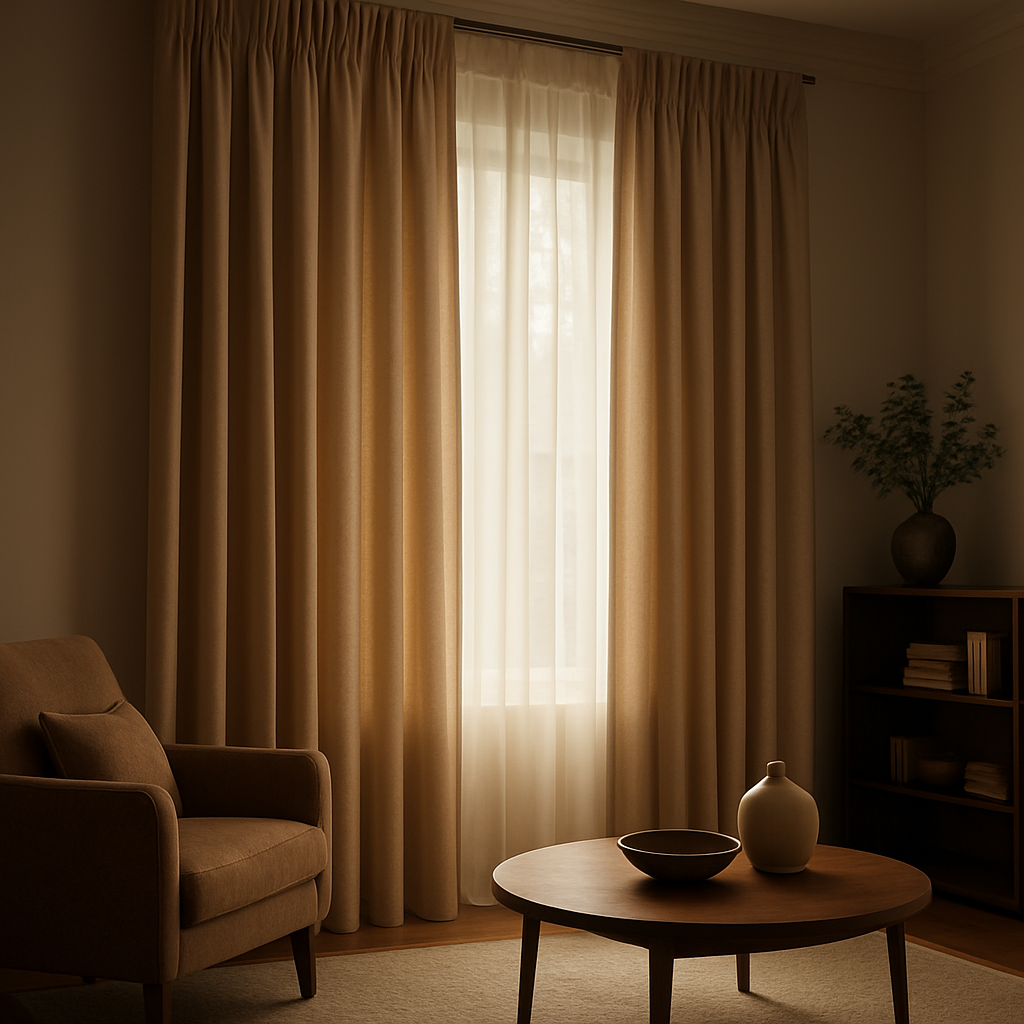
First, decide whether you want your curtains to kiss the floor, hover just above it, or sit on a polished sill. That decision sets the length you’ll mark on the tape.
Next, grab a sturdy steel tape (no rubber bands that slip) and measure from the rod or track to the spot you chose—usually a half‑inch to an inch above the floor for that elegant “just right” look.
But width is where many get tripped up. Think of the window as a stage and the curtains as the curtain‑call; you’ll want enough fabric to create a soft, layered fold. A good rule of thumb is to multiply the window’s width by 1.5 to 2, depending on how full you like the drape.
And don’t forget the hardware. The rod’s diameter adds a few extra inches to the overall width, so add that in before you place your order.
Now picture the moment you see those custom curtains arrive, perfectly sized, hanging like a masterpiece you curated yourself. That feeling of “I got this” is exactly why we break down the process into bite‑size steps.
Ready to turn that vision into reality? Let’s dive in and walk through each measurement step so your next curtain project feels as smooth as a fresh cup of coffee on a lazy Sunday morning.
TL;DR
Measuring for curtains is easier than you think—just decide the drop, grab a steel tape, and note the window width plus a little extra for fullness today.
Follow our quick steps, add the rod’s diameter, and you’ll effortlessly order perfectly sized, luxurious drapes that instantly transform any room without guesswork.
Step 1: Gather Your Tools and Know Your Space
Before we even think about the drop or the fullness, we need to get a clear picture of the space we’re working with. Imagine you’re about to bake a cake – you wouldn’t start mixing ingredients without first checking you have the right pan size, right? Same idea here.
First up, the tool kit. Grab a sturdy steel tape (rubber‑band tapes love to slip), a pencil, a notepad, and a level if you have one. A small step ladder can be a lifesaver for high windows. And, just for fun, keep a blanket‑sizes chart nearby – it’s a handy visual reminder of how measurements translate into real‑world dimensions.
Now, stand back and take a mental snapshot of the window. Does it sit in a busy kitchen, a cozy bedroom, or a formal living room? The room’s purpose will dictate how much fabric you want to show. For a kitchen you might prefer a lighter, airy look, while a bedroom calls for that plush, floor‑to‑ceiling drama.
Speaking of kitchens, if you’re planning to freshen up the surrounding walls, you might already be in touch with a local service like Dublin Kitchen Respray. Knowing the colour palette you’re leaning toward helps you choose curtain fabrics that complement rather than clash.
Next, assess any obstacles. Are there radiators, vents, or trim pieces that could get in the way? Measure from the edge of the trim to the outer edge of the window opening – that’s your true width. If you’re unsure whether to mount the rod inside or outside the frame, picture the final look: an inside mount gives a neat, tailored finish; an outside mount adds visual width.
Here’s a quick checklist you can scribble on your notepad:
- Window width (inner and outer)
- Desired rod placement (inside or outside)
- Height from rod to floor (or to the sill, depending on style)
- Any hardware dimensions you already own
- Room lighting and colour scheme
Got that list? Great. Now, let’s talk about the “fullness factor.” Most designers recommend multiplying the window width by 1.5 to 2, depending on how much gather you love. If you’re leaning toward a more relaxed drape, aim for the lower end; for a rich, layered look, push toward the higher end.
While you’re measuring, think about the curtain’s purpose. Are they purely decorative, or will they block light for a home theatre? The answer will affect both the fabric weight and the needed overlap onto the wall. A light café‑style panel can stop at the window frame, but blackout curtains usually need an extra 4‑6 inches on each side.
And don’t forget the ceiling height. If you have high ceilings, you can pull the rod up a few inches to create an illusion of even taller space. That extra inch can make a world of difference in how grand the room feels.
For a little creative inspiration, I often browse design blogs late at night – that’s where I found a quirky site called Midnight Scriber, which showcases unexpected colour pairings that work surprisingly well with luxe curtains.
Now, let’s see these steps in action. Below is a short video that walks you through measuring a typical living‑room window, complete with tips on avoiding common pitfalls.
Take a pause after the video and double‑check your notes. It’s easy to miss a fraction of an inch when you’re in the flow, and that tiny error can turn a perfectly tailored curtain into a sloppy cascade.

Finally, give yourself a quick sanity check: does the measured width plus your chosen fullness multiplier fit comfortably within the wall space? If the answer is “yes, but it feels cramped,” back up a little and add a few more inches. It’s far easier to trim a little excess later than to order a curtain that’s too short.
When you’ve nailed down these numbers, you’ll be ready for the next step – choosing the perfect fabric and ordering a rod that matches your style. Trust me, once you have the right tools and a clear sense of the space, measuring for curtains becomes as satisfying as nailing the perfect coffee‑to‑milk ratio.
Step 2: Decide on Curtain Placement and Style
Okay, you’ve got the width, the drop, and the rod diameter written down – now comes the fun part: where do you actually put the rod, and what kind of curtains will make that window sing?
High‑and‑wide is the default, but not the only rule
Most designers swear by hanging the rod at least 3‑4 inches above the window frame and extending it 6‑10 inches beyond each side. That tricks the eye into thinking the ceiling is higher and the window bigger.
But if you’ve got crown moulding you love, a low‑sill kitchen, or a radiator tucked under the window, you might need to adapt. The key is to keep the curtain’s “view window” – the gap you see when the panels are pulled back – as wide as possible so natural light can still flood in.
Pick a placement style that fits your room’s vibe
Are you after a formal, layered look? A pinch‑pleat header (think elegant hotel drapes) gives structure and works beautifully with a high rod. For a breezy, casual feel, tab‑top or rod‑pocket curtains let the fabric fall in relaxed folds.
Emily Henderson warns that a rod placed too close to the sill makes the room feel cramped, while lifting it up “creates the illusion of taller ceilings”according to her design rules. So ask yourself: do I want drama or ease?
Consider the function of the space
Bedrooms often benefit from the “kiss” length – a barely‑touching floor that feels tailored. Living rooms can get away with a slight float, especially if you have a plush rug you want to show off. Kitchens? A shorter drop keeps the fabric clear of splatters and lets you slide a stool underneath.
When you’re choosing a header, remember that some styles (eyelets, waves) need lighter fabrics to drape well, while heavier fabrics love the support of pinch pleats. EaseEase notes that the heading style directly impacts light control and maintenance, so match it to how often you’ll open and close the panels.
Quick decision checklist
- Ceiling height – higher rod for low ceilings.
- Window width – add 6‑10 inches each side for full opening.
- Room function – privacy vs. light.
- Fabric weight – pair heavy drapes with structured headings.
Now that you have a placement plan, you’re ready to feed those numbers into a configurator or bring them to your Harvey Bruce specialist.
Side‑by‑side comparison
| Feature | High‑and‑Wide Rod | Low‑Sill Placement |
|---|---|---|
| Ceiling illusion | Creates taller feel | Minimal impact |
| Light entry | Maximized when curtains open | Potentially reduced |
| Style compatibility | Works with pinch‑pleat, wave | Best for tab‑top, rod‑pocket |
Bottom line: there’s no one‑size‑fits‑all answer. Play with the height, the overhang, and the header style until the window looks like it belongs in the room you’re designing. And remember, a well‑placed rod is the secret sauce that makes even a modest‑budget fabric look luxe.
Step 3: Take Accurate Measurements
Now that you’ve settled on where the rod will sit and which header style you love, the next—and often most dreaded—part is actually measuring the window so the curtains fit like they were born there.
Grab your steel tape, a pencil, and a piece of masking tape. We’re going to break the process into three bite‑size actions: vertical drop, horizontal width, and hardware allowances.
Vertical drop: Decide if you want a floor‑kiss, a float, or a sill‑hang. Place a strip of masking tape at the exact spot where the bottom of the panel should rest—usually ½‑1 in above the floor for a clean “just right” look. Hook the end of the tape at the top of the rod (or track) and pull the tape down to the tape on the floor. Write down that number and add an extra ½ in if you like a little breathing room. This is the measurement you’ll feed into any configurator when you search “how to measure for curtains.”
Horizontal width: Measure the window opening from inside the trim on the left side to the inside of the right side. That’s your raw opening. Next, add extra width for the curtain’s “overhang” so the panels can open fully without blocking the view. A good rule of thumb is to add 6‑10 in on each side, depending on how dramatic you want the look. For a modest living‑room window that’s 48 in wide, you’d record 48 in + 12 in (6 in each side) = 60 in total.
Example: In a master bedroom, the window measures 62 in wide and the rod sits 4 in above the frame. Adding 8 in per side for a plush, layered look brings the total width to 78 in. That extra fabric will create the soft folds that make a room feel luxurious.
Don’t forget the rod’s diameter. A 1‑in rod adds roughly ½ in of fabric on each side because the fabric wraps around the rod. Write that down as “rod allowance” and add it to the width you just calculated. If you’re using a heavy pinch‑pleat header, you might even need a sturdier 1½‑in rod, which adds another inch overall.
If you’re dealing with a bay window or a set of paired windows, treat each pane as its own measurement. Measure the deepest point for the drop and the widest point for the width, then use the largest numbers across the set. That way you won’t end up with a short panel that looks like it was cut off.
Before you call the shop, double‑check everything. Lay the tape on the wall, mark the top and bottom points with a pencil, then step back and visualise the curtain. A quick trick is to hold a piece of newspaper at the marked height—if it looks right, you’re probably good.
Pro tip from our designers: measure twice, but also measure once in daylight and once in the evening. Light can make a floor appear farther away, and you’ll catch any hidden baseboard or heating vent that could bite the fabric.
A small torpedo level helps keep the rod straight. Clip it to the rod brackets before you drill, and then re‑measure the drop from the highest point of the rod to the floor tape. A crooked rod is the silent killer of an otherwise perfect curtain.
Create a simple spreadsheet with three columns—Drop, Width, Rod allowance—and fill in each window’s numbers. Add a notes column for quirks like “radiator behind” or “crown moulding”. When you hand this sheet to your Harvey Bruce consultant, they can instantly generate a CAD‑style visual of your custom drape.
If you’re leaning toward a pinch‑pleat look, our guide on designing pinch pleat curtains walks you through the same measurements while showing how the pleats affect fabric consumption.
And because a well‑measured curtain often shares the same attention to detail as a perfectly sized blanket, you might also want to check out this blanket sizes chart for guidance on cozy home textiles.
Take a breath, follow these steps, and you’ll walk away with numbers you trust. No more guessing, no more ill‑fitting panels—just curtains that hang like they were tailor‑made for your space.
Step 4: Choose the Right Curtain Length and Header
Now that you’ve got your window’s width, drop, and rod diameter nailed down, the next decision feels a lot like picking the perfect pair of shoes – it has to match the outfit, be comfortable, and look just right from every angle.
That outfit is your room’s style, and the “shoes” are the curtain length and header. Choose wisely and your windows become the room’s statement piece; choose poorly and you’ll be tugging at hems for years.
Decide the drop: floor‑kiss, float, or sill‑hang
First, ask yourself how you want the fabric to behave at the bottom. A floor‑kiss length (the panel just grazes the floor) adds formality and works great in formal living rooms or master bedrooms.
If you love a relaxed vibe, a float—about an inch or two above the floor—creates a subtle “air” between fabric and floor, making cleaning easier and preventing unwanted creases.
For kitchens, bathrooms, or any space where you need quick access, a sill‑hang (the curtain rests on the windowsill) keeps the panel out of the way and lets you slide a stool underneath without a hassle.
Pro tip: measure the exact distance from the rod to the floor at three points (left, center, right) and use the longest number. That way you avoid a short spot that looks like a wardrobe malfunction.
Pick a header that works with fabric weight and function
Headers are the backbone of a drape. Pinch‑pleat, grommet, rod‑pocket, and wave each have a personality, and they react differently to fabric weight.
Heavy velvets or blackout liners love the structure of a pinch‑pleat or tailored‑pleat header—they need that extra support to keep the folds crisp. Light sheers or linen look more natural with grommets or wave tops, which let the fabric glide.
If privacy is paramount, consider a double‑backed panel with a solid header; the header will bear the extra weight of the lining without sagging.
For example, in a downtown loft we fitted a 70‑inch‑wide window with a 1½‑inch rod, chose a floor‑kiss length of 96 in, and paired a rich charcoal velvet with a pinch‑pleat header. The result was a dramatic floor‑to‑ceiling cascade that also blocked street noise.
Calculate the exact length
Take the rod‑to‑floor measurement you recorded, then add ½ in for a breathing room and another ½ in if you plan to hem the bottom yourself. Most custom shops, including Harvey Bruce, will finish the hem for you, but knowing the math helps you double‑check the order.
If you’re going for a float, subtract the desired gap (usually 1–2 in) from that total. For a sill‑hang, measure from the rod down to the top of the sill and add a tiny allowance so the panel sits snugly without sliding off.
Create a quick decision checklist
✅ Desired drop (floor‑kiss, float, sill‑hang) – measure three points, pick the longest.
✅ Fabric weight – heavy = structured header, light = soft top.
✅ Room function – bedroom = privacy, living room = drama, kitchen = easy‑care.
✅ Hardware – rod diameter adds width, ensure brackets can support the weight.
Run through this list with your spreadsheet from Step 3. Tick each box, and you’ll see the perfect combo emerge without second‑guessing.
Pepper Home’s curtain measurement guide recommends extending the rod 6‑12 in beyond the frame to maximise light when the panels are opened, a tip that works equally well with any header style.
Once you’ve locked in length and header, you’re ready to place the order or hand the specs to your Harvey Bruce consultant. They’ll translate those numbers into a CAD‑style visual, so you can picture the final look before any fabric is cut.
And remember, the right length and header aren’t just about aesthetics—they affect how the room feels, how easy the curtains are to operate, and how long they’ll look flawless. Take a moment now, run the checklist, and you’ll walk away with windows dressed to impress.
Step 5: Double‑Check and Order Your Bespoke Curtains
Okay, you’ve finally nailed the drop, the width, the header, and the rod size. Before you hit “order” you want to be 100% sure those numbers won’t surprise you later – kind of like double‑checking the oven temperature before the cake goes in.
Run a quick sanity checklist
Grab the spreadsheet from Step 3 and read each row out loud. Does the drop match the floor‑kiss, float, or sill‑hang you visualised? Is the width the raw opening plus the overhang you decided on (usually 6‑10 in each side)? Did you add the rod‑diameter allowance?
Tick each box. If anything feels off, pause and re‑measure that single dimension – no need to redo the whole thing.
Visualise with a simple mock‑up
Cut a piece of painter’s tape the exact length you recorded and stick it to the wall where the rod will sit. Then tape a second strip at the bottom where the curtain should fall. Step back; does the rectangle look right? This tiny experiment saves you a costly return.
For an extra layer of confidence, place a sheet of newspaper or a light fabric over the tape to see how it drapes. You’ll instantly notice if the panel will pool or hover awkwardly.
Cross‑check fabric specifics
Different fabrics behave differently. Heavy velvet needs a few extra inches of length for the hem to sit nicely; sheer linen might need a touch less because it stretches a bit when hung. If you’re unsure, the quick guide on how to measure for curtains reminds you to add a half‑inch to a full inch for finishing.
Also, confirm the header you chose works with the fabric weight. Pinch‑pleat with a heavyweight drape? Perfect. Grommet with a light voile? Yep.
Confirm hardware compatibility
Look at the rod diameter you selected and compare it to the brackets you’ll be using. Most brackets support up to a 1‑inch rod; if you went to 1½ in for extra strength, make sure the mounting holes are deep enough.
Check the weight rating of the brackets – a heavy, lined curtain can easily tip the scales. When in doubt, call your Harvey Bruce consultant and ask them to verify the specs.
Final order details
Now it’s time to write down the exact numbers you’ll hand to the maker:
- Rod‑to‑floor drop (including any breathing room)
- Total width including overhang and rod allowance
- Header style and fabric name
- Any special finishing – hemming depth, pleat count, lining
Send these in a clean email or upload them to the Harvey Bruce configurator. The team will turn your spreadsheet into a CAD‑style visual, so you get a 3‑D preview before the first stitch is cut.
Ask for a sample swatch
If the fabric is a new shade or texture, request a small swatch. Hold it up to the window at the exact drop height you measured – this is the fastest way to see if the colour and drape meet your expectations.
Many clients discover that a fabric that looks “rich” in the showroom can look slightly different in their own light, so a swatch is a low‑risk safety net.
Place the order with confidence
When you click “order” or hand the specs to your consultant, you’ll feel that satisfying click of certainty – you’ve done the math, visualised the result, and checked the hardware. The curtains will arrive, fit perfectly, and instantly lift the room’s vibe.
And remember, the whole point of this meticulous process isn’t just about avoiding a return; it’s about creating that moment when you pull the panels open and the light floods in just the way you imagined. That’s the magic of a well‑measured, bespoke curtain.
FAQ
What’s the first thing I should do when I start learning how to measure for curtains?
Grab a sturdy steel tape, a pencil, and a notepad – that’s your starter kit. Before you even think about length, walk around the window and note any quirks: crown moulding, radiators, or a built‑in shelf. Those little details tell you whether you’ll need to raise the rod a few inches or add extra width so the panels open fully without blocking light.
How do I decide whether my curtains should kiss the floor, float, or sit on the sill?
Imagine the room’s vibe. A floor‑kiss look feels formal and luxurious – perfect for a master bedroom or elegant living room. If you love a relaxed feel and want easy cleaning, aim for a float a inch or two above the floor. For kitchens or bathrooms, a sill‑hang keeps the fabric out of the way. Measure three points (left, centre, right) from the rod to the floor and use the longest number for the most accurate drop.
Why do I need to add extra width beyond the window opening?
The extra width creates the soft folds that make curtains look full and tailored. A common rule is to add 6‑10 inches on each side of the raw opening – the exact amount depends on how dramatic you want the drape. Without that overhang, the panels will hug the window and you’ll lose that elegant, layered look that makes a room feel upscale.
Do I really have to measure the rod’s diameter, and how does it affect the final width?
Yes, it matters more than you might think. The fabric wraps around the rod, so a 1‑inch rod adds roughly ½ inch of fabric on each side. If you opt for a sturdier 1½‑inch rod for heavy velvet, you’ll need an extra inch total. Adding this allowance to your width calculation ensures the curtains sit straight on the brackets and don’t look squeezed.
What’s the best way to double‑check my numbers before I place an order?
Turn your measurements into a simple visual mock‑up. Tape a strip of painter’s tape at the exact drop height and another at the bottom where the curtain should fall. Step back – does the rectangle look right? For an extra safety net, cut a piece of newspaper the same length and hold it up to the window. If it frames the view the way you imagined, you’re good to go.
How can I avoid common mistakes when measuring bay or arched windows?
Treat each segment as its own window. Measure the deepest point for the drop and the widest point for the width of each pane. Then use the largest numbers across the set so no panel ends up too short. It’s also smart to note any angles or recesses in a separate column of your spreadsheet – that way your maker can tailor the fabric panels to each curve.
What should I do if the fabric I love looks different in my home’s light?
Always ask for a swatch before you commit. Hold the piece up to the exact spot where the curtain will hang, ideally at the same time of day you’ll see it most. Natural light can shift colours dramatically, and a swatch lets you confirm both hue and drape. It’s a low‑risk step that saves you from costly returns and ensures the final look matches your vision.
Conclusion
We’ve walked through every step of how to measure for curtains, from gathering tools to visualising the perfect drop.
Now you’re standing in front of the window, tape in hand, and you actually know why that extra inch of overhang matters.
Remember the quick sanity checklist: measure twice, mark the rod‑to‑floor height at three points, add the rod diameter, and picture a strip of tape on the wall. If it looks right, you’re ready to place the order with confidence.
What’s the biggest win? Knowing that a little extra planning saves you from costly returns and gives your room that “just‑arranged‑by‑a‑pro” feel.
So, what’s next? Grab your spreadsheet, upload the numbers to Harvey Bruce’s custom configurator, and request a fabric swatch in your home’s light. When the curtains arrive, you’ll see the exact fit you measured for – no surprises.
Enjoy that moment when you pull the panels open and the light floods in just the way you imagined. It’s the tiny victory that turns a house into a home.
Ready to transform your space? Let’s make those measurements work for you and create a luxe look that lasts.
And if you ever feel unsure, just revisit the tape, the notes, or give our team a call – we love turning questions into perfect curtains.
← Older Post Newer Post →
