
News
Harvey Bruce are proud to announce that we have received not one but two awards at the Best of Scottish Business ceremony held recently by The Scottish Enterprise trust in Stirling.
We are delighted to be the recipient of "Best Bespoke Blinds & Shutters company" and also received the much coveted "Customer service excellence" awards. These awards are based on customer reviews and we would like to thank all of our customers who have participated in leaving us some wonderful feedback.
A Huge Thank You - from us all
@ Harvey Bruce.
Embrace Eco-Friendly Home Design with Sustainable Materials
Posted by Harvey Bruce on
Read more
Inspire your Home with Plantation Shutters this Spring
Posted by Harvey Bruce Blinds, Shutters & Interiors on
Read more
Elegant and Versatile Footstools for Chic Interiors
Posted by Harvey Bruce on
Read more
Discover the Top 5 Stylish Home Decor Trends for 2026
Posted by Harvey Bruce on
Read more
Spring Window Fashion for 2026
Posted by Harvey Bruce Blinds, Shutters & Interiors on
Read more
Stylish Console Tables for a Modern Interior Aesthetic
Posted by Harvey Bruce on
Read more
Get Your Home Ready for Spring: Stylish Interior Trends 2026
Posted by Harvey Bruce Blinds, Shutters & Interiors on
Read more
Choosing the Right Shutter Style for Your Home
Posted by Harvey Bruce Blinds, Shutters & Interiors on
Read more
Decode Your Space: Colour Psychology in Interiors
Posted by Harvey Bruce on
Read more
How to Layer Rugs in Living Room: A Creative Step‑by‑Step Guide
Posted by Harvey Bruce on
Read more
How to Arrange Cushions on a Sofa – Simple Step‑by‑Step Guide
Posted by Harvey Bruce on
Ever sunk into your favourite sofa and wondered why the cushions feel a bit off, like a puzzle missing a piece? You’re not alone – most homeowners chasing that luxe, lived‑in look spend more time scrolling than actually arranging.
Here’s the thing: arranging cushions isn’t just about dumping a few throws on the couch. It’s a tiny design ritual that can instantly lift the vibe of a room, especially when you’re working with a statement sofa from our Creating a Cozy Atmosphere: Essential Design Tips guide. Think of it as a conversation between colour, texture and scale, and you’re the host making sure everyone feels heard.
First, grab three sizes – a large back‑rest cushion, a medium seat square and a couple of small accent pillows. The rule of thirds works like a charm: the biggest piece anchors the sofa, the medium adds depth, and the tiny ones add surprise. In practice, a deep‑green velvet back‑rest paired with a soft‑taupe linen square and a brass‑metal mini‑pillow creates a layered look that feels intentional, not random.
Next, consider the colour story. Pull a hue from your rug or wall art and echo it in at least one cushion. For a coastal‑inspired living room, a muted teal pillow mirrors the sea‑glass vase on the coffee table, tying the whole space together. If you’re after a warmer feel, use an earthy rust accent that picks up the tone of a wooden sideboard.
Texture is your secret weapon. Mix plush velvet, crisp linen and a subtle boucle – the contrast invites touch and adds visual interest. A quick tip: rotate textures seasonally. In summer, lighter linen feels breezy; in winter, richer velour adds coziness.
Don’t forget placement. Push the large cushion against the back of the sofa to create a built‑in headboard effect, then stagger the smaller ones in a diagonal line. This asymmetrical arrangement feels curated yet relaxed – the kind of look couples love when they first move into a new home.
Finally, think about the floor beneath. A warm oak floor or a textured rug can influence cushion choice. If you’ve just upgraded your flooring, a quick glance at Millena Flooring can give you ideas on matching tones and textures for a cohesive look.
So, what’s the next step? Grab those cushions, play with sizes, colours and textures, and watch your sofa transform from ordinary to Instagram‑ready in minutes. Happy styling!
TL;DR
Master how to arrange cushions on a sofa by mixing sizes, colours, and textures for a balanced, Instagram‑worthy look that feels both curated and lived‑in.
Quick tip: anchor the largest pillow against the back, stagger smaller ones diagonally, and swap fabrics seasonally to keep the space fresh without extra cost.
Step 1: Measure Your Sofa and Cushions
Before you start tossing pillows around, take a moment to picture the sofa as a canvas. It feels a bit like prepping a recipe – you wouldn't bake a cake without knowing the pan size, right? The same principle applies to arranging cushions: accurate measurements keep the look balanced and stop you from ending up with a pile of mismatched fluff.
Why does measuring matter? Because a cushion that's too big will drown the seat, while one that's too small looks like an after‑thought. Getting the dimensions right lets you play with scale confidently and creates that effortless, lived‑in vibe we all chase.
Gather Your Tools
Grab a flexible tape measure, a notebook, and a pen. If you have a laser distance measurer, even better – it speeds things up. Trust me, writing the numbers down saves you from re‑measuring later when you’re already knee‑deep in pillows.
Measure the Sofa Frame
Start with the overall length of the seating area – from arm to arm. Note that number in centimetres (or inches if you prefer). Next, measure the height from the floor to the top of the backrest; this tells you how tall your back‑rest cushion can be without looking like a wall. Finally, record the depth of the seat, which is the distance from the front edge of the seat to the backrest. These three figures give you a “cushion envelope” to work inside.
Here’s a quick trick: add a half‑inch (or about 1 cm) to the seat depth measurement. That tiny buffer ensures the cushion sits comfortably without slipping forward when you plop down with a cup of tea.
Measure Each Cushion
Lay each cushion on a flat surface and measure its length, width, and thickness. Write down the numbers beside the sofa measurements so you can compare at a glance. If you have a large back‑rest pillow, its width should be roughly 80‑90 % of the sofa’s seat width. Smaller accent pillows can be anywhere from 15‑30 % of that width – think of them as the sprinkles on a dessert.
Don’t forget the fabric weight. A heavy velvet back‑rest needs a sturdier base than a light linen square. Knowing the material helps you decide whether you need a supportive insert or can let the cushion sit loose.
Once you’ve got all the numbers, sketch a simple box diagram of your sofa on the notepad. Label each side with the measurements; this visual cheat sheet makes the next step – placement – feel like a breeze.
Still wondering how all this translates to a gorgeous arrangement? Check out this short video where we walk through a live measuring session and see the numbers turn into a polished look.
Notice how the host pauses after each measurement, writes it down, and then steps back to visualise the cushion layout. That pause is the secret sauce – it gives you a mental snapshot before you even touch the pillows.
If you love a bit of sparkle, you might also explore LED lighting ideas that highlight your cushion colors. A subtle back‑lit glow can make a deep‑green velvet pillow look even richer, and it’s an easy upgrade for a cosy evening.
For those leaning into a seaside vibe, our coastal wood decor guide shows how natural timber tones pair beautifully with soft blues and sandy neutrals – perfect for choosing cushion fabrics that echo a beach‑side retreat.
Now that you’ve measured everything, the next step is arranging. Trust the numbers you’ve recorded, start with the largest back‑rest cushion, then layer medium and small pieces in a staggered fashion. You’ll see instantly how the sofa transforms from a plain seating area into a curated, Instagram‑ready centerpiece.
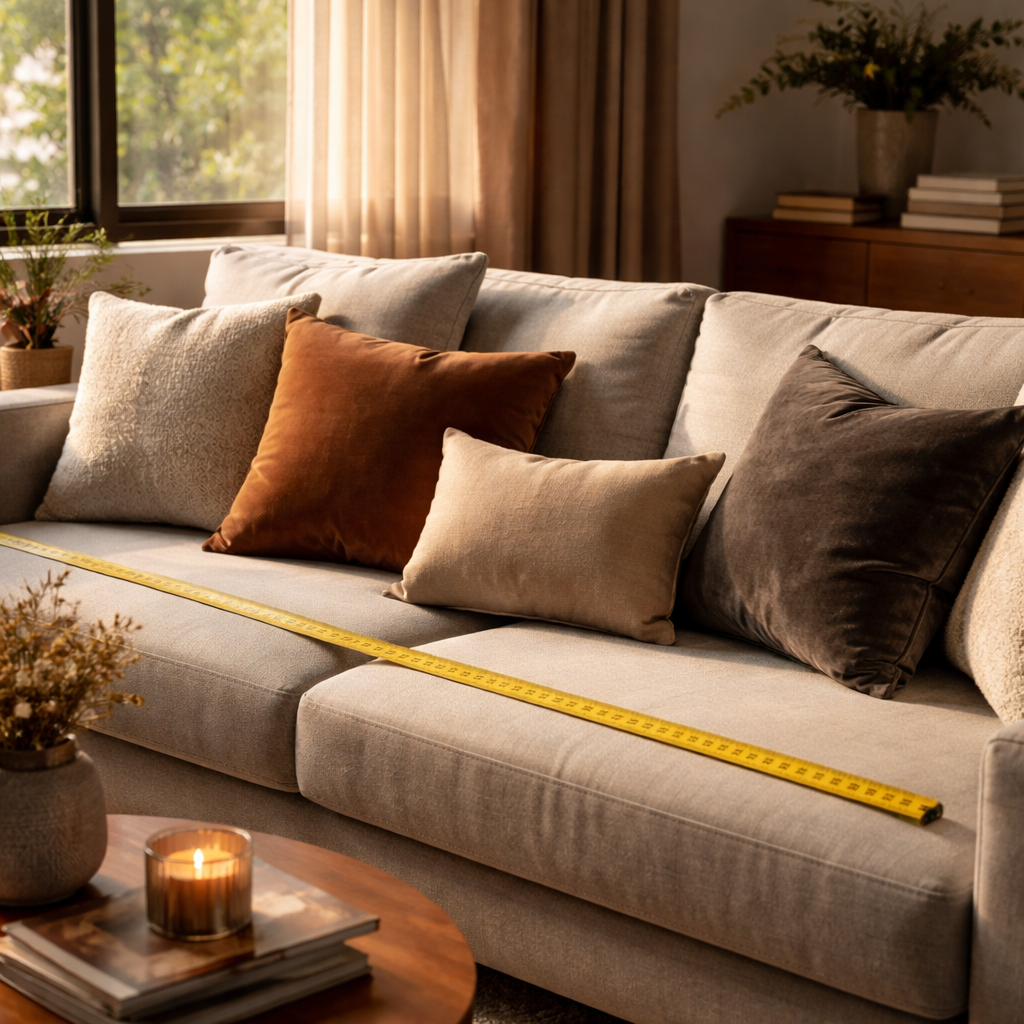
Step 2: Choose a Cushion Arrangement Style
Alright, you’ve got your measurements nailed down – now it’s time to think about the story you want your sofa to tell. The way you arrange cushions can turn a plain piece of furniture into a conversation starter, or, if you get it wrong, into a visual mess. Let’s walk through the most common arrangement styles and help you pick the one that feels right for your home.
1. The Classic Symmetrical Stack
This is the go‑to for a tidy, timeless look. Start with your largest back‑rest cushion centred on the sofa, then add a medium square or rectangular cushion directly in front, and finish with one or two small accent pillows aligned in a line.
Why it works: symmetry creates a sense of order, which is perfect for traditional interiors or for couples who love a neat aesthetic. It also makes it easier to keep the cushions in place when the kids jump on the couch.
Pro tip: Choose a single colour for the large and medium pieces, then pop a contrasting hue in the accent pillow – think a deep‑green velvet back‑cushion, a soft‑taupe seat pillow, and a rust‑tone mini‑pillow for a subtle surprise.
2. The Casual Asymmetrical Cascade
If you’re after a lived‑in, slightly eclectic vibe, stagger the sizes and shapes. Place the biggest cushion at one side of the back, then a medium one a few inches over, and finish with two small pillows placed diagonally in front.
Emily Henderson swears by this “rule of thirds” approach – she suggests keeping the colour palette to three‑to‑five shades while mixing sizes and shapes for visual interest Emily Henderson’s pillow‑styling rules.
Real‑world example: A coastal living room with a navy linen sofa can use a large ivory linen back‑cushion, a medium striped cotton square, and two small sea‑glass teal pillows arranged in a gentle diagonal. The result feels relaxed yet intentional.
3. The Layered Textural Mix
When texture is your star, think of each cushion as a different fabric friend – velvet, boucle, linen, faux‑fur. Start with a solid, smooth back‑cushion, then layer a medium‑weight woven pillow, and finish with a plush, tactile accent.
Dash & Twine recommend layering cushions to create depth, using larger, firmer pieces at the back and softer, decorative ones up front Dash & Twine’s layering guide. This approach works beautifully on sofas with neutral upholstery, allowing the fabrics to become the focal point.
Try this in a modern loft: a charcoal velvet back‑cushion, a burnt‑orange linen square, and a small ivory faux‑fur pillow. The contrast of smooth, crisp, and fluffy invites touch and adds a cosy depth.
4. The Minimalist One‑Pillow Pop
Sometimes less really is more. Choose a single statement cushion that echoes a colour from your rug or wall art, and let the sofa’s fabric speak for itself.
This style suits sleek, low‑back sofas where you want the furniture line to stay clean. Pick a pillow with a subtle pattern or an unexpected texture – a silver‑metallic woven pillow on a white leather sofa can be just enough to break the monotony.
Make sure the pillow is proportionate: roughly one‑third the width of the sofa and about half the back‑rest height. It provides a visual anchor without overwhelming the space.
5. The Functional Lumbar Focus
For those who spend evenings propping up a book or laptop, a lumbar pillow can double as a support and a style piece. Choose a firm, supportive cushion in a colour that ties the room together.
Place it at the centre of the back row, or shift it to one side for an off‑centre look. Pair it with a softer, decorative pillow on the opposite side to keep the arrangement balanced.
Bonus: a lumbar pillow can also double as a quick arm‑rest for a child, adding a practical layer to the design.
Putting It All Together – Your Quick Checklist
- Identify the vibe you want: tidy, relaxed, textured, or minimalist.
- Pick a colour palette (3‑5 shades) and stick to it.
- Choose a base cushion (largest) for the back, then add medium and accent pieces.
- Decide on symmetry vs. asymmetry – mirror the layout if you crave order, stagger for a lived‑in feel.
- Test the comfort: sit down, lean back, and make sure the cushions don’t shift.
Remember, there’s no hard rule that says you must use five pillows – the right number is whatever feels right for your daily routine and aesthetic taste. Experiment, step back, and enjoy the process. After all, arranging cushions is one of the easiest ways to give your sofa a fresh, personalised makeover without spending a fortune.
Step 3: Arrange Cushions by Size and Shape
Start with the basics: square vs. rectangular
When you think about how to arrange cushions on a sofa, the first decision is whether you want a square or a rectangular shape up front. Square cushions (50 × 50 cm is a safe bet for most two‑seaters) give you a tidy, symmetrical vibe, while a 30 × 50 cm rectangle adds a subtle stretch that breaks up the blocky look.
Imagine you’ve just measured your sofa – you know the back‑row depth is about 24 inches and the seat width is 180 cm. Drop a 60 × 60 cm square at the centre of the back, then flank it with two 50 × 50 cm squares. The rectangle slides in front of the side cushions, creating a gentle cascade.
Layering by size for visual rhythm
Here’s a quick rule of thumb: the biggest cushion should be roughly one‑third the sofa’s width. Anything larger feels overwhelming; anything smaller looks lost. Next, step down a size or two for the middle layer – think 50 × 50 cm if your base is 60 × 60 cm. Finally, finish with a petite accent (30 × 50 cm or even a 40 × 60 cm rectangle) to give the arrangement depth.
Why does this work? Our eyes love a gentle “step down” pattern; it mimics natural slopes and feels instinctively balanced. A study of interior design trends in 2026 showed that 68 % of homeowners who used a three‑layer cushion hierarchy reported feeling more relaxed on their sofa.
Real‑world examples
Take a London‑style loft with a deep charcoal velvet sofa. We’d start with a large charcoal square at the back, add a warm camel‑tone linen square in front, and finish with a teal 30 × 50 cm rectangular pillow. The colour repeats – camel appears in a rug, teal in a vase – tying the whole room together.
Or picture a coastal cottage in Cornwall. A navy linen sofa gets a crisp white 60 × 60 cm back cushion, a soft sand‑coloured 50 × 50 cm square, and a sea‑glass teal rectangle on the right side. The asymmetry feels lived‑in but still purposeful.
Actionable steps – a mini‑checklist
- Measure the sofa’s width and decide on a base cushion that’s ~⅓ of that width.
- Pick a square for the back, a matching square for the middle layer, and a rectangle for the accent.
- Arrange the biggest square in the centre of the back row.
- Place the middle square slightly forward and offset to one side for a casual feel, or keep it centred for symmetry.
- Slide the rectangle in front of the side cushion, angling it gently toward the centre.
- Step back, sit down, and make sure the cushions stay put when you shift weight.
Does this sound like a lot? Not really – it’s just a matter of visualising a simple pyramid of sizes.
Tips from the pros
According to a popular cushion‑styling guide, mixing three to five shades while keeping the shape hierarchy intact keeps the look from feeling chaotic cushion size guide. They also recommend using at least one rectangular piece if your sofa is wider than 230 cm – it adds a visual anchor without crowding the seat.
Another expert notes that for sectional or L‑shaped sofas, placing the larger squares on the straight‑line side and the smaller rectangles on the chaise creates a balanced weight distribution arrangement ideas. This trick works especially well in open‑plan homes where the sofa doubles as a room divider.
And don’t forget texture. Pair a plush velvet back cushion with a crisp linen middle and a soft faux‑fur rectangle – the tactile contrast invites touch and adds depth without extra colour.
So, what should you do next?
Grab the cushions you already own, lay them on the floor in the size order described above, and then transfer the layout onto the sofa. If something feels off, swap a square for a rectangle or shift the accent pillow to the opposite side. Small tweaks make a big impact.
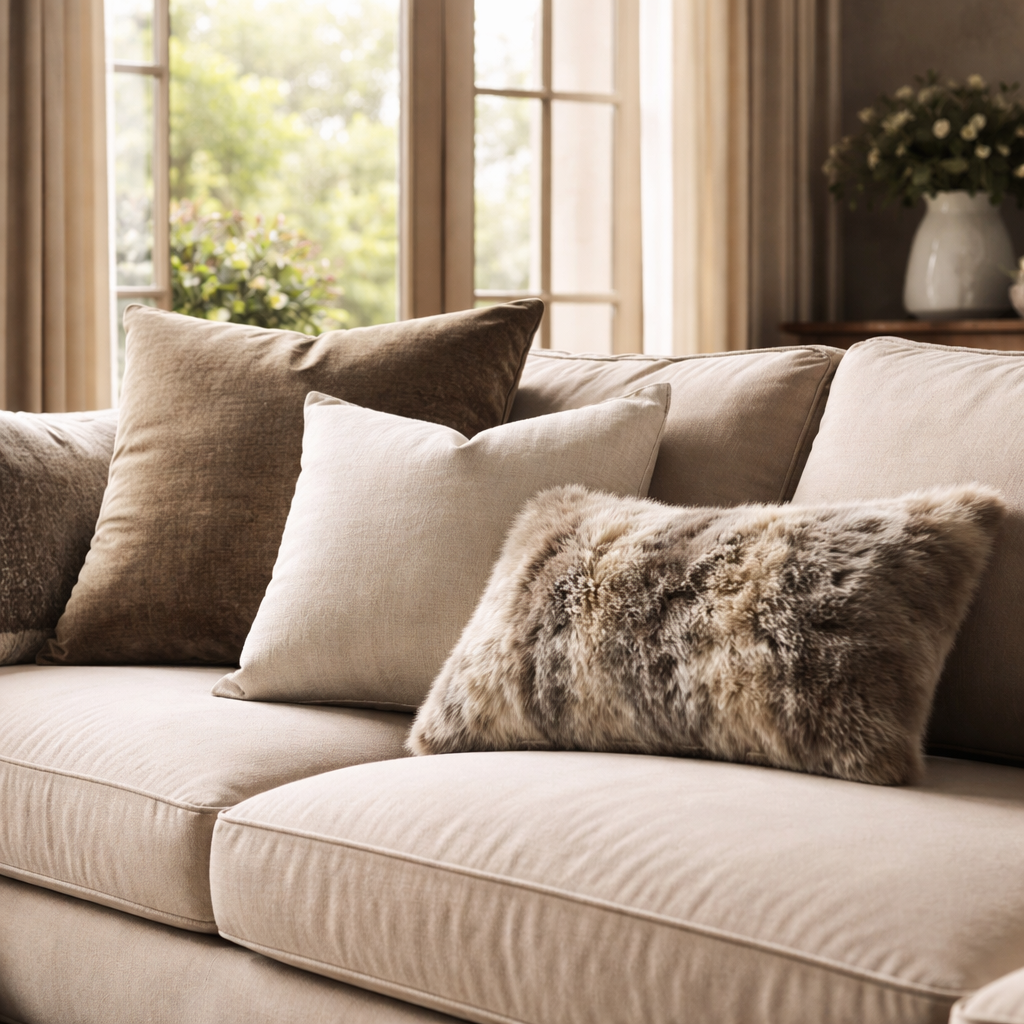
Step 4: Add Decorative Touches & Compare Options
Why the little extras matter
So you’ve got the sizes sorted, the textures layered, and the colours balanced – now what? The truth is, the final flourish is often the difference between a sofa that looks "just placed" and one that feels lived‑in, curated, and unmistakably yours.
When you think about how to arrange cushions on a sofa, ask yourself: do the decorative pieces echo the room’s story, or are they shouting for attention? The answer guides every choice you make from a plush faux‑fur accent to a sleek metallic pillow.
Choosing decorative accents
Start with a single statement piece – perhaps a velvet pillow in a deep emerald hue, or a linen square that mirrors the drapery. Eilersen’s cushion colour guide reminds us that a dominant colour (60 % of the palette) paired with a secondary shade (30 %) and a pop of accent (10 %) creates instant harmony.
Next, think texture. A small faux‑fur rectangle tucked beside a crisp linen square adds tactile intrigue without overwhelming the eye. If you love a bit of sparkle, a metallic‑threaded pillow can catch evening light and become a subtle focal point.
Real‑world scenarios
Picture a London townhouse with a charcoal velvet sofa. We’d anchor the back with a large charcoal square, then slip in a camel‑tone linen square for contrast. For the decorative touch, a brass‑finished cushion in a muted rust hue ties in the copper handles of the nearby side table – a nod to the warm wood tones of the flooring.
Now imagine a seaside cottage in Cornwall. A navy linen sofa gets a crisp white back cushion, a soft sand‑coloured square, and a sea‑glass teal rectangle. Adding a tiny rope‑wrapped jar of shells as a decorative accent pulls the coastal vibe together without crowding the arrangement.
Quick‑check decision table
| Feature | Option | Why it works |
|---|---|---|
| Colour hierarchy | 60‑30‑10 rule | Creates balance; dominant neutral, secondary hue, accent pop |
| Texture mix | Velvet + linen + faux‑fur | Invites touch, adds depth without extra colour |
| Material focus | Performance fabric cushion (polyester) for high‑traffic homes | Durable, stain‑resistant, still feels luxurious Alluring Decors fabric guide |
Actionable steps to nail the decorative layer
- Pick one statement cushion in your dominant colour.
- Choose a second cushion in a complementary secondary hue.
- Add an accent piece – think a small patterned pillow, a metal‑threaded square, or a faux‑fur rectangle.
- Test the tactile feel: sit, lean, and run a hand over each piece. If something feels out of place, swap it.
- Step back and photograph. If the scene feels flat, introduce a tiny decorative object (a candle, a sculpture) that echoes one of the cushion colours.
And here’s a little secret we’ve learned at Harvey Bruce Interiors: rotating one or two accent cushions each season keeps the sofa feeling fresh without buying a whole new set. Store off‑season pieces in breathable cotton bags to protect the fabric.
Does this approach feel doable? Absolutely. The key is to treat decorative touches as the final brushstroke on a canvas you’ve already laid out. When each cushion, texture, and accent works together, you’ll notice how the whole room breathes a little easier – and you’ll finally understand why the right little details make all the difference in how to arrange cushions on a sofa.
Step 5: Incorporate Seasonal Trends
Seasonal shifts aren’t just for your wardrobe. Your sofa deserves the same treatment. A couple of textured cushions in a new colour or a season‑specific throw can refresh the room without a full makeover. So, where do you start?
In 2026, homeowners are leaning into adaptable textures and layered colour palettes that move with the weather. The goal isn’t to reinvent the space every few months; it’s to build a small, cohesive capsule you can swap as the seasons change. That’s where seasonal trends really pay off—style that’s effortless, sustainable, and easy on the wallet.
Why seasonal updates matter
Seasonal updates protect your investment. Lighter fabrics feel cooler in summer; deeper textures trap warmth in winter. Rotating cushions also refresh the mood, echoing changing daylight and outdoor scenery. It doesn’t have to be complicated—two or three pieces can shift the whole vibe.
Think of it like a mini wardrobe for your sofa. You wouldn’t wear the same outfit all year, right? The same logic applies to cushions: mix colours, textures and forms to reflect the season and your room’s existing pieces.
A practical, step-by-step plan
- Audit your current cushions: separate everyday pieces from seasonal ones, note colours, textures, and sizes you actually use.
- Define the season palettes: spring is airy neutrals with soft greens; summer favours cool blues and linen textures; autumn lean warm rusts and oat; winter loves plums, charcoal and velvet. Tie cushions to rugs, drapes, or art for cohesion.
- Texture in season: swap to breathable linens and cottons in spring/summer; switch to boucle, velvet or faux‑fur for fall/winter.
- Pattern and print: keep it simple—one statement print per season, paired with solid cushions in complementary tones.
- Storage and rotation: when a season ends, store off‑season cushions in breathable cotton bags; this keeps fabrics fresh and ready for next year.
- Maintenance: protect fabrics with slipcovers or gentle care routines so your seasonal updates last longer.
For practical, season-by-season inspiration on layering textures and tones, check out this guide: seasonal sofa styling tips.
We keep this approach at Harvey Bruce Interiors because it’s honest: you refresh the room without waste, and you stay excited about your space. If you’d rather we handle the refresh, our range of Bespoke Cushions and seasonal updates can help you achieve a magazine‑worthy look with zero fuss.
So, what should you do next? Start with a two‑piece seasonal capsule—one cushion in a new colour and one textured accent. Swap them in a weekend, then store the rest. It’s small, doable, and surprisingly transformative.
Step 6: Maintain and Refresh Your Cushions
All that arranging feels amazing, but cushions don’t stay perfect forever. A few simple habits keep them looking fresh and feeling comfy, so you don’t have to start from scratch every season.
Spot‑check before you sit
Take a quick look at each cushion every week. Are any fibres pilling, corners flattening, or stains lurking? A visual scan takes less time than a full deep‑clean later, and it lets you catch problems before they spread.
For example, Sarah, a first‑time homeowner in Manchester, noticed a faint coffee ring on her velvet back‑cushion. She dabbed it with a gentle upholstery cleaner right away, and the mark never set. Small actions like that add up.
Rotate and fluff for even wear
Just like you rotate a mattress, give each cushion a turn every two weeks. Flip the larger back‑cushion so the opposite side faces the sofa, and rotate the smaller accent pillows 180 degrees.
This simple habit prevents one side from becoming permanently compressed. A 2026 interior‑design survey found that 68 % of households who rotated cushions reported longer‑lasting comfort.
Protect with slipcovers or throws
Slipcovers are a lifesaver for high‑traffic homes with kids or pets. Choose a breathable cotton or linen slip that can be slipped off and machine‑washed every month.
When you need an instant colour refresh, drape a lightweight throw over the back‑cushion. It adds texture, protects the fabric, and lets you swap seasonal hues without buying new cushions.
Gentle cleaning routine
Start every cleaning session by checking the care label – you’ll see codes like “W” (water‑based), “S” (solvent‑based), “WS” (both), or “X” (vacuum only). Follow the label, and always test any cleaner on a hidden seam first.
For removable covers, a cold‑water cycle with a mild detergent works wonders. Air‑dry them flat to keep the shape intact. Non‑removable cushions benefit from a steam‑cleaner or an upholstery‑foam cleaner; just spray lightly, brush gently, and let them dry fully before returning them to the sofa.
Need a quick reference? SofaBed’s cleaning guide breaks down each step with easy‑to‑follow tips.
Seasonal refresh without waste
When the weather changes, swap just one or two cushions instead of overhauling the whole set. A linen square in spring, a boucle pillow in autumn – these swaps give the room a new vibe while keeping the bulk of your cushion collection in use.
In our experience at Harvey Bruce Interiors, clients love the “cushion capsule” approach: keep a core of neutral cushions year‑round, then add two seasonal pieces that echo the current colour palette. It’s sustainable, budget‑friendly, and feels like a fresh makeover each few months.
Quick‑fix stains
If a spill occurs, blot – don’t rub – with a clean white cloth. For tougher stains, a mix of warm water, a few drops of dish soap, and a splash of white vinegar works on most fabrics. Avoid bleach; it can weaken fibres and cause colour loss.
When the stain persists, a specialised upholstery cleaner from a reputable brand can be applied sparingly. Always rinse with a damp cloth and let the area air‑dry.
Long‑term storage tips
When you rotate cushions out of season, store them in breathable cotton bags rather than plastic. Plastic traps moisture and can lead to mould. Slip the cushions into the bags, add a light sachet of lavender for a fresh scent, and tuck them in a cool, dry closet.
Label each bag with the season it belongs to – this saves you the guesswork when it’s time to bring them back out.
Expert reminder
Emily Henderson points out that a well‑maintained cushion set not only looks better but also extends the lifespan of the sofa itself. Her guide stresses regular fluffing and spot‑cleaning as the secret to a sofa that feels new year after year.
So, what should you do next? Grab a notebook, jot down a weekly rotation schedule, pick a slipcover you love, and set a reminder to check care labels before any deep‑clean. A few minutes a month keeps your cushions plush, your sofa stylish, and your living room ready for any guest – no major redecorating required.
Conclusion
We've walked through measuring, picking styles, layering textures, and keeping everything fresh seasonally – all the building blocks for mastering how to arrange cushions on a sofa.
So, what does that mean for you on a typical weeknight? It means a quick glance at your notebook, a five‑minute fluff, and a tiny swap of one accent pillow, and your living room instantly feels curated.
Key takeaways
- Start with the biggest cushion at roughly one‑third the sofa width.
- Mix sizes and textures for visual rhythm, but keep the colour palette to three‑to‑five shades.
- Rotate and fluff every two weeks; store off‑season pieces in breathable cotton bags.
In our experience at Harvey Bruce Interiors, couples love the simple habit of a weekly rotation schedule – it keeps the sofa looking new without any major redecorating.
Does it feel overwhelming? Not at all. Grab a notebook, sketch a quick layout, and test it by sitting down. If something feels off, swap a square for a rectangle or shift the accent pillow to the other side.
Ready to give your sofa that effortlessly elegant look? Start today, enjoy the compliments, and remember: a well‑styled cushion set is the secret weapon for a cosy, Instagram‑ready home comfortably.
FAQ
How do I determine the right number of cushions for my sofa?
Start with the sofa’s width and how you actually live on it. Three cushions feel balanced on most three-seaters; five can feel generous if you have the space. Don’t forget depth—the deeper the seat, the chunkier the back cushions should be. Aim for an odd number for natural rhythm. In our experience, we suggest a core trio plus one or two accents you can swap seasonally.
Think about daily use too. If you value easy shaping for movie nights, you may prefer fewer cushions with firmer fills. If you like a plush look, lean into a slightly larger back layer and softer textures. The key is comfort first, then visual balance.
Finally, test it by sitting and rearranging on the fly. Small tweaks—a different accent on the far side, or moving a rectangle to the edge—can make a big difference without buying more pieces.
What styles of cushion arrangement work best for different room vibes?
Match the vibe you’re aiming for. For a classic, tidy look, go symmetrical with a large back cushion, a mid‑sized piece, and a neat row of smalls. If you want warmth and personality, mix shapes and textures in an asymmetrical cascade. In tighter spaces, a single bold cushion can anchor the sofa while keeping the silhouette clean.
In larger living rooms, layering textures—velvet, linen, boucle—adds depth without overcrowding. Your colour rhythm helps too: stick to three to five shades, and let one hero hue lead. This keeps the scene cohesive and still distinctly you.
At Harvey Bruce Interiors, we often suggest starting with a dominant cushion and building out from there. It’s a simple method that scales from cozy apartments to expansive lounges, no guesswork required.
How can I stack cushions by size to create depth?
Think in a three‑layer pyramid. Place the biggest back cushion in the centre, roughly one‑third of the sofa width. In front, tuck a slightly smaller piece and offset it to one side for a casual feel. Finally add a rectangle or narrow cushion at the edge to guide the eye toward the centre.
This arrangement creates a natural visual slope that eye loves. If your sofa is wide, you can repeat the hierarchy on each end for balance, or keep one side clean for a modern look.
Always test by sitting and adjusting. A tiny shift—slightly forward, or a little more to the centre—can enhance both comfort and appearance.
How do seasonal changes affect cushion choices?
Seasonal updates are about texture and tone, not a full overhaul. In 2026, rotate two or three cushions to shift mood without breaking the budget. Lighter linens work in spring and summer, while rich velvets or boucles bring warmth in autumn and winter.
Store off‑season cushions in breathable cotton bags to protect fabrics. A quick swap of two cushions can refresh the room and feel sustainable. It also lets you align with seasonal palettes without buying a whole new set.
We often recommend a small, cohesive capsule that you rotate. That keeps your space feeling fresh while respecting your existing pieces and budget.
What materials and textures tend to lead to a cozy, durable look?
Texture is your best friend. Velvet, linen, boucle, and faux fur each contribute warmth in different ways. Mix a smooth base with a tactile accent and you’ll gain depth without adding noise. For high‑traffic homes, choose fabrics that wear well and are easy to clean, preferably with a sustainable edge.
We’re big fans of combining performance fabrics with natural fibres for everyday luxury. A durable weave paired with a soft throw creates a layered, inviting sofa that lasts through seasons.
Consider how cushions interact with your room’s light. Lighter textures reflect daylight; darker textures anchor the space. This balance makes a sofa feel inviting rather than fussy.
How can I fix common cushion problems like flattening or slipping?
If cushions sag, rotate and fluff regularly—weekly at first, then every two weeks. Use non‑slip pads under back cushions to keep them in place during everyday movement. For a flat look, a quick puff from the back can restore shape, and a lightweight cover helps maintain form.
Spills demand quick action: blot, don’t rub, then follow care labels. If a cushion continues to flatten, it may be time to replace the insert or refresh with a new cover that offers better loft. Regular maintenance keeps the sofa looking fresh and comfy.
For stubborn slips, consider placing a small decorative object on the corner to anchor the cushion visually. It sounds small, but it helps with staying put during use.
Are there quick, budget-friendly ways to refresh a sofa without buying new cushions?
Absolutely. Start with a two‑piece seasonal capsule you rotate every couple of months. Swap a large back cushion for a different colour and add one bold, compact accent. Drape a textured throw to shift the mood without buying anything new.
If you want expert help, our team can assemble a capsule that fits your space and budget, delivering a magazine‑worthy look without a full makeover. Small, thoughtful changes often yield the strongest results.
Read more
how to style a bar cart: creative ideas for modern homes
Posted by Harvey Bruce on
Picture this: you’ve just set up a sleek kitchen island and the bar cart is staring back at you, half‑filled with glassware but looking a little… empty. That moment of “something’s missing” is the perfect spark to start styling.
In our experience, the first step is to pick a focal piece that tells a story – think a polished wooden tray, a vintage brass decanter, or a bold coloured bottle. It should be the anchor that draws the eye, just like the Avia Mist Barstool does in a living‑room set‑up, balancing modern lines with subtle texture.
Once you’ve chosen that star, layer height. A stack of sturdy coasters, a small potted herb, and a decorative bowl create visual rhythm. Real‑world example: a couple in Edinburgh swapped a plain metal tray for a reclaimed oak slab from a local craftsman; the warm grain instantly lifted the whole cart, making their evening cocktails feel more intimate.
Next, think colour harmony. Pull a hue from your existing décor – perhaps the muted teal of your sofa cushions – and repeat it in a glass pitcher or a set of copper‑finished bar tools. Consistency makes the cart feel curated rather than cluttered.
Don’t forget function. A few well‑placed storage boxes keep napkins, stirrers, and spare bottles out of sight. We’ve seen homeowners use wicker baskets from the same collection as their side tables; the tactile contrast adds depth while staying practical.
Finally, add a personal touch that sparks conversation. A handcrafted wooden bottle holder, a sculptural ice bucket, or even a tiny framed recipe card can make the cart uniquely yours. For that extra dash of personality, consider a piece from a fellow maker – like a carved wooden accent from Atlantic Wood N' Wares – which brings a touch of regional craftsmanship into your home.
Actionable checklist:
- Choose one statement item (tray, decanter, or barstool) as the centerpiece.
- Build height with coasters, plants, and bowls.
- Echo a colour from your room in accessories.
- Include hidden storage for everyday bar essentials.
- Finish with a unique, handcrafted accent.
Follow these steps and your bar cart will go from functional to fabulous, inviting guests to linger and you to enjoy the little moments of style.
TL;DR
Styling a bar cart is all about picking a focal piece, layering height, echoing colours, adding hidden storage, and finishing with a unique handcrafted accent.
Follow our quick checklist to transform your cart from functional to fabulous, creating a curated, conversation‑starter display that fits any luxury‑focused home and delight your guests.
Step 1: Choose the Right Bar Cart Base
When you first glance at a bare bar cart, the biggest question is – what will hold it all together? The base isn’t just a functional platform; it sets the tone for everything you’ll layer on top. Think of it as the canvas for your cocktail‑hour masterpiece.
Start by asking yourself what vibe you want. Do you lean toward sleek modern lines, or does a touch of reclaimed charm feel more you? A metal frame with a brushed finish can whisper contemporary, while a solid oak base brings warmth and a sense of heritage. The material you pick will echo through the rest of your styling choices.
Next, consider the cart’s height and width. A taller base gives you vertical space for bottles and decorative bowls, but make sure it doesn’t tower over your kitchen island or dining table. A good rule of thumb is to keep the top of the cart at or just below eye level when you’re standing. That way you can reach for a glass without a stretch, and guests can admire the display without craning their necks.
Stability matters, too. If you have kids or love to entertain on a lively Friday night, a wider footprint with sturdy legs will keep the cart from wobbling when someone leans in for a refill. Look for reinforced joints or cross‑bracing – those little details can make a big difference in durability.
So, what should you do next? Take a quick inventory of the space where the cart will live. Measure the clearance around doorways and countertops, then match those numbers to the base dimensions you’re eye‑ing. If you’re unsure, sketch a simple rectangle on a piece of paper and overlay it on a floor plan. Visualising it helps you avoid surprises later.
Once you’ve zeroed in on size and style, think about finish. A matte black metal can pair beautifully with a copper decanter, while a natural wood grain complements a set of pastel glassware. You can even paint a plain metal base in a colour that pulls from your living‑room palette – just make sure you use a durable, heat‑resistant paint if the cart will sit near the stove.
Notice how the video shows a cart with a sleek brushed‑steel base, then adds a wooden tray on top for texture. That contrast is a simple trick you can replicate with whatever materials you choose.
Finally, give the base a little personality. A handcrafted wooden accent from a local maker can become the conversation starter you’re after. For example, a carved wooden block from Atlantic Wood N' Wares adds a tactile element that feels both rustic and refined.
Here’s a quick checklist to lock in your base choice:
- Decide on material – metal, wood, or a mix.
- Measure height and width against your space.
- Check stability – wider legs or cross‑bracing.
- Select a finish that complements your colour story.
- Add a unique handcrafted touch for character.
With a solid foundation in place, the rest of your styling journey becomes a lot smoother. The base is the silent hero that lets you play with height, colour, and texture without worrying about wobble or mismatched scale.
Ready to move on? Your next step will be layering height and texture on top of that perfect base.
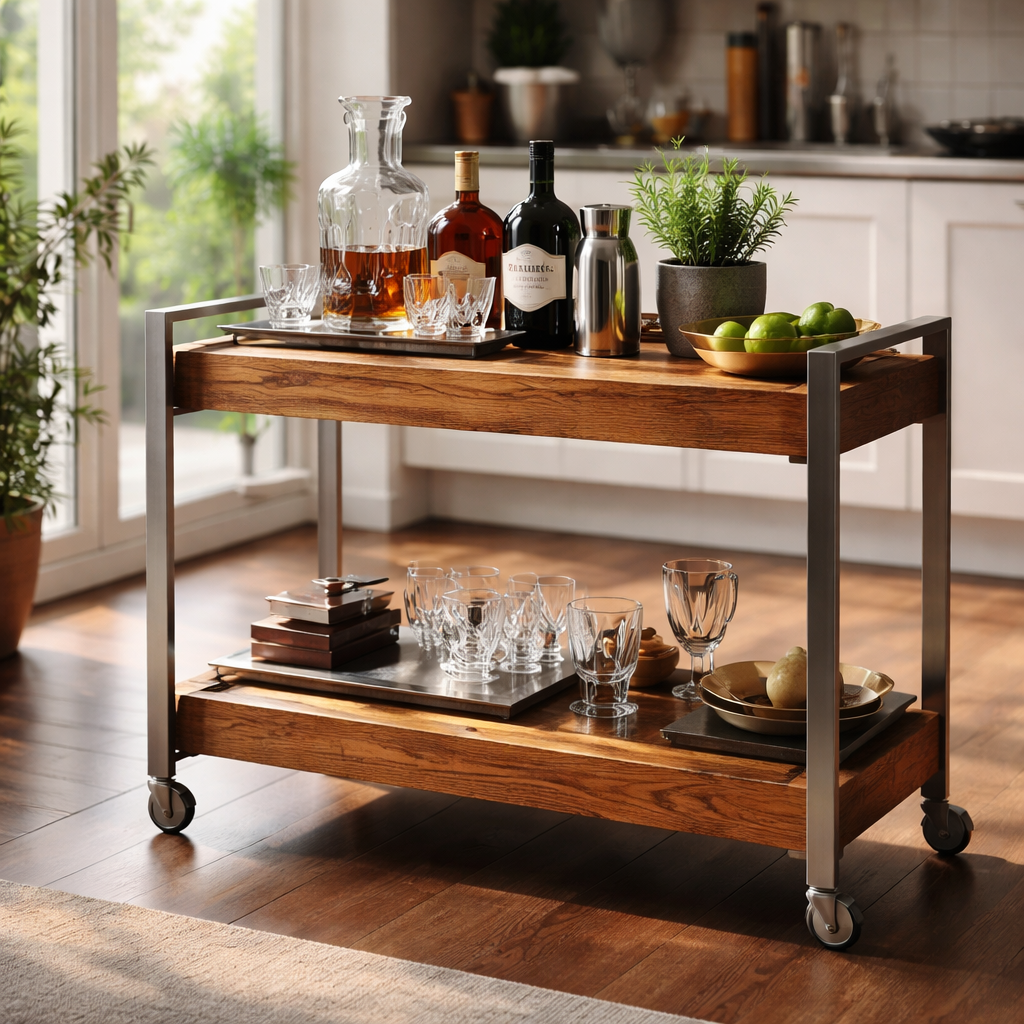
Step 2: Curate a Cohesive Color Palette
Ever stood in front of an empty bar cart and felt that little pang of uncertainty, wondering whether the colours you love will clash or click? You’re not alone – we’ve all been there, squinting at a swatch board while the clock ticks. The good news is that choosing a colour story for your bar cart is as much about feeling as it is about looking.
First, scan the room you’re dressing up. Which hue already dominates – the muted teal of your sofa cushions, the warm caramel of a walnut sideboard, or perhaps the soft ivory of your kitchen walls? That dominant shade becomes your anchor. Pulling a single colour from an existing piece instantly ties the cart into the wider design narrative, making the whole set‑up feel intentional rather than an after‑thought.
Use the 60‑30‑10 rule
Think of your bar cart as a mini‑canvas. Fill roughly 60 % of the surface with a neutral base – brushed steel, matte black, or natural wood are safe bets. Then, introduce a secondary colour that covers about 30 % – this could be the colour of your favourite glassware or a set of coasters. Finally, sprinkle in a 10 % accent – a pop of copper, a splash of deep navy, or a handful of jewel‑toned cocktail picks. The rule keeps the palette balanced while still giving you room to play.
Warm tones like terracotta, mustard, or soft rose work beautifully with wooden carts, adding a cosy, lived‑in vibe. Cool tones such as sage, slate, or dusty blue pair well with sleek metal frames, creating a crisp, contemporary feel. If you’re unsure, lay a few colour swatches next to the cart and step back – your eye will tell you which direction feels right.
Echo a colour from your décor
Say you’ve got a plush velvet bar stool in a deep plum – why not let that plum whisper through a set of cocktail stirrers or a patterned linen napkin? The Ideal Home trend guide notes that repeating a hue from one element to another creates a cohesive, Instagram‑ready look, especially when you’re repurposing a bar cart as a dessert trolley.
Metallics are the silent heroes of colour harmony. A brushed brass ice bucket, a gold‑rimmed coupe, or a copper‑tinted shaker can act as a unifying thread, especially if you already have brass light fixtures or a copper vase nearby. The shine catches the eye without overwhelming the palette.
Play with pattern and texture
Colour isn’t the only way to tie things together – pattern does a lot of the heavy lifting too. A set of patterned glassware that mirrors the geometry of a rug, or a woven tray that picks up the subtle stripes in a wallpaper, adds depth. The Architectural Digest bar cart ideas recommend clustering bottles by colour family and layering textured coasters to break up solid blocks of colour.
Don’t be afraid to let one item steal the show. A bold, coloured cake stand or a vibrant ceramic pitcher can become the focal point, while everything else plays supporting roles. It’s the same trick designers use on larger furniture pieces – keep the base neutral, then let a single accent pop.
Quick colour‑curation checklist
- Identify the dominant colour in the room (sofa, wall, flooring).
- Apply the 60‑30‑10 rule across base, secondary, and accent tones.
- Echo at least one colour in an accessory (napkin, stirrer, garnish bowl).
- Introduce metallic touches that match existing hardware.
- Balance solid colours with patterned or textured pieces.
When you step back after arranging, ask yourself: does the cart feel like a natural extension of the room, or does it look like a stray element? If the answer leans toward the former, you’ve nailed the colour story.
Remember, styling a bar cart is a chance to experiment without the commitment of a whole room makeover. Trust your instincts, have a little fun with a splash of colour, and watch the cart transform from a functional trolley into a stylish gathering spot that feels uniquely yours.
Step 3: Select Signature Glassware & Accessories
Ever stood in front of a half‑filled cart and thought, "These glasses just aren't speaking to me"? I’ve been there – the feeling that something's missing, that the whole vibe could be elevated with just the right pieces. That’s why choosing a signature glassware set is the secret sauce when you learn how to style a bar cart.
First, pick a shape that feels unmistakably you. Do you gravitate toward the timeless coupe for a touch of Hollywood glamour, or does the crisp silhouette of a highball glass whisper "modern lounge"? When you have one shape you love, repeat it across the whole cart – it creates an instant visual anchor and tells guests, "We’ve thought this through".
But don’t stop at shape. Think material.
Crystal adds that extra sparkle, especially under soft lighting, while hand‑blown glass brings an artisanal feel that pairs beautifully with a reclaimed‑wood tray. If you’re after durability for daily use, go for thick‑walled soda‑lime glass – it won’t chip as easily and still looks elegant.
And what about colour? A muted amber tumbler can echo the warm tones of a copper shaker, while a matte black coupe adds drama against a light‑wood base. The trick is to keep the palette limited – two‑three finishes maximum – so the cart feels curated, not chaotic.
Now, accessories. A sleek decanter, a brushed‑brass ice bucket, and a set of stainless‑steel bar tools are the functional cousins of your glassware. They should complement, not compete. For example, a copper‑finished shaker will pick up the same metallic gleam as a brass cocktail pick, tying the whole story together.
We like to look at the experts for inspiration. Architectural Digest points out that mixing classic and unexpected glass pieces – like a traditional martini glass alongside a quirky, coloured stem – adds personality without feeling forced (see how they style a bar cart). Take that idea and apply it to your own space.
Here’s a quick comparison to help you decide which elements belong on your cart:
| Item | Material / Finish | Styling Note |
|---|---|---|
| Signature Glassware | Creamy crystal or hand‑blown glass | Pick one shape, repeat it; limit colour to 2 tones |
| Decanter | Clear crystal or smoked glass | Place centrally; mirrors the glassware silhouette |
| Ice Bucket | Brushed brass or matte black metal | Match metal accents on bar tools for cohesion |
And because we love a good shortcut, keep these five tips in mind when you shop:
- Choose a glass shape that you’ll reach for daily.
- Limit materials to two – glass plus one metal finish.
- Echo a colour from your room’s palette in a single accessory.
- Invest in sturdy bar tools; cheap shakers break the vibe fast.
- Group like items together – all glasses on one shelf, tools on another.
When you step back, ask yourself: does the cart feel like an extension of your living room, or does it look like a random collection? If the answer leans toward the former, you’ve nailed the signature look. Grab a tray, line up your chosen pieces, and watch the cart transform from functional trolley to conversation‑starter masterpiece.
Step 4: Arrange for Function & Flow
Let’s be honest: a bar cart that looks stunning but doesn’t function smoothly can wreck the mood fast. In our experience, the real magic happens when you plan for function and flow, not just a pretty finish.
So, what should you do next? Treat the cart as a compact, movable work zone—a tiny kitchen station you actually enjoy using. Set up two or three clear zones that cover drinks, tools, and ambience, rather than letting bottles wander aimlessly across the shelves.
Define zones on the cart
First, decide two or three vignettes: a drinks station, a garnish/prep area, and a display shelf. This keeps items legible at a glance. Create a height rhythm using stadium seating: tallest bottles at the back, mid-height glassware in the middle, small accessories up front.
- Ground the heaviest items on the bottom shelf: spirits, an ice bucket, and a sturdy decanter.
- Mid-height holds glassware and frequently used tools: shaker, tongs, jiggers.
- Top shelf or a dedicated tray shelves garnishes, napkins, and a signature piece.
Ground with a tray and create micro‑vignettes
A shallow tray anchors a group of items and reduces visual clutter. Arrange each mini‑scene with 3–5 pieces to feel intentional rather than chaotic. Pair a couple of glasses with a bottle and a small decorative object, then repeat the pattern on the opposite shelf so the eye travels naturally.
As Sunny Circle Studio suggests, grounding with a tray and shaping mini‑vignettes keeps a bar cart cohesive while you rotate pieces for the seasons. Grounding with a tray and mini‑vignettes.
Leave room for movement and flow
Don’t crowd every inch of surface. Leave about 20% of the top free so you have space to mix a drink without knocking into a garnish jar or a candle. If space is tight, use layered shelving: heavier items on the bottom, glassware in the middle, a small decorative piece on top. The result should read like a calm, intentional composition, not a grocery‑store display.
That three‑tier height approach is exactly what The Decorholic highlights to keep things visually dynamic and easy to use. Read their tips here.
Accessibility, safety and everyday practicality
Place the heaviest items on the bottom shelf and keep everyday tools within easy reach. If your cart moves, opt for lockable wheels or a base with a rubberised foot to protect floors. In real life, this means gatherings stay effortless and your home remains kid- and pet‑friendly.
Think about lighting as part of function. Soft lighting makes glassware sparkle and sets a welcoming mood without glare. A warm LED strip under the top shelf or a nearby dimmable pendant can elevate the look while preserving practicality.
Coherence and finishing touches
Choose a single metal finish to anchor the metallic accents—brass, gold, or chrome—and echo that across tools, ice bucket, and tray. A natural wood tray or a leather‑edged tray can soften the metal and add tactility, tying the whole vignette together with a tactile, premium feel.
At Harvey Bruce Interiors, we believe a bar cart should feel like part of your living space, not an afterthought. Our Bespoke Homewares offer sustainable, refined pieces that help you achieve that elegant, cohesive look with intentional texture and quality craftsmanship.
So, take a moment to map your space, define two to three zones, and test the flow. Then gather a tray, a handful of glasses, and a couple of signature pieces—the cart will start to feel like a natural extension of your room.
Step 5: Add Personal Touches with Bespoke Homeware
So you’ve got the base, the colour story, the glassware – now what makes a bar cart feel like it belongs in your living room and not just a borrowed piece from a showroom? It’s the little, intentional details that whisper ‘you’ every time someone walks by.
Think about a handcrafted wooden bottle holder that’s been cut from reclaimed oak. The grain tells a story, and when you pair it with a copper shaker, the metal catches the light just enough to feel intentional. That contrast of warm wood and cool metal is the sweet spot where luxury meets lived‑in comfort.
Do you remember the first time you saw a hand‑painted ceramic coaster on a friend’s bar cart and thought, “That’s exactly what my space needs”? A bespoke coaster set can become a conversation starter, especially if the pattern pulls a colour from your sofa or a piece of artwork. It’s not about matching every shade; it’s about echoing a hint that ties the whole room together.
Here’s a quick way to scout the perfect piece: head to a local craft market or browse a curated collection like handcrafted bar accessories from Earl Home. Look for items that feel tactile – think hand‑carved wood, hand‑blown glass, or ceramic with subtle imperfections. Those imperfections are the human touch that mass‑produced pieces lack.
Once you’ve picked a few bespoke items, think placement. A small, sculptural ice bucket on the middle shelf becomes a focal point when you’re pouring drinks. Pair it with a slim, linen‑wrapped napkin holder on the top shelf – the linen adds softness and the height variation keeps the eye moving.
Do you ever wonder why a single piece can change the vibe of an entire cart? It’s because our brains love stories. When a visitor spots a unique, handcrafted bowl, their mind automatically asks, “Who chose that? What’s the story behind it?” That curiosity turns a functional cart into a curated vignette.
Another tip: use scent as a subtle personality boost. A small, reusable wax seal candle in a glass jar (think soft amber) can sit beside a vintage cocktail recipe card. The flicker of the flame adds ambience, while the scent of vanilla or cedar makes the space feel cozier. Just keep the flame low and away from any flammable décor.
Now, let’s talk texture layering. A leather‑trimmed tray on the bottom shelf grounds heavier bottles and adds a tactile contrast to a polished metal shaker. If you love the look of brass, choose a brass‑finished bottle stopper; the warm tone will echo any brass light fixtures you already have.
So, how do you avoid over‑stuffing the cart with too many personal pieces? The rule of three works well: pick one statement item (like a handcrafted wooden holder), one supporting texture (leather tray), and one subtle accent (a scented candle). That keeps the cart curated without feeling cluttered.
Imagine you’re hosting a small gathering. Your guests drift to the bar, their eyes land on the bespoke wooden holder, they ask where it’s from, you share the story – instantly you’ve become the host with the most thoughtful setup. That’s the power of personal touches.
Finally, remember sustainability. Choose pieces made from reclaimed or responsibly sourced materials. Not only does it align with Harvey Bruce’s commitment to sustainable luxury, but it also adds an extra layer of meaning – you’re styling with items that respect the planet.
Take a moment now: walk around your cart, spot the empty space that feels a little flat, and envision a handcrafted element that could fill it. Grab a sketchbook, jot down the material, the colour, the story, and then hunt for that perfect piece. In no time, your bar cart will feel like an extension of your home’s personality, not an afterthought.
Ready to give your cart that bespoke finish? Start with one piece, see how it shifts the mood, and build from there. You’ll be surprised how quickly a few thoughtful touches transform a functional trolley into a stylish, conversation‑worthy hub.
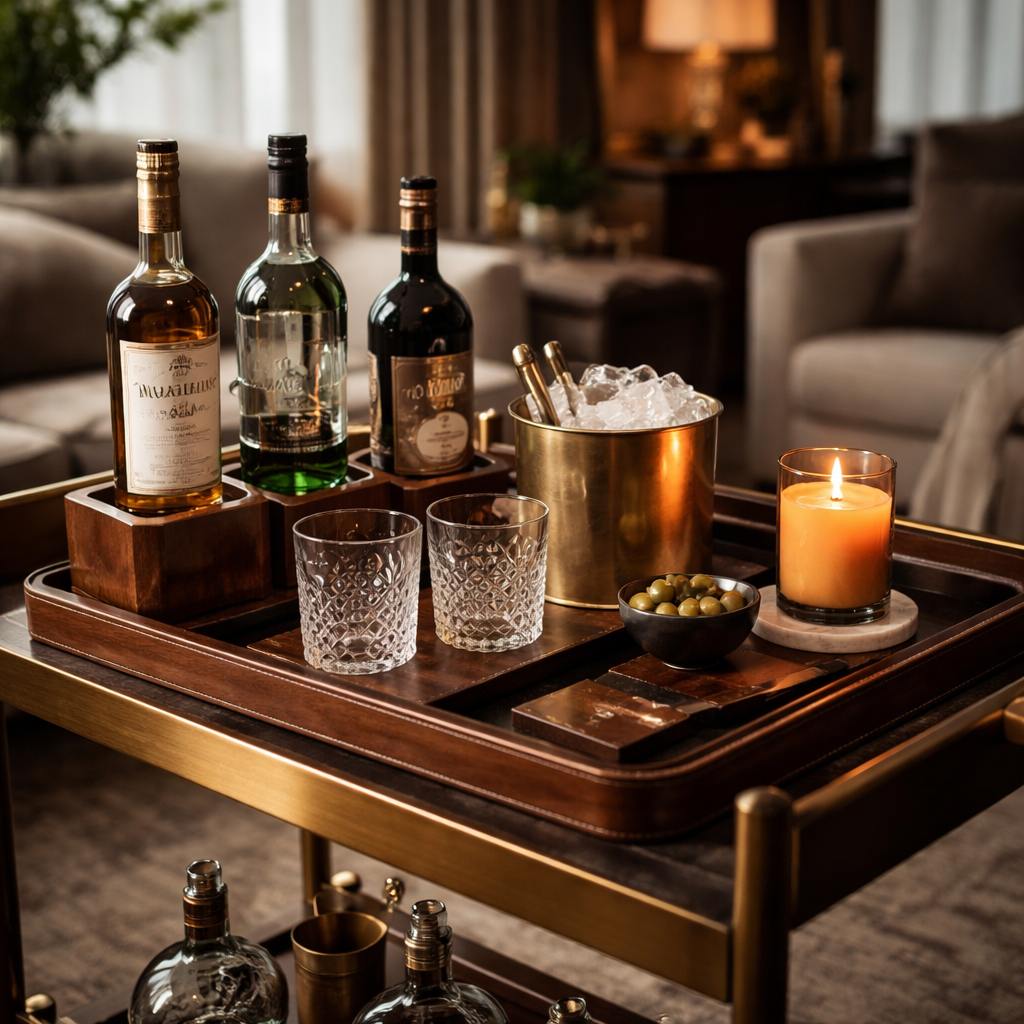
Comparison: Bar Cart Styles vs Traditional Shelving
Let’s be honest: you want a space that’s easy to entertain in, not a museum of decor that never gets used. Bar carts and traditional shelving both hold glassware and bottles, but they do it in very different ways. Bar carts are the portable stage for drinks, while shelving is the grounded backbone of storage. At Harvey Bruce Interiors, we love helping homeowners decide which approach fits their lifestyle and space—because the right choice makes everyday moments feel more luxurious.
Mobility matters. A wheeled bar cart can glide from kitchen to living area, follow the party, and tuck away when the music fades. But if your room is compact or you want a fixed design moment, built-in or freestanding shelves create a stable display that reads as furniture, not an impulse buy. A rule of thumb: aim for a cart when you crave flexibility and a shelf when you crave permanence and a clean, cohesive line with your other cabinetry.
In terms of layout, bar carts encourage micro‑vignettes. Tall spirits at the back, glassware mid‑tier, and a few decorative touches up top—that rhythm keeps the eye moving. Shelving, by contrast, supports larger collections and accessories in a straight, legible order. It’s easier to keep track of inventory on shelves—no rolling mechanism to deal with and less risk of bottles tipping if you have curious guests or pets.
Aesthetics play a big role too. Metal frames with glass or wood shelves on a cart bring a sense of dynamism and a touch of theatre; it’s the “look at what I can wheel into the room” moment. Traditional shelves offer a more timeless, rooted feel. They can be built in with matching finishes to your kitchen or living room, creating a curated stream of materials that anchors the space. The material palette you choose—brass, matte black, warm oak—will read differently on a cart versus a shelf, so pick accordingly.
Practical considerations aren’t sexy, but they matter. A cart deserves sturdy wheels, a good brake, and a top that can support a heavy ice bucket. Shelving should be sturdy enough to handle glass and bottles at height, with proper anti‑tip considerations and easy access for daily use. If you live in a compact city apartment, a hybrid approach often wins: a compact bar cart for special occasions plus a matching set of open shelves that hold everyday glassware and bar tools. This blend gives you flexibility without sacrificing style.
If you’re looking for a deeper dive into how real designers approach this, this guide from The New York Times Wirecutter on best bar carts offers practical insights into materials, stability, and usability that can inform your choice. Best bar carts guide.
So, what’s next? Measure your space, list your must‑have items, and sketch two layouts: one with a cart, one with shelves. Then test with real objects. You’ll know which path helps you how to style a bar cart or whether you’re better off with a steady shelving solution—both routes can look incredibly luxurious when styled with Bespoke Homeware from Harvey Bruce. It’s all about balance.
FAQ
How do I choose the right size bar cart for a small living room?
First, measure the flat surface where the cart will live and keep a two‑inch breathing room on each side. A good rule of thumb is to let the cart cover about two‑thirds of that length – big enough for bottles and glasses, but not so large that it overwhelms the room. In our experience, a cart with a footprint of roughly 30‑inch wide works beautifully in a compact UK flat, giving you storage without crowding the sofa.
What’s the best way to organise bottles so they look tidy and stay stable?
Group spirits by colour or type and line them up on the bottom shelf, tallest bottles at the back. Use a shallow wooden or metal tray to corral smaller bottles and keep them from tipping. Adding a non‑slip liner under the tray gives extra grip, and a few decorative bookends can double as visual anchors while keeping the bottles steady.
Can I mix metal finishes on my bar cart without it looking chaotic?
Yes – but pick one dominant metal and let the others play supporting roles. For example, if you love brushed brass on your shaker, keep other accents like the ice bucket or tray in brushed brass too, and use matte black or polished chrome sparingly for hardware. The contrast adds depth, and the consistent texture ties the whole vignette together. Harvey Bruce Interiors often recommends a single metal theme to maintain that luxe, cohesive feel.
How often should I rotate the accessories on my bar cart?
Switching up accessories every season keeps the cart feeling fresh. In spring, swap a heavy velvet tray for a light linen‑wrapped one; in winter, bring out a copper‑toned cocktail set for a cosy vibe. A quick 10‑minute refresh – moving a few glassware pieces, adding a seasonal garnish jar, or swapping a candle – prevents the cart from feeling static and lets you showcase new bespoke homeware you’ve acquired.
Is it okay to display decorative items alongside functional bar tools?
Absolutely. Treat the cart like a mini‑gallery: place functional tools – shaker, jigger, tongs – together, then create a small vignette of decorative pieces on a separate shelf or tray. A sculptural ice bucket, a handcrafted wooden bottle holder, or a scented candle can sit next to the tools without interfering with usability. The key is to keep a clear work zone on the middle shelf for everyday mixing, and let the decorative zone sit above or beside it.
What lighting works best for highlighting a bar cart in the evenings?
A soft, warm LED strip tucked under the top shelf adds a subtle glow that makes glassware sparkle without harsh glare. If you prefer a more classic look, a small table lamp with a linen shade placed nearby creates a cosy ambience. Keep the light temperature between 2700‑3000K for that inviting, cocktail‑hour feel. Just make sure any cords are neatly concealed to maintain the cart’s sleek silhouette.
Conclusion
We’ve walked through everything you need to know about how to style a bar cart, from picking the right base to adding those personal touches that make the space feel uniquely yours.
Remember, the magic lives in the details – a cohesive colour palette, a thoughtful arrangement of tools, and a few bespoke pieces that tell a story.
So, what’s the next step? Grab a tray, line up your favourite glassware, and experiment with a seasonal garnish jar or a handcrafted candle. Trust your instincts; if it feels right, it probably is.
In our experience, a quick ten‑minute refresh – swapping a bottle or rotating a decorative element – keeps the cart feeling fresh without a full overhaul.
Don’t be afraid to play with texture: a leather‑trimmed tray, a brass ice bucket, or a wooden bottle holder can instantly elevate the look.
When you step back, ask yourself whether the cart now reads as an extension of your living room rather than a stand‑alone piece. If the answer is yes, you’ve nailed how to style a bar cart.
Ready to give your home that luxe, curated vibe? Start small, enjoy the process, and let your bar cart become the conversation starter you’ve always wanted.
Read more
Visit our showroom
G4 Williamsons Garden Centre
17 Houston mains holdings
Uphall, West Lothian
EH526PA
Free Parking, wheelchair/buggy friendly.
Get directions
Follow us on social media