Wooden Cabinets: Choosing, Designing, and Caring for Timeless Storage Solutions
Posted by Admin on
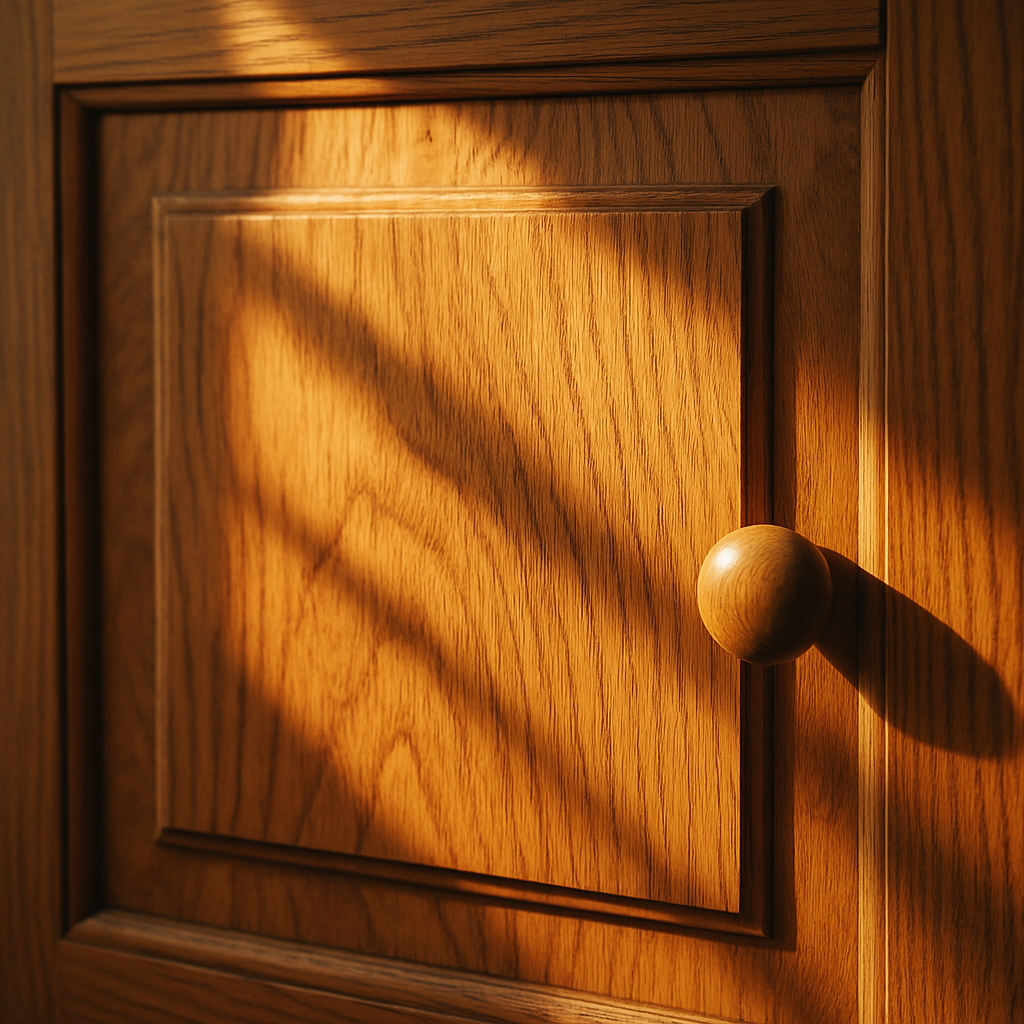
Picture this: you walk into a living room, and the centerpiece is a gleaming wooden cabinet that feels like a work of art. It’s more than storage; it’s a statement.
Ever wondered why some homes feel instantly warm and inviting? It’s the subtle touch of natural timber, the grain that tells a story, the way light dances across a cabinet’s surface.
At Harvey Bruce, we’ve spent years curating pieces that blend luxury with practicality. Our cabinets don’t just hold your books; they hold your memories, your secrets, your favorite mug that never gets cold.
But choosing the right cabinet can be overwhelming. Size, finish, style—each decision feels like a puzzle you’re trying to solve for the first time.
Let’s break it down into bite‑size steps. First, consider the room’s purpose. Is it a study that needs built‑in filing, or a kitchen that demands easy access to cookware?
Next, think about the flow of light. A darker oak can anchor a space, while a lighter maple invites daylight to travel further.
And don’t ignore the feel. A cabinet that feels solid under your palm reassures you of its longevity—something we pride ourselves on delivering.
You might ask, “Will this cabinet age well?” Absolutely. Hand‑finished timber adapts to seasons, developing a richer patina that tells the story of years lived.
If you’re a homeowner looking to upgrade, the right cabinet can transform a bland hallway into a gallery. Imagine a custom piece that doubles as a display for your prized collection.
So, what’s the next step? Start by measuring your space, then sketch a rough layout. This simple act unlocks clarity and keeps the process from spiralling into confusion.
Remember, you’re not just buying furniture—you’re investing in a piece that will grow with your family, echoing the legacy of craftsmanship.
We’re here to guide you, from the first measurement to the final polish. Let’s turn that vision of a stunning wooden cabinet into reality.
TL;DR
If you’re looking to elevate your space, a wooden cabinet can shift the vibe from plain to polished, blending timber charm with modern storage solutions. By choosing the right grain, finish, and layout, you’ll create a statement piece that grows with your family, turning everyday storage into a lasting heritage.
Step 1: Choosing the Right Wood for Your Cabinets
Choosing the right wood for your cabinets is like picking the right soundtrack for a movie – it sets the mood and keeps the audience engaged. When you’re hunting for that perfect timber, you’re not just thinking about color; you’re thinking about longevity, texture, and the story it tells every time you open a drawer.
Think about where the cabinet will live. A kitchen that sees a lot of splash‑back needs a wood that resists moisture. A study room, on the other hand, can handle a bit more humidity, but you’ll still want something that won’t warp or crack when the humidity swings.
Know the wood’s personality
Oak and maple are the two giants in this game. Oak brings bold, pronounced grain that screams traditional charm, while maple offers a smoother, more subtle pattern that fits modern palettes. Both are sturdy, but the difference lies in their Janka hardness numbers – maple edges out oak by a small margin.
Hardness and wear
When it comes to wear and tear, maple’s 1450 Janka rating gives it a slight edge over oak’s 1290. That means it’s a tad more resistant to dents and scratches in high‑traffic areas like kitchens or entryways. But don’t forget: a well‑finished oak cabinet can still feel incredibly robust under your hand.
Colour and grain
Colour is another game‑changer. Oak tends to lean toward warm browns and deep mahoganies, while maple ranges from creamy whites to rich chestnut browns. If you want a cabinet that lightens a room, pick a lighter maple; if you’re aiming for an anchor piece that feels grounded, go for a deeper oak.
Staining and painting
Staining and painting decisions hinge on grain texture. Oak’s coarse grains soak up stains beautifully, letting you achieve deep, dramatic colors. Maple’s finer grain can be trickier; uneven staining often leaves a mottled look unless you prime first. If you’re a DIY enthusiast, consider this when choosing your finish.
Cost and budget
Cost can be a deciding factor, especially if you’re mixing and matching species for a layered look. Oak is usually the cheaper option, but white oak sits a touch higher due to its water resistance. Maple’s price is comparable to oak, but you might pay a premium for exotic veneers.
If you’re still on the fence, let this short video walk you through a real‑life comparison of oak and maple cabinet doors, including grain patterns and finish options. Watching the texture under different lighting helps you make a more confident decision.
Now that you have the facts, pause for a moment and imagine your space. Visualise the wood’s grain catching the morning light, the scent of fresh polish, and the tactile comfort when you pull a drawer open. That mental image is the first step toward a cabinet that feels truly yours.
Take action by measuring your room, sketching a rough layout, and noting the light sources. Then pick a species that aligns with both your aesthetic vision and functional needs. If you want a quick reference, check out our guide on oak versus maple for a deeper dive.
Step 2: Exploring Design Styles for Wooden Cabinets
We’re moving past the wood choice. Now it’s time to decide how those boards will look on your walls. Think of it like picking a paint colour, but the paint is the style itself.
Classic Craftsman
Picture a kitchen with wide, flat panels, a subtle bevel on the edges, and a gentle brass handle that feels warm when you grip it. That’s the Craftsman look. It celebrates the grain, letting the wood breathe in all its natural glory. If you love a home that feels timeless and invites conversation over a cup of tea, this is your go‑to.
What you’ll notice is the harmony between wood and metal. Low‑profile hinges, a slight recess for a soft‑close drawer, and a finish that can be matte or satin—any shade from creamy white to deep walnut. The result? A cabinet that feels like a trusted friend in your space.
Modern Minimalist
Now shift gears. Minimalist cabinets keep the form sleek: straight lines, smooth surfaces, and often a glossy, almost mirror‑like finish. Handles are either flush or hidden behind the door so that the door itself becomes a statement.
Imagine a living room where the cabinet is a statement wall. It reflects light, brightens the room, and gives the illusion of extra space. For homeowners who crave clean lines and a clutter‑free vibe, this style pairs perfectly with glass shelving or open racking.
Rustic Charm
Rustic cabinets are all about texture and character. Think reclaimed boards, uneven edges, and a finish that looks like it’s been sanded by hand. The grain pops like a painting, and each piece feels unique.
For those who adore the smell of fresh pine or the sight of weathered boards, rustic cabinets create a cosy, lived‑in feel. Pair them with a farmhouse sink or a stone countertop to complete the story.
So, what are the key questions you should ask yourself when deciding on a style?
- Does the cabinet fit the overall aesthetic you’ve already set?
- Will the finish protect the wood where you’ll see the most wear?
- Can you envision the cabinet in everyday moments—opening a drawer, pulling out a spice jar, or displaying a favourite book?
Once you answer those, you’re halfway there. The next step is to choose a finish that supports the style. For Craftsman, a semi‑gloss or satin works; for Modern, a high‑gloss or even a lacquered surface; for Rustic, a matte oil finish that lets the grain breathe.
Remember, the style you pick should echo the story you want your home to tell. It’s not just about the look; it’s about the feel when you touch it, the way light falls on it, and the memories you’ll create around it.
When you’re ready to pick, check out our range of luxury cabinets. Each piece is hand‑crafted with sustainable woods and finishes that age beautifully. That way, your investment feels good today and grows richer with every season.
Take the next step—draw a quick sketch, label the style you’re leaning towards, and let the rest of the process feel as natural as a conversation over coffee.
Step 3: Video Guide to Installing Wooden Cabinets
Gather Your Toolkit
First thing’s first: you need the right tools. A cordless drill, a level, a stud finder, a tape measure, and a set of Phillips and flat‑head screwdrivers will do the trick. If you’re working with pre‑assembled cabinets, you’ll also need a rubber mallet and a pair of pliers for hardware. Having everything at hand saves you from chasing a screw half‑way through the wall.
Prep the Space
Before you even touch a cabinet, clean the area. Sweep, mop, and make sure the floor is dry. Measure the height from the floor to where the top of your base cabinets will sit. That gives you a clear target for the bottom line. If you plan to paint the walls first, do it now so you won’t splatter the finish later.
Assemble the Cabinets
Start with the bottom shelves and drawers. Lay the cabinet flat, then follow the manufacturer’s diagram to attach the frame. Tighten the screws in a criss‑cross pattern—this distributes pressure and keeps the box tight. If you’re using ready‑to‑assemble (RTA) units, pause to double‑check that you have every piece: door fronts, drawer fronts, hinges, and brackets. A quick inventory before you hit the wall prevents a scramble at the last minute. If you want a visual walkthrough of each step, this step‑by‑step cabinet installation guide walks you through the process in detail.
Hang the Base Cabinets
Mark the stud line with a pencil or painter’s tape. Slide the first cabinet into place, aligning it with the floor line. Use a level to keep the front flat, then drill pilot holes into the studs. Insert the screws and tighten, but leave a hair’s‑breadth of slack—this allows you to make fine adjustments later. Once the first cabinet is secure, attach the next one to its neighbor. Keep the spacing uniform; a 2‑inch gap is standard for most kitchens.
Install the Wall Cabinets
Wall units are a bit trickier because they’re often heavier. Start with the corner unit; it anchors the entire row. Hang it first, then work your way out. When you attach each cabinet, use a furring strip or a shimming system to level the wall. Remember the rule: never tighten a screw until all cabinets in that row are in place. This keeps the line straight and prevents wobble.
Finishing Touches
With everything up, it’s time to seal the deal. Replace the cabinet doors, attach the hardware, and test the drawers. Open each one; they should glide smoothly. If you notice a slight tilt, a tiny shim under the cabinet can correct it. Finally, clean any fingerprints or dust from the newly installed surfaces. A quick swipe with a microfiber cloth gives the cabinets a polished look. For cleaning and maintaining wooden cabinets, this cleaning guide offers practical tips to keep them looking like new.
Quick Tips & Common Pitfalls
Tip: If your floor has a slope, start installing at the high spot and shim the lower cabinets. Pitfall: Over‑tightening screws can crack the wood; stop once the cabinet feels snug.
Another common error is misreading the stud finder. A cheap model might give false positives. Double‑check with a small nail before drilling a hole. If a cabinet feels out of place, don’t force it—measure again, adjust the spacing, and re‑level.
Finally, if you’re working with a long span of cabinets that reach the ceiling, install the topmost unit last. The weight distribution is easiest that way, and you’ll avoid a shaky base.
Remember, the goal is a level, stable, and functional installation. Each step builds on the last—skipping one can throw everything off. Take your time, double‑check your measurements, and you’ll have a set of wooden cabinets that look as good as they feel.
Step 4: Customising Your Cabinets with Finishes and Hardware
Alright, we’ve nailed the structure. Now let’s put the personality on those boards. Finishing and hardware are the last chapters in the cabinet story—your chance to shout, or whisper, what the piece really means to you.
Choose a Finish That Feels Right
Think of finish like a mood ring for wood. Matte gives a calm, understated vibe; gloss is bold and reflective. If you love a modern minimalist kitchen, a high‑gloss satin will keep light bouncing and the space feeling airy. For a cosy living room, a satin or semi‑gloss finish will soften the grain and hide everyday scratches.
When you’re in the showroom, touch a sample. Feel the grit under your fingertips. Does it feel smooth, or do you sense a grain you can’t ignore? That tactile feel tells you whether the wood will match the room’s rhythm. The best part? We source sustainably finished veneers, so you can feel good about your choice.
Test a Tiny Swatch
Take a 3‑inch square of the finish you like. Tape it to a wall, let it dry, then stand back and see how it changes with the light. Do you love the way it catches the afternoon sun? If not, try a lighter or darker variant. It’s cheaper than repainting a whole cabinet, and you’ll avoid regret later.
Selecting Hardware That Matches Your Style
Hardware is the silent narrator of a cabinet. A brass pull on a rustic oak cabinet feels like a nod to heritage; a sleek, matte black knob on a sleek walnut door screams contemporary. When you choose, keep the scale in mind—oversized handles can feel like a billboard; tiny pulls may get lost.
For a classic look, consider a simple, single‑handle pull. For an industrial edge, a flat bar or recessed latch works wonders. If you’re into vintage, a brass or bronze knob with a patina finish can give that aged‑but‑still‑fresh look.
Don’t Forget the Function
Hardware isn’t just for looks—it needs to work. Check the smoothness of the latch. Does the pull feel firm? A weak pull can mean a weak cabinet. When in doubt, grab a cabinet that’s already installed and feel the hardware in action. It’ll tell you if the design will last through your daily rituals.
Before you paint or stain, make sure every surface is clean. A quick wipe with a microfiber cloth removes dust that would mar the finish. When you start applying, use long, even strokes and let each coat dry fully before adding the next. If you rush, you’ll get drips or unevenness that look unprofessional.
Remember the rule of thumb: thin coats beat thick coats. It’s like a good cup of coffee—smoothness matters more than the volume.
Seal the Deal
After the final coat, apply a clear sealant that matches your finish. A satin sealer will keep the look consistent while adding durability. If you’re in a kitchen or bathroom where moisture is a concern, choose a water‑resistant topcoat. It will protect the wood and keep your cabinets looking fresh for years.
With finish and hardware in place, run a quick walk‑through. Open each door and drawer. Feel the hinges; test the latch. Notice how light plays across the grain. If something feels off, you can still tweak it before the paint fully sets.
Now step back and admire the transformation. That finish, that pull, that subtle sheen—these are the details that turn a functional piece into a statement of style and personality. And remember, the right finish and hardware not only enhance beauty but also protect your investment.
Step 5: Comparison Table of Popular Wood Types for Cabinets
When you’re picking a cabinet, the grain’s not just decoration; it’s the foundation of how the piece behaves in your home. Let’s break down the most popular options so you can match feel, look, and budget in a single glance.
First, think of wood like a wardrobe of personalities. Some are sturdy and understated, while others are bold and dramatic. We’ll look at five that show up on most shelves, plus a quick tip for each so you can decide faster.
Quick‑look comparison
| Wood Type | Durability (Janka) | Colour & Grain | Best Use | Price Range | Quick Tip |
|---|---|---|---|---|---|
| Cherry | 950–1,150 | Rich reddish‑gold, smooth grain | Luxury kitchens, formal dining | High | Expect a slow darkening over time |
| Maple | 1,450 | Pale to creamy, subtle flecks | Modern, high‑traffic spaces | Mid‑high | Prime before staining to avoid blotches |
| Oak (Red/White) | 1,200–1,350 | Bold flame‑like or honey‑tone | Traditional or rustic rooms | Mid | Choose white for moisture‑resistant walls |
| Bamboo | 1,500+ | Vertical stripes, light finish | Eco‑friendly, contemporary | Mid | Check for laminates that resist expansion |
| Birch | 1,050 | Uniform, almost feature‑less | Budget‑friendly, versatile | Low‑mid | Good for painted finishes |
Does this give you a clearer picture? If you’re still staring at a long list of names, think about the two key questions: How often will this cabinet see the light of day? And what vibe are you after for the whole room?
Durability matters first
Maple’s 1,450‑Janka rating makes it a champion against dents and scratches, which is why it’s popular in kitchens where kids and pets love to play. Bamboo even outpaces maple in strength, but only if the boards are properly laminated.
Cherry, while softer, ages like fine wine. It’s a good fit for dining areas where the cabinet will see less daily use but more occasional guests.
Colour & grain decide the mood
Want a light, airy feel? Maple or white oak will lift the space. For a cozy, deep‑rich look, cherry or red oak will anchor the room. If sustainability is a top priority, bamboo offers the same warmth with a lower carbon footprint.
Cost & budget reality
High‑end cherry can cost 20–25% more than maple. If you’re on a tight budget, birch or bamboo are solid choices that still look great. A mid‑range maple cabinet can be built for under £3,000, while a cherry set might push you closer to £4,000. Think of the upfront price as an investment that saves you from replacements down the line.
Finishing & maintenance
Every wood reacts differently to sealants. Maple accepts both matte and glossy finishes well, but a high‑gloss coat will highlight the subtle flecks. Cherry prefers a satin sealer to keep the grain visible without glare. Bamboo, because of its density, works best with a water‑resistant topcoat to protect against kitchen moisture.
Maintenance is a simple routine: wipe with a dry cloth after each use, spot‑clean spills promptly, and re‑seal every three to five years to keep the finish fresh.
Decision checklist you can use right now
- Measure cabinet space and decide the size.
- Grab a sample board of each wood you’re interested in.
- Hold the sample under your kitchen’s main light and a side lamp.
- Check the grain—does it feel right for your style?
- Ask your budget: can you afford the finish you want?
- Choose a finish that matches the room’s light and expected wear.
- Order a small piece or a full cabinet for a test fit if possible.
Actionable step: After you’ve chosen your wood, schedule a finish application session with a professional or a trusted friend who has a spray gun. The right technique—thin, even coats—makes a huge difference in long‑term durability.
Real‑world example
A couple just bought a loft and wants a kitchen that feels both modern and timeless. They’ve got a bright north wall, a small island, and a love for sustainable materials. Maple offers the contemporary light look, and bamboo could be an eco‑friendly accent piece for the island. If they want a touch of luxury, cherry would be the statement piece, but it might push the budget over the limit.
Another quick tip: always ask for a sample board before you commit. The grain can look different in a showroom than it does in your home lighting. Bring a small photo of the room so you can compare lighting angles.
So, what’s the next step? Grab a piece of each wood you’re interested in, hold it under your kitchen light, and let the grain speak. Then check your budget, think about the room’s mood, and pick the one that feels like an inevitable part of the space.
Finally, if you’re curious about how these woods stack up in a full kitchen build, the Kitchen Cabinet Kings guide offers a side‑by‑side look that can help you visualise each grain type in a living setting.
Keep in mind that no single wood is perfect for every scenario. The trick is to align the wood’s natural strengths with your lifestyle and design aspirations.
Step 6: Planning Your Budget and Timeline
Alright, we’ve nailed the design and finish. Now it’s time to ask the hard questions: How much will it cost, and when will it be ready? The answer isn’t a magic formula, but a simple framework that turns dreams into a budget‑friendly reality.
Start by pulling out a spreadsheet or even a good‑old notebook. Write down every line item: wood, hardware, finish, labour, shipping, contingency. That last line—typically 10‑15 % of the total—acts like a safety net for surprises. Trust me, the first time I built a kitchen cabinet, a hidden moulding defect pushed the price 12 % over; that contingency covered it without a scramble.
Next, map out the timeline. Split the project into phases: procurement, fabrication, delivery, installation, and final inspection. Give each phase a realistic window: for example, ordering custom cabinets can take 4–6 weeks, delivery 1–2 weeks, and on‑site assembly usually fits into a single weekend if you have a contractor handy.
Do you’re a DIY enthusiast or would you rather bring in professionals? If you’re hands‑on, factor in the cost of tools, paint, and any extra hours you’ll need to buy. If you lean on contractors, shop around for quotes, but remember that the lowest bid may be the most expensive in the long run if they cut corners.
Now, let’s talk about realistic budgeting for luxury cabinets. Our own Exquisite Luxury Wooden Cabinets range typically starts at £3,500 for a basic set and can climb to £6,500 for a fully custom finish with high‑grade hardware. That baseline helps you decide whether to splurge on a statement piece or allocate more to the finish.
One trick I learned early on is the “layered budget” method: keep a core budget for essential elements and a splurge budget for those wow‑factor touches. For example, you might allocate £2,000 for the wood itself, £800 for hardware, and any remaining £1,000 for a custom veneer or a unique drawer pull. This keeps you from overspending on one area and having to cut something else.
Do you’ve considered shipping costs? For bespoke cabinets, the weight can be a hidden variable. Many suppliers charge a flat rate for the first 500 kg and then a per‑kilogram fee beyond that. If you’re ordering from a distant showroom, add a 5‑10 % surcharge to the cost of the cabinet and factor that into your budget.
Speaking of logistics, the delivery window is just as important as the cost. Ask your supplier for a guaranteed delivery date, not just a “within 2‑4 weeks” estimate. A firm date gives you a concrete anchor for scheduling your interior design team or contractor.
When you’ve assembled your budget spreadsheet, double‑check every number against the supplier’s invoice. A quick audit can catch a missed 10 % tax or an incorrect shipping rate. A mistake here can snowball into a late‑stage surprise that derails your timeline.
What about the actual timeline? Set a “kickoff” date—when you place the order—and then mark the milestones. Add buffer days after major steps: for instance, add two extra days after delivery for test the cabinets for fit before installation.
In my experience, keeping a shared calendar with your contractor and supplier updates keeps everyone honest. A simple Google Sheet with dates, responsible parties, and status flags is surprisingly effective. It turns the project into a living document rather than a static plan.
Now, let’s talk about the real world: imagine a couple who ordered a pair of bespoke maple cabinets in mid‑June. They set the budget at £4,200 and allowed a 12 % contingency. The order went out on June 15, the supplier confirmed delivery for July 5, and installation was scheduled for July 12–13. Because they built a buffer, the installation went smooth, and they were delighted with the final result without a single cost overrun.
Finally, consider your own life schedule. If you’re moving into a new house, align the cabinet delivery with the move‑in date. If you’re renovating, coordinate with other contractors—plumbing, electrical, painting—to avoid costly back‑and‑forth.
And if you’re curious about how to handle a long travel‑like project, there’s a handy guide that walks through planning and budgeting for big moves: How to Get from Boston to New York: A Step-by-Step Travel Guide. The same principles of budget, timeline, and contingency apply whether you’re moving across the country or installing cabinets at home.
Bottom line: a clear, detailed budget paired with a realistic timeline turns the daunting task of buying and installing wooden cabinets into a well‑orchestrated event. Start early, track every line, and keep that buffer handy, and you’ll enjoy the process as much as the finished product.
FAQ
How long does it take for a custom wooden cabinet order to be delivered?
On average, a bespoke cabinet runs through design, fabrication and delivery in 6–8 weeks. We keep a buffer of two weeks for shipping or any last‑minute tweaks. If you need a tighter timeline, let us know early and we’ll explore expedited production routes—though it’ll bump the cost a touch.
What kind of warranty does Harvey Bruce Interiors offer on its wooden cabinets?
All our wooden cabinets come with a 10‑year structural warranty, covering any defects in joinery or finish that arise from normal use. It doesn’t cover accidental damage, but it does give you peace of mind that your investment will hold up for years.
Can I customize the finish and hardware on my wooden cabinets?
Absolutely. We have a palette of finishes—from satin to high gloss—and a range of hardware styles, from classic brass pulls to sleek matte knobs. We’ll provide swatches so you can see how the colour behaves under your lighting before you commit.
How do I maintain the natural grain and finish over time?
Give the surface a light wipe with a dry microfiber cloth after each use. Spot‑clean spills promptly with a damp cloth and a mild, non‑abrasive cleaner. Every two to three years, re‑seal with a satin topcoat that protects the grain without changing the look.
What sustainability practices are used in sourcing the wood for your cabinets?
We only source timber that is FSC‑certified, meaning it comes from responsibly managed forests. Additionally, our suppliers use low‑emission finishing processes, so your cabinets not only look great but also keep the carbon footprint low.
What happens if my cabinets arrive damaged or mis‑measured?
We’ll inspect the shipment immediately. If there’s damage, we’ll replace the affected pieces at no extra charge. If measurements are off, we’ll adjust the cabinet or offer a complimentary re‑fit. Customer satisfaction is our top priority, so you’re never left stuck.
Can I install the cabinets myself or do I need a professional?
If you’re handy and have the right tools, a single person can handle a basic cabinet install. You’ll need a level, stud finder, drill, and a firm grip on the screws. However, a professional brings experience with aligning cabinets, managing door shims and ensuring a flawless finish. For a first‑time homeowner, hiring a contractor can save time and avoid costly mistakes and peace of mind for a smooth project experience.
What are the key factors that affect the cost of wooden cabinets?
The cost of wooden cabinets is shaped by several factors. First, the species—maple and oak are common, while exotic woods like cherry or walnut will push prices higher. Next, finish and hardware: a high‑gloss, oil‑based stain and custom brass pulls add to the bill. Size and quantity also matter; larger units or a full kitchen set scale up the cost. Finally, shipping and labour—distance, delivery fees, and whether you install yourself or hire a pro—can add a few hundred pounds.
Conclusion
Let’s bring it all together. When you’re choosing wooden cabinets, the first thing you’ll notice is the grain—does it feel right in your light? If it does, that’s a win. If it feels off, grab another board, test it in a corner of the room, and compare.
The style you pick should echo the story you want your home to tell. A Craftsman look feels like an old friend, a modern minimalist feels like fresh air, and rustic charm is all about character. Pick the finish that protects and enhances that story. A satin gloss keeps a modern space bright, while a matte oil finish lets a rustic board breathe.
Budget isn’t a mystery if you break it down: wood, hardware, finish, and labour. Add a 10‑15 % contingency and you’ll have a safety net for surprises. And if you’re leaning DIY, keep tools handy; if you’re hiring, compare a few quotes.
Installation is the final step, but the real work begins with maintenance. A quick wipe every day, spot‑cleaning spills, and re‑sealing every few years will keep the grain looking fresh for years.
So, what’s the next move? Sketch a rough layout, pick a species, and decide on the finish. Then reach out—our family‑run team is ready to walk you through every choice, from board to finish, so your cabinets become the heart of your space.
← Older Post Newer Post →
