Creative Interior Design Guide: Inspiring Your Home with Bespoke Furniture and Accessories
Posted by Admin on
Picture this: you’ve just walked into a room that feels like a warm hug, where every piece—from the sleek sofa to the subtle wall mirror—seems to have been placed just for you.
And yet, a few weeks later you’re staring at that same space, wondering why it feels a little flat, like something’s missing.
That moment is the spark behind great Interior Design – it’s not just about picking a colour or a couch, it’s about weaving a story that reflects who you are and how you want to feel at home.
We’ve seen homeowners juggling a hectic work‑from‑home schedule and still longing for a place that feels like a personal gallery rather than a laundry room turned office.
So, what’s the first step? Start by listening to the room itself – notice the natural light, the traffic flow, the way your feet glide across the floor.
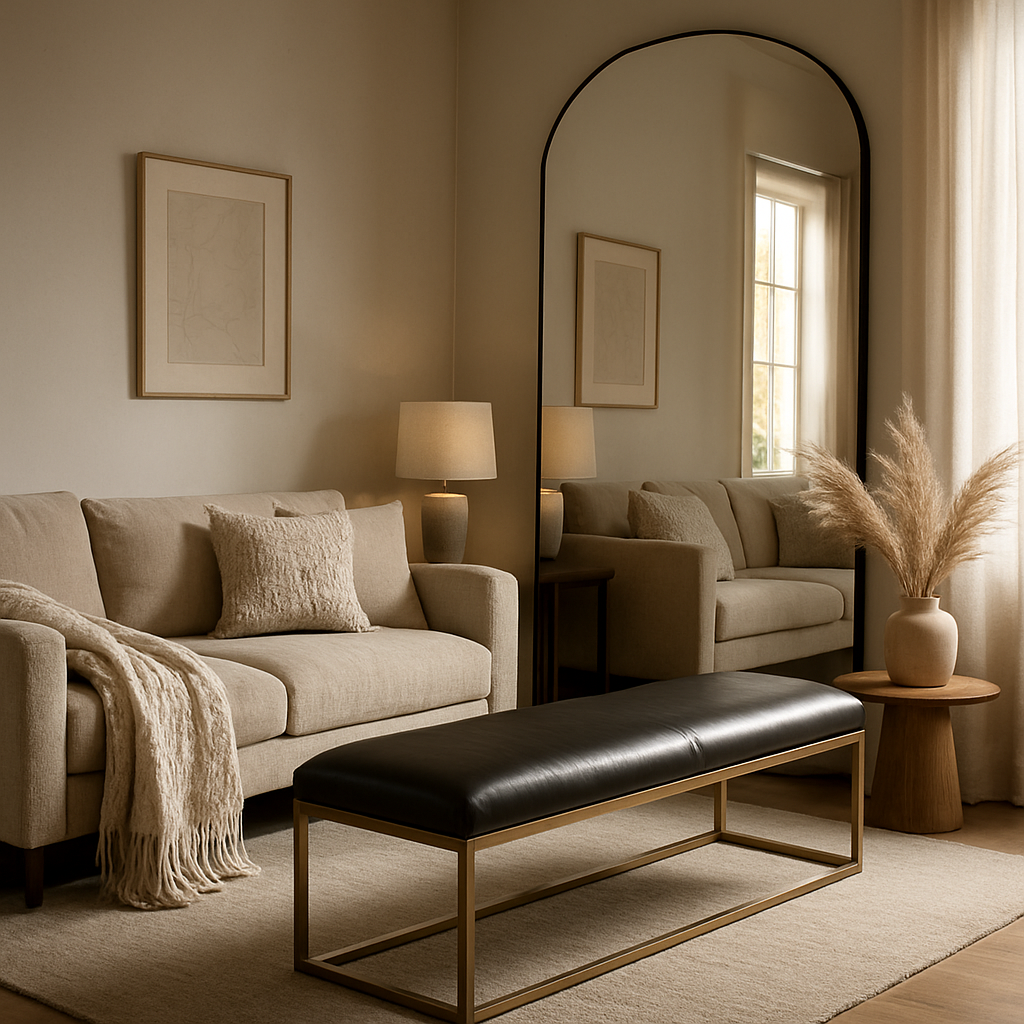
From there, pick one statement piece that anchors the vibe. A luxury bench, for instance, can double as a stylish perch and a subtle storage solution, instantly adding depth without clutter.
Imagine a handcrafted wooden console tucked against a wall of mirrors – the reflection multiplies the sense of space while the warm timber grounds the room.
And if you’re a couple just moving into your first home, think about pairing a sleek sideboard with a set of coordinated wall décor; it creates a cohesive backdrop for everything from weekend brunches to quiet movie nights.
You might wonder, “Do I need a designer for this?” Honestly, a little guidance can go a long way, and we love watching our clients discover that they already have a solid eye – they just need a few pro tips to bring it together.
So, stay with us as we walk through the fundamentals of Interior Design, from choosing the right texture to arranging lighting, and you’ll walk away with a clear, doable plan that feels as personal as a handwritten note.
TL;DR
Interior Design is all about listening to a room, picking a statement piece, and arranging elements so your home feels like a personalized hug.
Follow our simple steps—observe light, choose a luxe bench or mirror, and layer textures—to create a stylish, functional space you’ll love living in every single day.
Step 1: Define Your Style Vision
Imagine walking into a room and instantly feeling, "This is me." That gut‑level recognition is the core of any style vision – it’s the emotional compass that tells you whether a space feels like a sanctuary or just another room.
First, pause and take a mental snapshot of the feelings you want to stir. Do you crave calm, like a spa‑day retreat? Or maybe you’re after the buzz of a creative studio? Write those adjectives down – "serene," "playful," "sophisticated" – and keep them front‑and‑center.
Next, pull together visual clues. Grab a few magazines, scroll Pinterest, or simply photograph corners of your own home that make you smile. When you start seeing patterns – soft neutrals, bold brass, reclaimed wood – you’re mapping the language of your style.
Step‑by‑step worksheet
- 1. Mood‑board sprint (15 min): Open a blank board in a tool like Spoak’s design platform. Pin three images that instantly resonate. Don’t overthink – just go with the first thing that catches your eye.
- 2. Word dump (5 min): Under each image, jot one word that describes the vibe. You’ll end up with a list like "cozy, luxe, airy, grounded."
- 3. Prioritise (5 min): Circle the top three words. Those become your style pillars.
Now, translate those pillars into tangible product categories. If "luxurious" is a pillar, a statement piece like a luxury bench can anchor the room while providing hidden storage. If "organic" is key, think reclaimed oak console tables or woven natural fibre throws.
Real‑world example: Sarah, a first‑time homeowner in Edinburgh, loved the idea of “modern farmhouse.” She started with a mood board of light‑washed shiplap, black‑metal lighting, and soft linen. Her three pillars became "airy," "textured," and "warm." By choosing a wooden console table (the piece she’d see daily) and pairing it with a muted‑tone bench, she created a cohesive look without over‑decorating.
Another scenario: James and Maya, a couple working from home, needed a space that felt professional yet relaxed. Their pillars: "focused," "inviting," "flexible." They opted for a sleek wooden desk for work, a plush bench for quick breaks, and a modular sideboard that doubles as a bookshelf. The bench not only adds seating but also stores office supplies, keeping the room tidy.
Pro tip from our design team: test your vision in a small area first. Place a sample fabric, a decorative object, or even a paint swatch on the wall. Live with it for a day. If it still feels right after coffee spills and evening lighting, you’ve nailed the vibe.
Don’t forget to consider the practical side. Light direction, traffic flow, and room function should never be an afterthought. Sketch a quick floor plan – even a hand‑drawn one – and mark where you’d place your anchor piece. This helps you see if the vision works with the room’s anatomy.
Finally, write a short style statement. Something like, "My living room is a serene, modern haven that balances soft textures with clean lines." Keep it visible – on a sticky note on your fridge or in your design app – and refer back whenever you’re tempted by a trend that doesn’t fit.
When your style vision feels solid, you’ve built the foundation for every design decision that follows. It’s the first, most important step toward turning a blank canvas into a space that truly reflects you.
Step 2: Choose a Cohesive Color Palette
Okay, you’ve nailed your style vision, and you’ve got that anchor piece in place – now it’s time to let colour do the heavy lifting. Think of colour as the emotional soundtrack of your room; the right notes make everything feel in sync, the wrong ones leave you humming a nervous tune.
So, what does your home say about you? Are you craving a calm sanctuary after a long day, or do you want a lively backdrop that sparks conversation when friends drop by? Pinpointing the feeling is the first clue in building a palette that actually works for you.
Understanding colour psychology
Researchers have mapped specific emotions to individual hues – blues and greens tend to soothe, while warm reds and oranges can energise. The colour psychology research shows that tint, saturation and tone all shift the mood, so a soft sage can feel tranquil, but the same hue at full saturation might feel a bit too vibrant for a bedroom.
Take a moment: picture a bedroom painted in pale blue and imagine the first thing you’d do there. Most of us picture a gentle sigh, a moment of relaxation. That’s the power of a well‑chosen hue.
Map your mood to a hue
Grab a piece of paper and write three adjectives that capture the vibe you want – maybe “cozy, grounded, inviting.” Then flip through a colour swatch book or scroll a digital palette until a shade clicks with each word. It doesn’t have to be perfect on the first try; you’ll refine it as you go.
Pro tip: start with a dominant colour for 60 % of the room (usually the walls), add a secondary colour for 30 % (upholstery, large accessories), and sprinkle a 10 % accent colour (pillows, art, lampshades). This 60‑30‑10 rule keeps the look balanced without feeling chaotic.
Build your palette in three steps
Step 1 – Choose a base colour. Pick a neutral or a soft hue that will sit comfortably behind your furniture. If your bench is a warm walnut, a warm greige wall lets the wood shine without competing.
Step 2 – Select a supporting colour. Look for a tone that appears in your statement piece or a favourite textile. A navy throw on a light‑coloured sofa adds depth, and the same navy can echo a navy‑blue wall accent.
Step 3 – Add an accent colour. This is where you get playful – a mustard cushion, a brass lamp, or a teal vase. Keep it to a few items so the pop feels intentional, not overwhelming.
Real‑world examples
Example 1: Emma, a new homeowner in Glasgow, loved the idea of a “modern coastal” vibe. She chose a pale sea‑foam wall (base), a soft dove‑grey sofa (support), and bright coral cushions (accent). The result? A breezy, airy lounge that feels like a seaside retreat even when it’s raining outside.
Example 2: Mark and Aisha wanted a home office that feels productive yet calming. They went with muted sage walls (base), a deep charcoal desk (support) and a pop of amber desk lamp (accent). The subtle green keeps the mind relaxed, while the dark desk grounds the space, and the amber adds just enough energy for focus.
Pro tips you can start using today
1. Test swatches at different times of day. Natural light can turn a warm tan into a cool gray, so live with the sample for a few hours before committing.
2. Use painter’s tape to create a “color block” on the wall – 12‑inch squares of each colour you’re considering. Step back and see which block feels most harmonious with your furniture.
3. Remember the 18‑24‑inch walking clearance rule (the same rule we use for furniture flow). If a colour makes the room feel cramped, it’s a sign the hue is too heavy for the space.
4. Mix textures as a colour bridge. A linen curtain in the same hue as a velvet cushion can tie soft and plush finishes together without adding extra paint.
5. When in doubt, let your favourite piece dictate the palette. A beautiful luxury bench or a striking wall mirror can become the colour anchor – just make sure the surrounding walls and accessories echo its tone.
After you’ve watched the video, take a fresh look at the room with your newly drafted palette. Does the space feel balanced? Do the colours whisper to each other, or are they shouting?
If something feels off, go back to the three‑step checklist and tweak one element. Remember, colour is fluid – it can shift with the seasons, the light, even your mood. The goal isn’t a rigid formula, but a flexible framework that lets you adapt without starting from scratch.
When you finally land on a palette that feels right, write it down, snap a photo of your swatches, and keep that reference handy for future purchases. That way, every new rug, lamp or piece of art you bring home will already be speaking the same visual language.
Ready to turn those colour ideas into reality? Grab a tape measure, a swatch, and a cup of tea – the perfect trio for a relaxed, purposeful design session.
Step 3: Select Bespoke Furniture and Accessories
Alright, you’ve nailed the colour story, so now it’s time to let the furniture do the talking. In Interior Design the pieces you choose are the characters in the room’s narrative – they need personality, purpose, and, yes, a bit of that bespoke sparkle.
Start with a “statement anchor”
Think of the biggest, most eye‑catching item you want in the space – a custom sofa, a sculptural sideboard, or even a one‑off armchair. This anchor sets the scale and tone for everything else. When we work with clients, we often begin by measuring the wall or nook where the piece will live, then we sketch a quick mock‑up. If the proportion feels off, you’ll notice it instantly – the room either feels cramped or too airy.
Does this sound familiar? You’ve walked into a showroom, fallen for a gorgeous bench, but the dimensions don’t quite match your hallway. That’s why a “measure‑first” habit saves both time and money.
Blend new, bespoke, and antique wisely
One of the most reliable formulas in high‑end Interior Design is the 40‑40‑20 rule: roughly 40 % antique, 40 % bespoke, and 20 % new pieces. This mix gives you history, personality, and fresh cohesion. The House & Garden article explains how designers like James Thurstan balance these layers to create a lived‑in feel while still looking curated read more. Imagine a vintage French mirror paired with a custom walnut console and a modern, low‑profile lamp – the trio tells a story without shouting.
Pick accessories that echo your palette
Once the big pieces are in place, hunt for accessories that pull the colour palette together. A set of hand‑woven cushions in the accent hue, a brass candle‑holder that mirrors the metallic finishes in your sideboard, or a textured rug that adds depth to the floor. The trick is to keep the accessory count under 10 % of the total visual weight – you want them to support, not overwhelm.
For seating variety, consider an accent chair that adds a splash of pattern. Wagner’s collection shows how a single statement chair can become a conversation starter while still fitting the room’s scale browse chairs. Pair it with a matching ottoman or a sleek side table, and you’ve got a flexible spot for coffee, reading, or a quick phone call.
Practical checklist before you buy
- Measure the exact opening (width, height, depth). Add 2‑3 cm for clearance.
- Sketch a quick floor plan and mark where each piece will sit.
- Check the material provenance – solid wood, sustainable fabrics, or reclaimed metal align with Harvey Bruce’s eco‑focused ethos.
- Ask yourself: Does this piece solve a problem? (extra storage, extra seating, visual balance?)
- Live‑test the colour: place a swatch of the fabric next to your wall at different times of day.
When you’re happy with the checklist, order a sample or a mock‑up if possible. Seeing the piece in your own light can reveal surprises – a shade that looks warm in the showroom may read cooler under your evening lamp.
Layer with texture, not just colour
Texture is the silent hero of a layered interior. A smooth marble coffee table next to a rough‑hewn wooden bench creates a tactile conversation. If you’ve chosen a sleek, contemporary sofa, balance it with a chunky knitted throw or a woven basket for magazines. The result feels curated, not contrived.
Finally, give yourself permission to evolve. Bespoke pieces are an investment, but they also grow with you. A sideboard you love now might later house a new collection of heirloom dishes. Keep a photo journal of each addition – it helps you see the story unfold over months and years.
So, grab that tape measure, pull up the design board, and start selecting those one‑off pieces that will make your space unmistakably yours. The right mix of bespoke, antique, and fresh accessories is the secret sauce to a room that feels both timeless and truly yours.
Step 4: Arrange Layout and Space Planning
Okay, you’ve picked your colours and your statement pieces, now it’s time to ask the big question: how does everything actually live together? This is where layout meets the lived‑in rhythm of your home.
Start with a quick program
Grab a tape measure, a sketch pad, and jot down the room’s dimensions. Write down what you need the space to do – is it a family‑watch TV zone, a quiet reading nook, or a dual‑purpose home‑office? When you know the function, the flow starts to make sense.
In our experience, homeowners who map out traffic patterns avoid the dreaded “bottleneck” where a sofa blocks a doorway. A simple line drawing of the main walkways can reveal hidden snags before you move a single piece.
Use the industry’s “phases” as a cheat sheet
The standard interior design phases break the process into programming, schematic design, design development, construction documentation and administration. For a single‑room layout, focus on the programming and schematic steps: gather data, then sketch a few layout options.
Three layout strategies to try
- Anchor‑first: Place your biggest piece – often a sofa or a luxury bench – against the strongest wall, then arrange secondary furniture around it.
- Float‑center: If you have a focal point like a fireplace or a large mirror, float the main seating in the middle of the room to create a balanced conversation zone.
- Z‑zone: Break a large rectangle into three zones (seating, storage, display) using rugs or low cabinets as visual dividers.
Which of these feels like you? Maybe you love the cosy‑in‑the‑corner vibe of anchor‑first, or perhaps the airy feel of a floated centre works better for a loft.
Check the 18‑inch clearance rule
Every piece should have at least 18 inches of breathing room on all sides. That way you can move around without nudging a lamp or stepping on a rug. It’s a tiny detail that makes a huge difference in everyday comfort.
Scale, proportion, and eye‑level
When you stand in the room, the eye‑level is roughly 57‑inches from the floor. Anything taller than that draws the eye upward; anything lower pulls it down. Use this rule to decide where to hang wall art, place side tables, or stack books.
Don’t forget the hidden functional spots
Think about power outlets, heating vents, and window blinds. A sideboard placed directly in front of a vent will feel warm and cramped. A console table under a window can become a perfect spot for a coffee cup and mail.
Quick layout checklist
| Task | Tool | Notes |
|---|---|---|
| Measure room dimensions | tape measure, laser measurer | Record width, length, ceiling height. |
| Sketch traffic flow | paper + pen or simple app | Mark main pathways, keep 18‑inch clearance. |
| Place anchor piece | cardboard mock‑up or furniture cutout | Test several spots before committing. |
Once you’ve nailed the basic arrangement, step back and live in the space for a day. Does the TV glare hurt your eyes in the evening? Does the reading chair get enough natural light in the morning? Small tweaks now save big headaches later.
Finally, remember that layout isn’t set in stone. As your family grows or your work habits shift, you can rearrange the same pieces without buying new ones. That flexibility is the secret sauce of a well‑planned interior.
So, grab that sketchpad, plot those walkways, and let the room breathe. When the layout feels right, the rest of the design – texture, colour, accessories – will fall into place.
Enjoy the process – a well‑thought‑out layout turns a house into a home that welcomes you back, day after day.
Step 5: Add Finishing Touches with Homeware
Now that your layout feels solid and your colour story sings, it’s time to sprinkle the little things that make a room feel lived‑in. Think of homeware as the seasoning on a perfectly cooked dish – a pinch of salt, a dash of pepper, and suddenly the flavours pop.
Ever walked into a friend's lounge and noticed how a few well‑chosen candles, a decorative tray, and a stack of beautiful books instantly made the space feel welcoming? That’s the power of finishing touches.
Start with a purpose
Before you start buying, ask yourself what each object is meant to do. Is it purely decorative, or will it hold keys, mail, or remote controls? When a piece serves a function, you’ll never feel guilty about the cost.
For example, a sleek wooden tray from our collection can hold coffee mugs on a sideboard while also adding a warm texture to the surface. A set of matte‑black ceramic vases can hold fresh stems, but they also echo the metallic accents you chose for your lighting.
Layer textures for depth
Mixing textures is like adding different brushstrokes to a painting. Pair a smooth marble coaster with a chunky knit throw, or place a glossy lacquered box next to a hand‑woven basket. The contrast keeps the eye moving and prevents the room from looking flat.
One of our recent clients in Manchester layered a woven sisal rug, a polished walnut console, and a set of glass candlesticks. The result? A tactile experience that makes you want to run your fingers over every surface.
Choose a colour anchor
Pick one colour from your palette and repeat it in three different homeware items. If teal is your accent, you might select a teal‑blue pillow, a teal ceramic pitcher, and a teal‑tinted glass vase. The repetition ties everything together without feeling repetitive.
Pro tip: keep the accent colour to no more than 10 % of the total visual weight. Too much and the room can feel over‑styled.
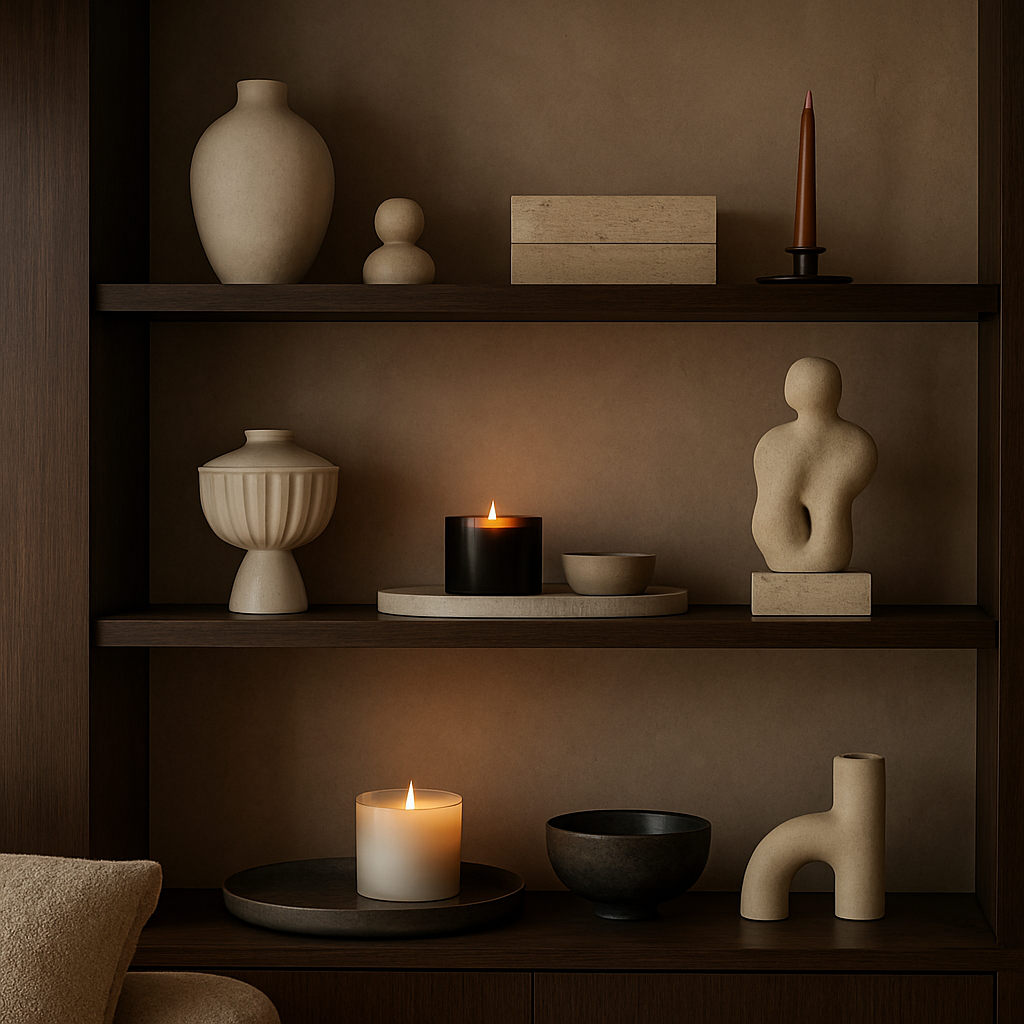
Curate a display shelf
Open shelving is a perfect canvas for homeware. Follow these three steps:
- Lay out all objects on the floor first, arranging by height – tallest at the back, shortest forward.
- Group items in odd numbers (three or five) to create natural clusters.
- Leave negative space; an empty spot is as important as a filled one.
Imagine a console table in your entryway: a large woven basket for scarves, a slim metal tray for keys, and a small framed print at eye level. The result is a tidy, stylish greeting board.
And don’t forget the power of scent. A soy‑based candle with a subtle vanilla note can make a room feel cozier without overwhelming the senses.
When you’re ready for a visual recap, check out this quick visual guide that walks through arranging homeware on a shelf.
Finally, give yourself a “test week.” Live with the new accessories for seven days, then ask: Do I reach for the candle without thinking? Does the tray still feel useful? If something feels out of place, swap it out – the beauty of homeware is its flexibility.
By treating homeware as both function and flourish, you’ll finish your interior design project with a room that feels thoughtfully completed, not just decorated.
A simple rule to remember: if you can’t see the item from the main seating area, it probably isn’t needed. This keeps the space uncluttered and lets each piece shine.
FAQ
How do I choose the right colour palette for my Interior Design project?
Start by spotting three adjectives that capture the mood you want – think “calm, cosy, vibrant.” Then pull swatches or digital palettes that match each word. Test a small patch on two opposite walls and live with it from morning to night; the light will reveal any hidden undertones. Aim for a 60‑30‑10 split – 60 % dominant hue, 30 % secondary, and 10 % accent – to keep the look balanced and intentional.
What’s the best way to mix bespoke furniture with existing pieces without it feeling cluttered?
Think of your room as a conversation. Let the bespoke item speak first – a custom sofa or a hand‑crafted bench – then bring in existing pieces that echo its material or colour. Keep the total visual weight of accessories under 10 % of the space, and use negative space to let each item breathe. A quick trick is to lay everything on the floor, arrange by height, and remove anything that doesn’t add function or a clear style link.
How can I make my small living room feel luxurious with homeware?
Scale is everything in a tight room. Choose a few high‑impact homeware pieces – a sculptural candle, a sleek metal tray, or a textured throw – and keep the rest minimal. Position a statement mirror opposite a window to double the light, then add a single pop of colour through a cushion or vase. The key is repetition: pick one accent colour and repeat it in three different textures so the room feels curated, not crowded.
Should I invest in a luxury bench as a functional focal point, and how do I style it?
A luxury bench works like a Swiss‑army knife: it offers seating, storage, and visual weight. Place it against the strongest wall or under a large artwork to anchor the space. Dress it with a soft cushion in your accent hue, a couple of decorative boxes for hidden storage, and a small plant for life. Because the bench draws the eye, keep surrounding furniture low‑profile so the bench remains the star without overwhelming the room.
What are the key layout rules to keep traffic flow smooth in an open‑plan Interior Design?
First, map the main walkways and mark a minimum 18‑inch clearance around each path. Position the largest piece – usually a sofa or bench – against a wall, then arrange secondary furniture at a 45‑degree angle to create natural sight lines. Use rugs or low cabinets as subtle dividers for zones like dining and lounge. Finally, step back and imagine moving from one end of the room to the other – if you can’t do it without sidestepping, tweak the layout.
How do I use texture and accessories to add personality without overdoing it?
Layer three textures in each display: a smooth base (like a marble coaster), a tactile middle (a knitted throw), and a glossy accent (a lacquered box). Group accessories in odd numbers – three candles, five books – because odd clusters feel more organic. Keep the overall visual weight of accessories under 10 % of the room, and let one colour repeat across at least three items to tie everything together without chaos.
What maintenance tips keep luxury homeware looking fresh over time?
Dust delicate pieces with a soft microfiber cloth weekly and avoid harsh chemicals; a dab of diluted vinegar works wonders on wood but rinse quickly. Rotate candles and decorative objects every few months so no area gets over‑exposed to sunlight, which can fade finishes. For upholstered items, a gentle vacuum on a low setting and occasional professional cleaning keep fibres plump. Lastly, store seasonal accessories in breathable bags to prevent moisture buildup.
Conclusion
We’ve walked through everything from spotting your style vibe to picking the perfect bench, mirror, or sideboard. By now you should feel that interior design isn’t a mystery reserved for pros, but a series of small, intentional choices you can make at home.
Remember the three‑step colour rule, the 60‑30‑10 balance for accessories, and the 18‑inch breathing room for traffic flow. Those simple formulas keep a room feeling luxurious without the overwhelm.
What’s the biggest win? Turning a single statement piece—like a luxury bench from Harvey Bruce—into both a functional anchor and a style statement. Pair it with layered textures, a repeat accent colour, and you’ve got a room that tells your story.
So, what’s next? Grab a tape measure, lay out a cardboard mock‑up of your biggest item, and test the flow for a day. If something feels cramped, shift it a few inches; the solution is usually that easy.
In our experience, the rooms that stay fresh over years are the ones you can tweak as life changes. Keep a handful of accessories you love, rotate them seasonally, and let natural light do the rest.
Ready to give your home the interior design refresh it deserves? Take the first step today—pick one piece, apply the checklist, and watch the transformation unfold.
← Older Post Newer Post →
