How to Measure Bay Window for Blinds: A Step-by-Step Guide for Stylish Home Interiors
Posted by Derek Lamb on
Picture this: you’ve just picked out a gorgeous set of blinds that will frame your bay window, and then you realize you have no idea how to measure it properly.
That “uh‑oh” moment happens to almost every homeowner who wants luxury style without a mis‑fit – from first‑time buyers to seasoned renovators.
In our experience at Harvey Bruce Interiors, the secret isn’t a fancy tool; it’s a simple, step‑by‑step process that removes the guesswork. It works for any shape, from classic arches to modern angular bays.
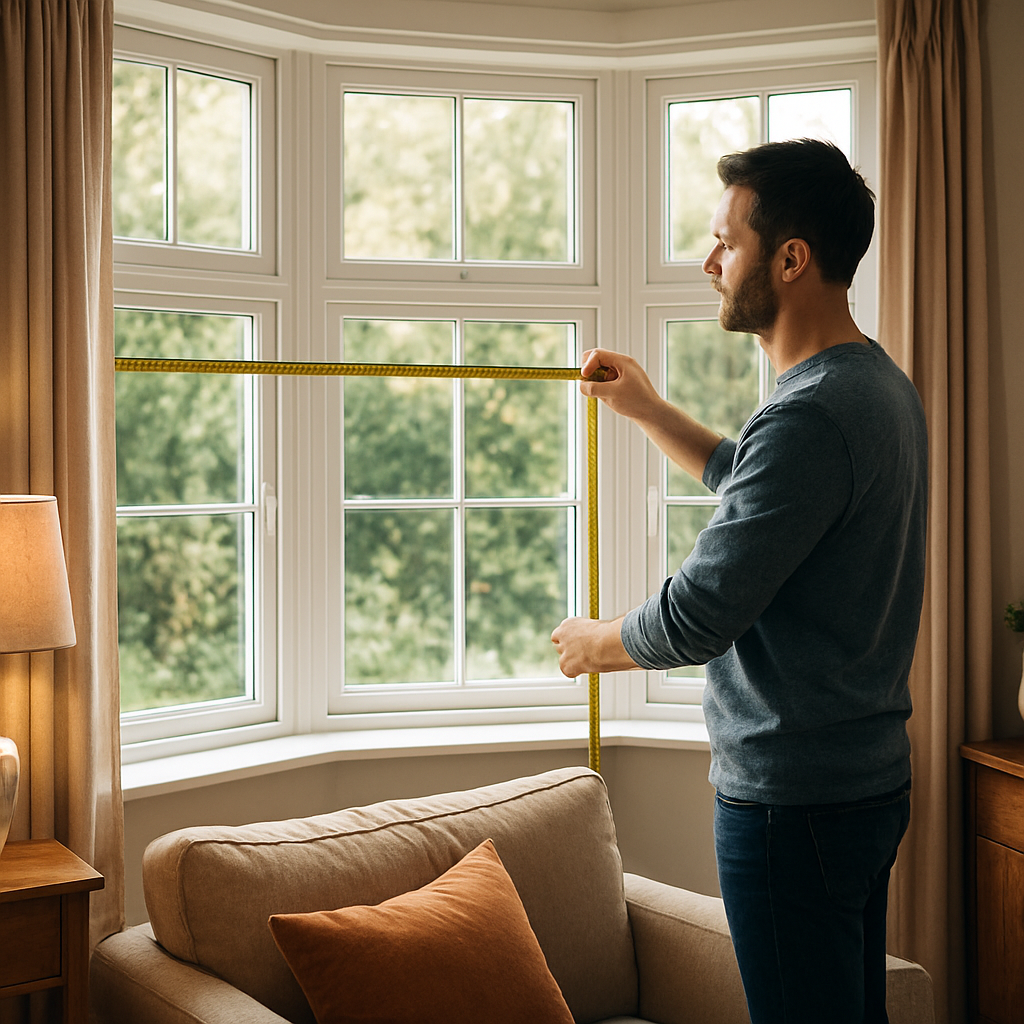
Grab a tape measure and a notebook. Start at the inside edge of the frame, where the glass meets the trim, and record the width at the top, middle and bottom – bay windows rarely stay perfectly uniform.
Then measure the height: from the top of the frame down to the sill, and again from the top to the floor if you prefer full‑length blinds. Write down each figure.
Decide whether the blinds will sit inside the frame for a sleek look or outside for a bolder statement. Inside mounts need the smallest measurements; outside mounts add a few centimeters on each side for visual balance.
Double‑check everything – measure twice, write once, then picture the blind in the space. Imagine how the light will dance across the room and how the fabric will complement your bespoke furnishings.
Feeling a bit overwhelmed? Not at all. With a few minutes and a bit of patience, you’ll have the exact dimensions you need to order blinds that fit like they were custom‑made for your bay window. You’ll also avoid costly returns and enjoy the confidence of a flawless finish.
Ready to turn those measurements into a stunning focal point? Let’s dive into the detailed steps that will guide you from tape measure to perfectly installed blinds.
TL;DR
Measuring a bay window for blinds is simple once you record width at the top, middle and bottom, note the height to the sill or floor, decide inside or outside mounting, and double‑check every figure before ordering.
Follow this quick checklist and you’ll enjoy a flawless, bespoke fit that eliminates costly returns and instantly elevates your living space with a touch of Harvey Bruce luxury.
Step 1: Measure the Central Window Width
Alright, you’ve got your tape, your notebook, and that feeling that the bay window is a little… mysterious. The first thing we need to pin down is the central width – the sweet spot that tells us how wide the blinds actually have to be.
Why the centre? Because bay windows are rarely a perfect rectangle. The top might flare out, the bottom could taper, and the middle often sits somewhere in between. Measuring just the top or bottom can leave you with a blind that either scrapes the frame or hangs loose.
Step‑by‑step: Locate the true centre
1. Stand directly in front of the window and eyeball the midpoint between the top and bottom rails. If the window is tall, a good trick is to use a small piece of painter’s tape and mark the exact middle on the glass.
2. Pull the tape measure across the window at that mark, making sure the tape lies flat against the glass and not the trim. Record the number in millimetres or inches – whatever you’re comfortable with.
3. Double‑check by measuring a few centimetres to the left and right of that centre point, then averaging those two readings. This helps catch any slight curve or angle that a single line might miss.
Now you have the central width. But don’t stop there; we’ll need the top and bottom measurements later to confirm the final blind size.
So, what if the centre isn’t perfectly level? Maybe the frame is a bit crooked. In that case, use a level or a laser line to make sure your tape is perfectly horizontal before you lock in the number.
Take a breath. You’ve just measured the most critical piece of the puzzle. It’s a moment of triumph – you’re one step closer to that sleek, custom‑fit blind that will frame your view like a piece of art.
Here’s a quick sanity check: compare the central width you just wrote down with the width of a standard sheet of A4 paper (210 mm). If the numbers are wildly different, you probably measured to the outer edge of the trim instead of the glass. Go back and measure again, this time starting inside the trim line.
Pro tip: account for mounting style
If you plan to mount the blinds inside the frame, shave off a millimetre or two on each side – the blinds need a little breathing room. For an outside mount, add a few centimetres to each side so the blind sits proudly over the frame and creates a sense of balance.
And remember, a little extra on the outside looks intentional, not sloppy. It’s the same principle we use when choosing a rug that slightly overhangs a coffee table – it just feels right.
Finally, jot down the measurement in a dedicated column of your notebook, label it “central width,” and move on to the next step. Trust the process, and trust that you’re handling a task that many homeowners find intimidating.
When you return to the ordering page, you’ll simply plug in that central width, and the rest of the dimensions will fall into place. In our experience, this single, accurate measurement eliminates most of the guesswork and saves you a costly return.
Ready for the next step? Let’s move on to measuring the top and bottom widths so you can confirm the perfect fit from edge to edge.
Step 2: Determine the Projection Depth
Now that you've nailed the central width, the next thing that trips up a lot of homeowners is figuring out how far the blind has to sit back from the frame – that’s the projection depth.
Why does depth matter? If the blind’s headrail is deeper than the window recess, the slats will hit the trim and you’ll hear a nasty scrape every time you raise it. Too shallow, and the blind looks like it’s floating, leaving a gap that lets light leak around the edges.
First, take a quick peek at the window’s inner cavity. Using a simple ruler or a steel tape, measure from the inner edge of the frame straight back to where the glass stops. That number – usually between 2 and 4 cm on older sash windows and up to 6 cm on deeper bay constructions – is your maximum projection.
If you’re planning an inside‑mount, you need to make sure the blind’s headrail and any lift cords fit within that space. Most of our roller‑blind kits need at least 2.5 cm of depth, while wooden venetian blinds often require 3 cm or more. When the measured depth is tighter than the blind’s spec, you have two options: choose a slimmer profile (think cellular shades) or switch to an outside mount.
Let’s walk through the measurement step by step:
Step‑by‑step depth check
- Position the tape at the inner edge of the top rail.
- Pull it straight back, keeping it perpendicular to the frame.
- Note the distance to the glass surface.
- Repeat at the bottom and middle – the smallest reading wins.
- Add a 0.5 cm safety buffer if you plan a motorised mechanism.
A quick tip: run your finger along the measured line; if you feel any moulding or a window sill that protrudes, subtract that from the total. Those little details are why a blind can look custom‑made rather than a cheap afterthought.
What about angled side panes? Because they sit at a 90‑ or 135‑degree angle, the depth can vary from one pane to the next. Measure each pane separately and record the smallest figure. That way, when the blind wraps around the corner, you won’t end up with a blind that sticks out and blocks the view.
Does this feel like a lot? Not really – it’s the same rhythm you used for width, just turned sideways. In our experience, a double‑check at the end saves you from a return that could cost both time and money.
Now, before you order, compare your depth reading with the product’s specifications. Most manufacturers list a minimum and maximum projection on the product page. If you’re eyeing a cellular shade, you’ll often see a note like “requires 2‑cm depth minimum.” That’s where the Blindster guide on stylish bay window blinds comes in handy – it outlines exactly how to match depth to blind type.
If the window’s depth is right on the edge, consider a low‑profile headrail or a concealed mounting bracket. These options sit flush with the frame, preserving the clean lines that make bay windows look so elegant.
And remember, you don’t have to sacrifice style for fit. A slim‑profile Roman blind can slide into a 2‑cm recess while still giving you that soft, draped look you love. It’s all about pairing the right blind style with the right depth.
Finally, jot down your depth measurement next to the width numbers you recorded earlier. When you hand the sheet to your supplier, they’ll have a complete picture – width, height, and projection – and can cut the blind to the exact pocket you’ve measured.
Ready to move on? The next step will show you how to translate those numbers into a perfect order, so you can sit back, pull the blind down, and watch the light dance across your bay.
Step 3: Capture the Angle and Height
Now that you’ve got width and depth nailed down, it’s time to think about the angle of each pane and the exact height you need. If you skip this, you’ll end up with a blind that looks like it’s been forced into a space that wasn’t meant for it – and nobody wants that.
Why the angle matters
Bay windows aren’t flat rectangles; they’re a series of angled planes that meet at a corner. That corner is the trickiest spot because the blind’s headrail can hit the adjoining pane if you don’t account for the angle.
Think about it like trying to slide a bookshelf around a corner in a hallway. If you ignore the turn, the shelf smacks the wall and you’re left with dents. The same principle applies to blinds.
Here’s a quick reality check: a traditional three‑pane bay often has side panes set at a 135‑degree angle to the central pane. If you measure the height straight up from the floor to the top rail on the side pane without adjusting for that angle, you’ll be off by a few centimetres – enough to cause a gap or a scrape.
Step‑by‑step angle capture
- Grab a sturdy steel tape and a small level.
- Place the zero end of the tape on the inner edge of the top rail of the central pane.
- Swing the tape toward the side pane until it rests flat against the inner edge of that pane’s top rail. The tape will form a diagonal across the corner.
- Read the measurement – that’s your “angled height” for the side pane.
- Repeat for the opposite side pane.
When you write the numbers down, label them clearly: “Centre height,” “Left angled height,” “Right angled height.” A tiny X next to each figure (just like we suggested in Step 1) keeps the data tidy.
Pro tip: If you have a laser distance meter, use it to double‑check the diagonal. It’s fast, accurate, and eliminates the wiggle‑room you get with a flexible tape.
Real‑world example: the coastal cottage
Emma, a new homeowner in Cornwall, measured her three‑pane bay. The centre pane height was 84 inches, but the left pane’s angled height came out to 78 inches and the right to 80 inches. She ordered a custom roller blind set using the smallest height (78 inches) for an inside mount. The result? The blind sits flush in the corner, no light leaks, and the view of the sea remains uninterrupted.
Notice how she chose the smallest height? That guarantees clearance on the tightest corner. If you’re after a more dramatic look with a little overlap, add 1‑2 cm to each height, but keep the smallest measurement as your baseline.
Height for outside‑mount options
Outside mounts don’t have to fight the depth, but they still need a solid height measurement. Here you’ll want the tallest point of the bay – usually the centre pane – plus a little extra for the headrail and any decorative trim you want to cover.
A good rule of thumb is to add 2‑3 cm to the tallest height you recorded. That extra buffer lets the blind sit nicely on the wall above the window without looking cramped.
Checklist before you hit “order”
- Centre height – measured straight down from the top rail to the sill or floor.
- Left and right angled heights – measured diagonally across each corner.
- Smallest height – use this as the base for inside‑mount blinds.
- Extra 2‑3 cm for outside‑mount headrail clearance.
- Write everything in the same notebook next to your width and depth figures.
Having everything on one sheet makes it easy for your supplier to cut the blind to the exact pocket you measured. It also prevents the dreaded “oops, the blind is too short” call back.
Need some visual inspiration while you’re finalising those numbers? Check out Elegant Window Treatment Ideas for Bay Windows to Elevate Your Living Space – it’s packed with real‑world photos that show how the right angle and height turn a plain bay into a show‑stopper.
And one last thought: if you’re already planning a fresh coat of paint around the new blinds, a professional painter can make sure the trim and wall finish complement the clean lines of your new treatment. A smooth finish around the blind’s headrail adds that extra touch of luxury you’ve been aiming for.
Step 4: Choose the Right Blind Style for Your Space
Alright, you’ve got the width, depth, and angle all nailed down – now the fun part begins: picking a style that actually feels like yours. This is where the room’s personality meets the practical need for light control.
Do you imagine a sleek, modern vibe, or are you leaning toward something a little softer, maybe with a touch of texture? The answer will guide you toward roller blinds, Roman shades, venetian blinds, or even a luxe blackout panel.
Match the style to the room’s function
Think about how you use the space. A home office needs glare‑free focus, so a light‑filtering roller or cellular shade works wonders. A cozy sitting area? A Roman blind in a soft linen gives that layered, inviting feel.
And what about the bay itself? Because a bay window often becomes a focal point, you don’t want a blind that disappears into the wall – you want it to complement the architectural drama.
Consider the material
Fabric, wood, aluminium, PVC – each has its own mood. In our experience, a subtle woven bamboo works beautifully in a light‑filled lounge, letting a hint of sunshine spill through while still offering privacy.
If you love the drama of a deep colour, a blackout Roman can turn a sunny bay into a private cinema without sacrificing style.
Scale matters
Bay windows have a built‑in sense of depth. Heavy, bulky headrails can look clunky. Look for low‑profile options that sit flush – especially on an inside mount. A slim‑profile venetian blind, for example, slides neatly into a 2‑cm recess and still lets you tilt the slats for that perfect diffused light.
Do you feel a little overwhelmed by the choices? Here’s a quick cheat sheet:
- Roller blinds: Minimalist, easy to operate, great for a clean line.
- Roman shades: Soft folds, adds texture, works well with plush cushions.
- Venetian blinds: Adjustable light, classic look, ideal for deeper recesses.
- Cellular shades: Insulating, energy‑saving, perfect for a sunny bay.
- Blackout panels: Full privacy, movie‑night ready, best for bedrooms or media rooms.
Notice how each option solves a specific problem? That’s the trick – pair the need (privacy, light, insulation) with the style that feels right.
Colour and pattern – don’t overthink it
Because the bay already draws the eye, you can keep the blind colour neutral and let the window itself be the star. Or, if you’re feeling bold, pick a hue that echoes a rug or a sofa – it ties the room together without looking forced.
And patterns? A subtle chevron or a delicate damask can add depth without competing with the bay’s geometry.
Practical tip: Order a sample swatch
Before you commit, ask your supplier for a fabric swatch or a small sample panel. Hold it up to the window at different times of day – you’ll instantly see how the colour shifts with natural light. It’s a tiny step that saves a lot of regret later.
Does this feel like a lot to juggle? Remember, you’re already half‑way there with your measurements. The style decision is really about mood, function, and the tiny details that make a bespoke look feel custom‑made.
One last thing: think about the hardware. A discreet cord lock or a motorised pull‑chain can keep the look sleek, especially if you have kids or pets running around.
So, take a breath, look at your notebook, and ask yourself: “What does this space need to feel complete?” Once you have that answer, the blind style will click into place, and you’ll be one step closer to that Harvey Bruce‑level finish you’ve been dreaming of.
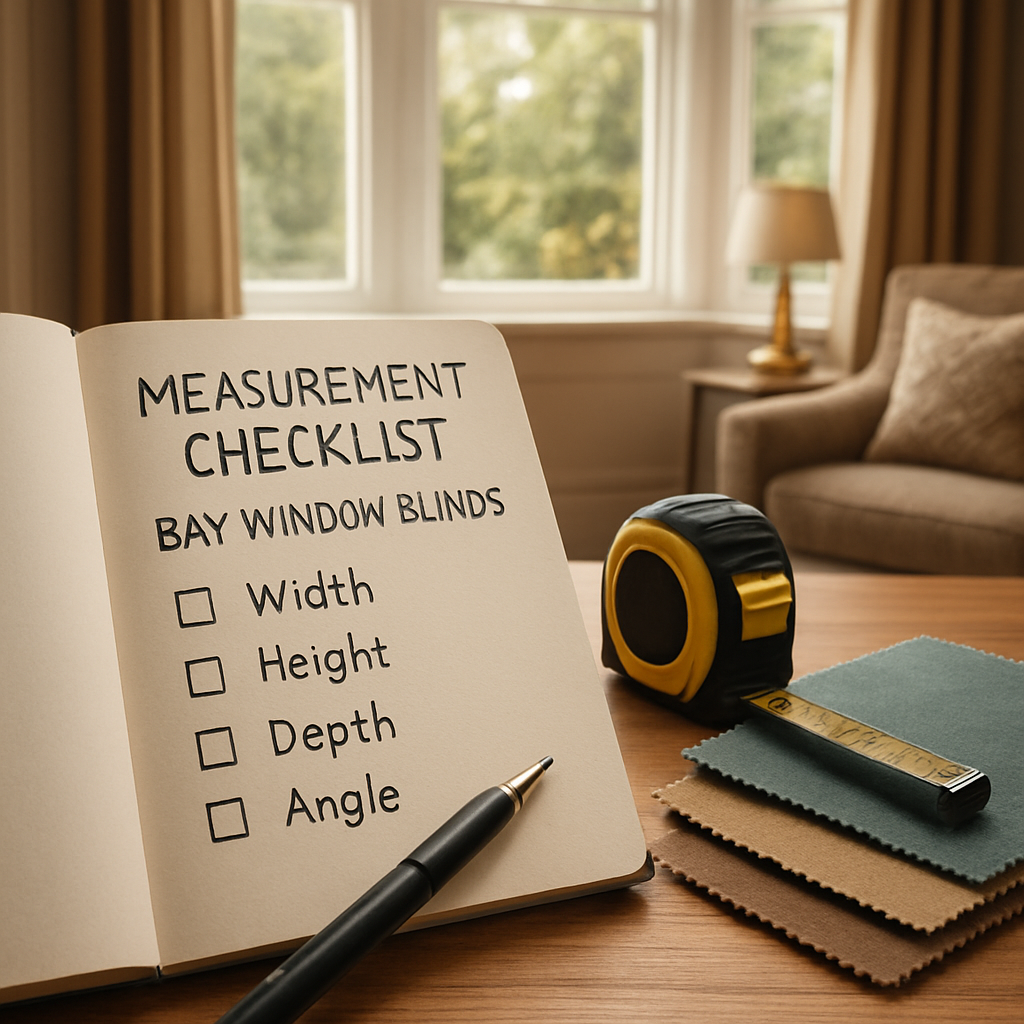
Step 5: Create a Measurement Checklist
Now that you’ve got width, depth, and angle down on paper, it’s time to stop juggling loose numbers and pull everything into one tidy list. A checklist is the safety net that turns “I think I measured it right” into “I’m 100 % sure before I hit order.”
Think about the last time you tried assembling IKEA furniture without the step‑by‑step sheet – you probably ended up with a few extra screws and a lot of frustration. The same principle applies to blinds: a clear checklist keeps you from sending the wrong size back for a costly return.
Why a checklist matters
First, it forces you to double‑check each figure. When you write the numbers side by side – top‑width, middle‑width, bottom‑width, deepest depth, angled heights – you instantly see if something looks off. Second, it gives your supplier a single reference point. No more back‑and‑forth emails trying to decipher whether “115 cm” was the top or the bottom measurement.
And, let’s be honest, a checklist feels surprisingly satisfying. There’s a tiny moment of triumph each time you tick a box, and that momentum carries you straight to the ordering stage.
Building your own checklist
Grab a fresh page in your notebook or open a simple spreadsheet. Create three columns: Measurement, Value, and Notes. Here’s the bare‑bones structure you’ll want:
- Central pane width – top, middle, bottom (record the smallest)
- Side pane widths – top, middle, bottom (again, smallest wins)
- Projection depth – inner edge to glass, smallest reading
- Centre height – floor or sill to top rail
- Left angled height – diagonal measurement
- Right angled height – diagonal measurement
- Mount type – inside or outside (add 1‑2 cm per side for outside)
- Hardware preference – cord lock, motorised pull‑chain, etc.
- Sample swatch colour reference – note the fabric number or Pantone
Under the Notes column, jot down anything that could affect the fit: a protruding window sill, a decorative cornice, or a pet‑friendly cord lock you plan to use. Those little details are what turn a good blind into a bespoke one.
Quick sanity‑check before ordering
Before you send the sheet to the supplier, run through these three quick questions:
- Did I record the smallest width for each pane? (That guarantees clearance.)
- Is my projection depth equal to or greater than the blind’s headrail requirement? (Add a 0.5 cm buffer if you’re going motorised.)
- Did I add the extra height for an outside mount, if that’s my choice?
If the answer to any of those is “no,” grab the tape and re‑measure. It feels like extra work now, but it saves you from a return that could cost both time and money.
One tip we’ve seen work wonders for our clients: after filling the checklist, step back from the window and imagine the blind in place. Visualise the fabric draping, the cord disappearing into a discreet lock, the light filtering just right. If the mental picture feels off, tweak the numbers before you click “order.”
And remember, the checklist isn’t set in stone. As you gain confidence, you might combine the angled heights into a single “minimum height” field or add a column for “preferred finish” – matte, glossy, or wood‑grain – depending on the room’s vibe.
When you finally hand the checklist to your supplier, you’ll notice they respond faster and with fewer questions. They can cut the blind to the exact pocket you measured, and you’ll get that flawless, Harvey Bruce‑level finish you’ve been dreaming of.
So, take a breath, pull out that notebook, and start ticking. Your measurement checklist is the bridge between a DIY measurement adventure and a professional‑grade window treatment that feels tailor‑made.
Step 6: Compare Materials and Mounting Options
Now that you’ve recorded the widths, depths and angles, the next step is to decide what will actually live in that pocket and how it will stay there. The material you pick and the way you mount it are the two levers that turn raw numbers into a room‑defining feature.
Start with the fabric. Light linen or cotton works beautifully in a sun‑lit lounge – it lets the bay breathe while still giving privacy when you pull it down. If you want a touch of luxury, plush velvet or woven bamboo adds texture without adding bulk. For energy‑savvy homes, cellular (honey‑comb) shades trap air and can shave a few degrees off your heating bill. Families with kids or pets often choose fade‑resistant polyester because it cleans up with a quick wipe.
Wood and aluminium each bring a distinct vibe. A slim wooden venetian blind offers a warm, classic look but needs at least 3 cm of projection depth. Aluminium slats are ultra‑light, perfect for a modern minimal look, and can fit into recesses as shallow as 2 cm. If drama is the goal, a blackout panel in a deep hue can turn the bay into a private cinema without hiding the window’s shape.
Mounting follows the same logic. Inside‑mount gives a seamless, built‑in look – the blind sits flush with the frame, keeping the window as the star. Just double‑check that the headrail and any cords fit within the depth you measured. Outside‑mount adds a few centimeters on each side, which can visually enlarge a cramped bay or hide imperfect trim. Ceiling‑mount is a niche choice for low‑set windows; the blind drops from the ceiling and works well in lofts with high ceilings.
How do you choose? Ask yourself three quick questions: Do I need maximum light control or just a soft filter? How much depth do I actually have? What vibe am I chasing – cozy, contemporary or ultra‑modern? Your answers will point you toward the right material‑mount combo.
Quick decision checklist
- Light‑filtering & soft feel → linen, cotton or cellular, inside‑mount.
- Full blackout & drama → velvet or blackout panel, either inside or outside depending on depth.
- Thin profile & tight recess → aluminium slats, inside‑mount, 2 cm depth.
- Warm traditional look → wooden venetian, inside‑mount, ≥3 cm depth.
- High‑traffic family room → polyester or bamboo, outside‑mount for easy cleaning.
One habit we’ve seen work wonders is to sketch a tiny rectangle on your measurement sheet, label it “material” and “mount,” then shade in the option that ticks all three boxes. When you hand that sheet to the supplier, they can cut the blind to the exact pocket and pre‑install any brackets, saving you a day of fiddling on site.
Below is a compact table that lines up the most common materials with their pros, cons and the mounting style that usually fits best. Use it as a quick reference while you’re standing in front of the bay, tape in one hand and fabric swatches in the other.
| Material | Best‑Fit Mount | Key Benefits / Considerations |
|---|---|---|
| Lightweight linen/cotton | Inside‑mount | Soft diffusion, easy to fold; may wrinkle. |
| Cellular shade | Inside‑mount (≥2 cm depth) | Insulates, UV‑blocking, sleek; higher cost. |
| Aluminium slats | Inside‑mount (2 cm min) | Modern look, ultra‑light, fits tight recesses; less privacy fully open. |
| Wooden venetian | Inside‑mount (≥3 cm depth) | Warm aesthetic, adjustable light; heavier headrail. |
| Blackout panel | Outside‑mount or inside if depth allows | Complete privacy, dramatic visual weight. |
Finally, remember the “perfect” choice is the one that feels right in your daily routine. If you love pulling down a linen shade each morning with a cup of coffee, go for that inside‑mount linen. If you’re a movie‑buff who needs total darkness, a blackout panel mounted just outside the frame will save you from glare.
Take a moment, compare the options in the table, and pick the combo that matches both your measurements and your mood. When you order, double‑check the supplier’s spec sheet – a one‑centimeter mismatch can be the difference between a flawless fit and a frustrating return.
With the right material and mount paired to your exact numbers, you’ll watch that bay window transform from a plain opening into a curated backdrop for every moment in your home.
Conclusion
By now you’ve walked through every step of how to measure bay window for blinds, from the three‑point width trick to the depth check and angled height math.
If you’re a homeowner chasing that polished, bespoke look, the biggest win is keeping the smallest measurement as your safety net – it guarantees clearance and saves you a costly return.
In our experience, pairing a light‑filtering linen roller with an inside‑mount gives the bay a soft, airy vibe while staying snug inside the recess; a blackout panel works wonders for a home cinema night when you need total darkness.
So, what’s the next move? Grab your notebook, double‑check each figure, add that half‑centimetre buffer if you’re going motorised, and send the final checklist to your supplier. A quick sanity‑check now prevents a surprise at installation.
Remember, the goal isn’t just to fit a blind – it’s to turn that bay window into a stage for everyday moments, whether you’re sipping coffee at sunrise or watching a film at dusk.
Ready to bring your vision to life? Browse our curated collection of luxurious fabrics and hardware, or drop us a line for a bespoke measurement consultation – we’ll help you fine‑tune every detail so the final result feels truly yours.
FAQ
What’s the first step when figuring out how to measure bay window for blinds?
Start by clearing the window area so you can see the full recess. Grab a steel tape, a notebook, and a pencil. Measure the central pane at three heights – top, middle, bottom – and write each number down before you move the tape. Picking the smallest of those three gives you a safe width that won’t jam the blind later.
How can I capture the most accurate width across the three‑point trick?
Lay the tape flat against the glass, not the trim, and pull it taut. Record the top‑width, then slide the tape down a few inches for the middle, and finally to the bottom edge. If the numbers differ, circle the smallest one and note the variation in the margins. That tiny detail prevents the blind from catching on the side frames.
Why does projection depth matter and what depth should I target?
Depth tells you how far the blind’s headrail can sit inside the window cavity. Measure from the inner edge of the frame straight back to the glass surface at three spots and use the smallest reading. Most roller‑blinds need at least 2.5 cm, while wooden venetian blinds prefer 3 cm or more. Staying within that range keeps the blind flush and quiet.
How do I deal with the angled side panes when measuring height?
Angle the tape from the top rail of the centre pane to the top rail of each side pane, creating a diagonal line across the corner. That diagonal is your “angled height.” Write it down as left‑angled and right‑angled heights, then pick the smallest as your base measurement for an inside‑mount. This avoids gaps or scrapes where the blind meets the corner.
Should I add extra allowance for motorised or cordless hardware?
Yes – a half‑centimetre buffer is a good rule of thumb for motorised rollers or cordless pull‑chains. It gives the motor housing a little breathing room and stops the blind from binding when it lifts. If you’re using a heavy fabric like blackout velvet, add an extra centimetre to the headrail space so the blind slides smoothly.
What are the most common measuring mistakes that lead to blind returns?
Skipping the three‑point width check, measuring to decorative trim instead of the glass, and forgetting to note the smallest depth reading are the big culprits. Also, many people forget to account for angled heights, so the blind ends up too long on one side. A quick sanity‑check – compare each recorded number against the product’s spec sheet – catches these errors before you place the order.
Do I need to re‑measure if I change furniture or remodel the room?
Whenever you add a deep sofa, a new bookshelf, or change the window sill height, re‑measure the depth and height. Even a small shift in the sill can affect the clearance for an inside‑mount blind. A fresh set of numbers ensures the blind still fits perfectly and keeps the elegant look you aimed for, no matter how the space evolves.
← Older Post Newer Post →
